Little Bird Lorikeet WS2812B Rainbow Board with micro:bit
Written By: Cherie Tan

Difficulty
Easy
Steps
9
The Little Bird Lorikeet is an RGB LED strip 5 programmable LEDs. In this guide, learn to connect it up to the micro:bit and get it to light up! Complete this guide to understand the basics in using the Lorikeet with your micro:bit.
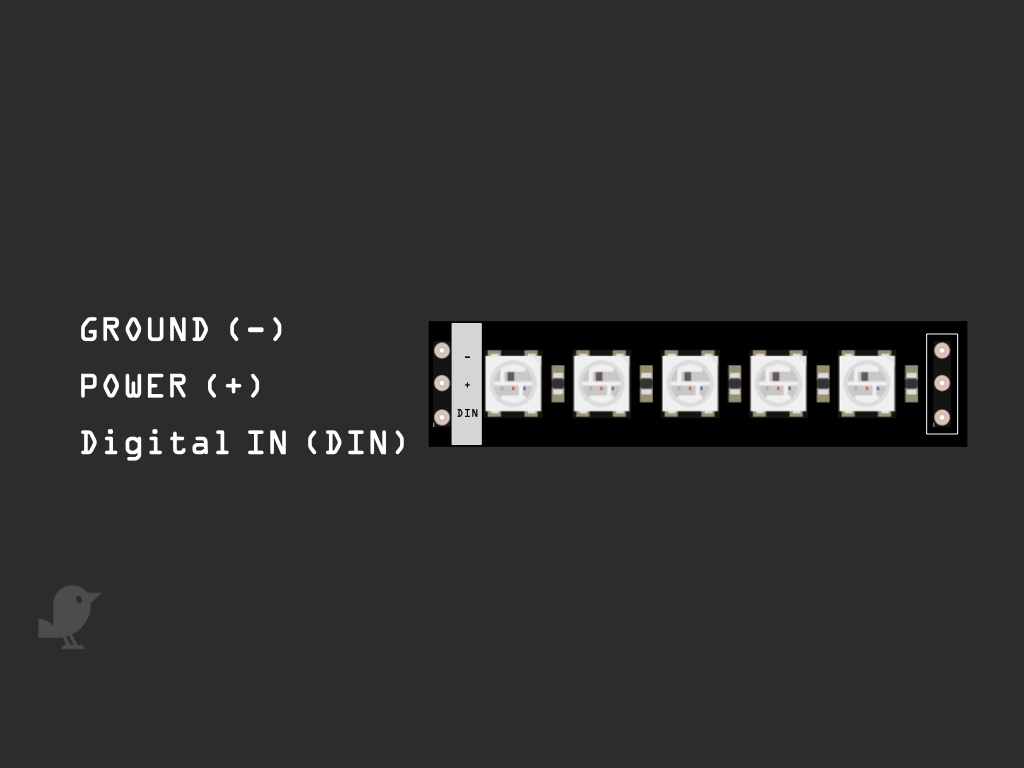
Let's first take a closer look at the Lorikeet's pins: The - labelled pin is to be connected to GND The + pin is to be connected to power DIN stands for digital input and can be connected to a digital pin on the Arduino
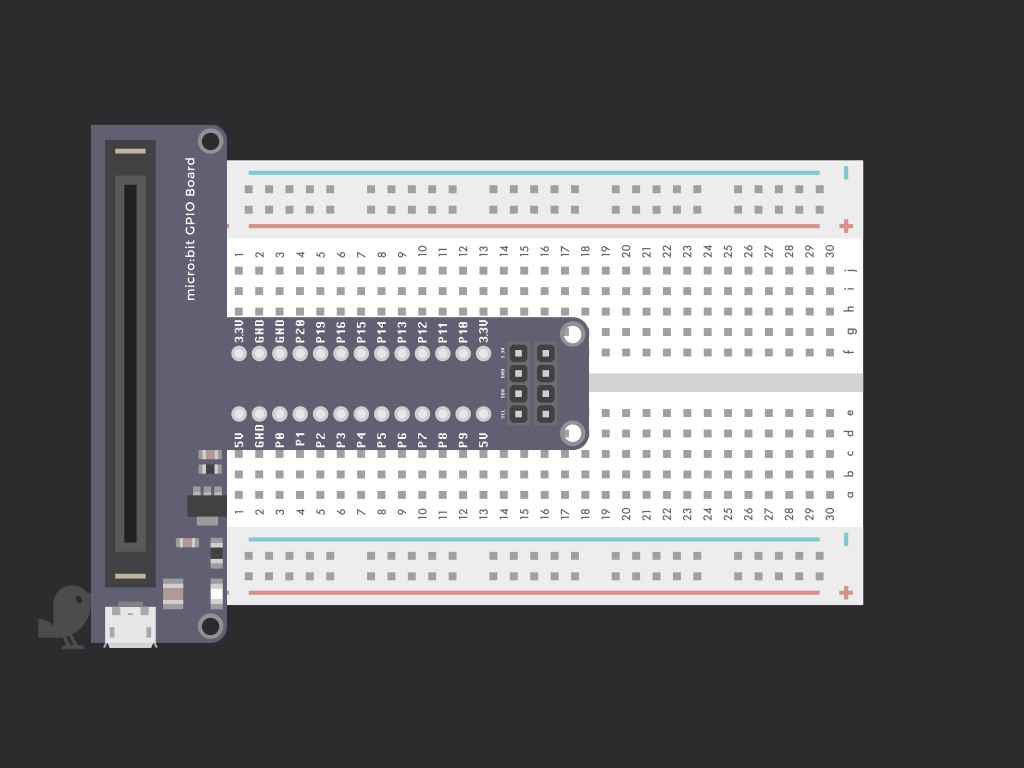
Insert the micro:bit GPIO board into the breadboard as shown.
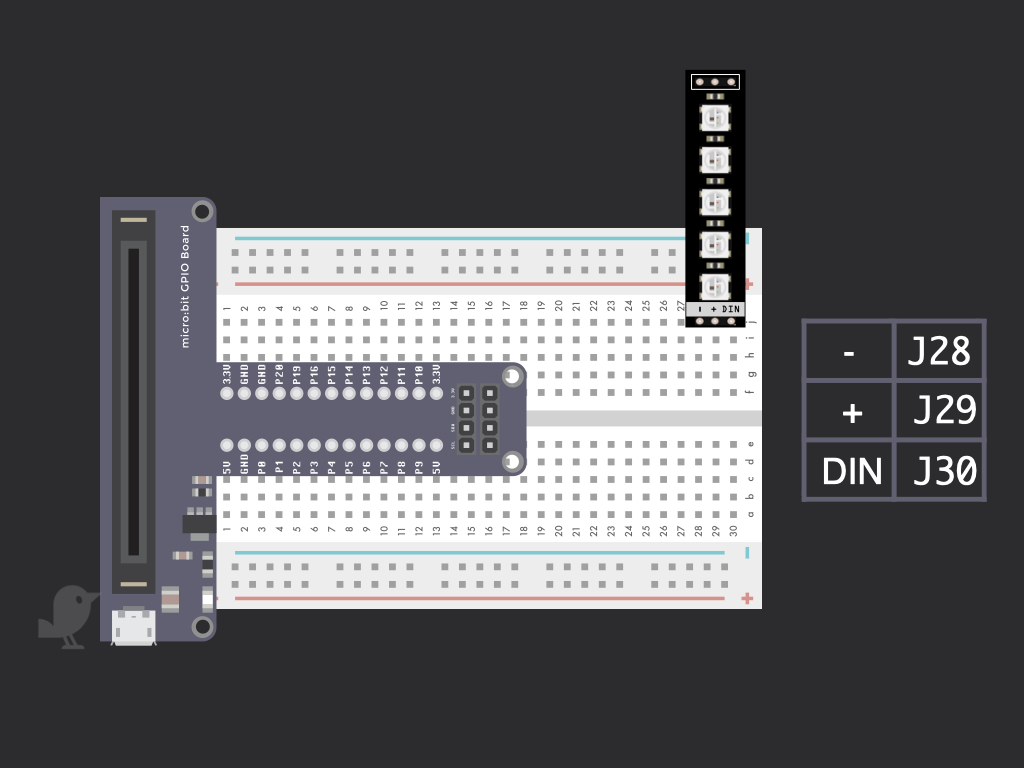
Insert the three header pins of the Lorikeet into the breadboard as shown.
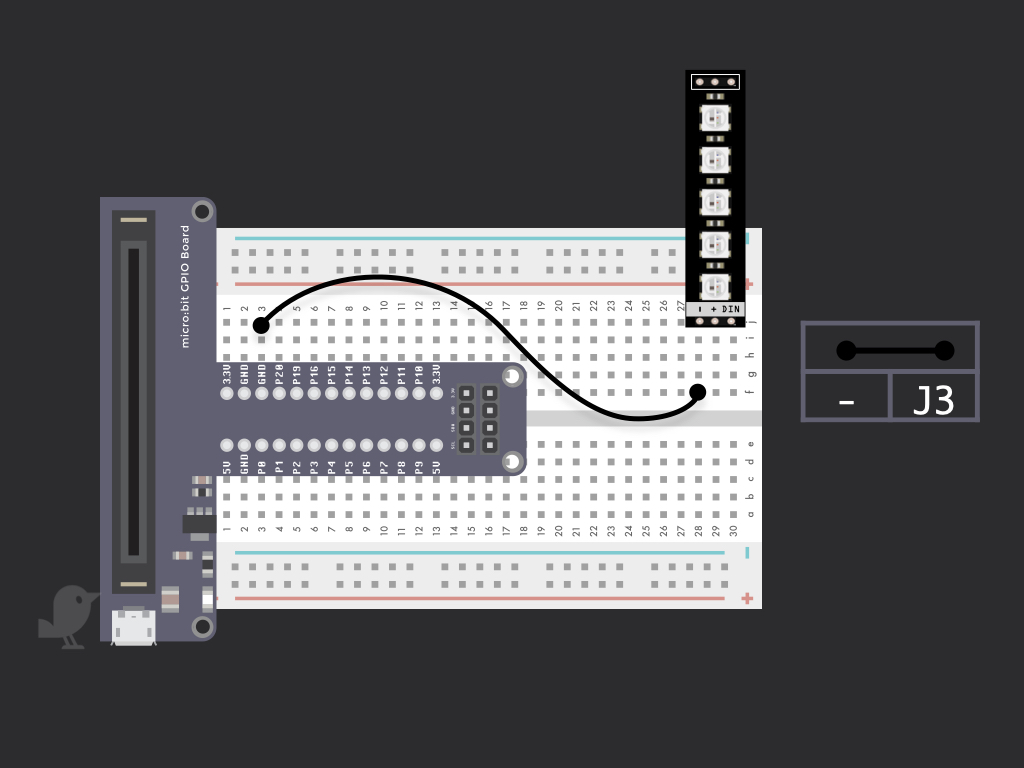
Connect - of the Lorikeet to J3 on the breadboard. This will connect it to one of the GND pins found on the micro:bit.

Connect + of the Lorikeet to J1 on the breadboard, this will connect + to 3.3V on the micro:bit!

Connect DIN of the Lorikeet to B3 on the breadboard. So it should be connected to P0 of the micro:bit.
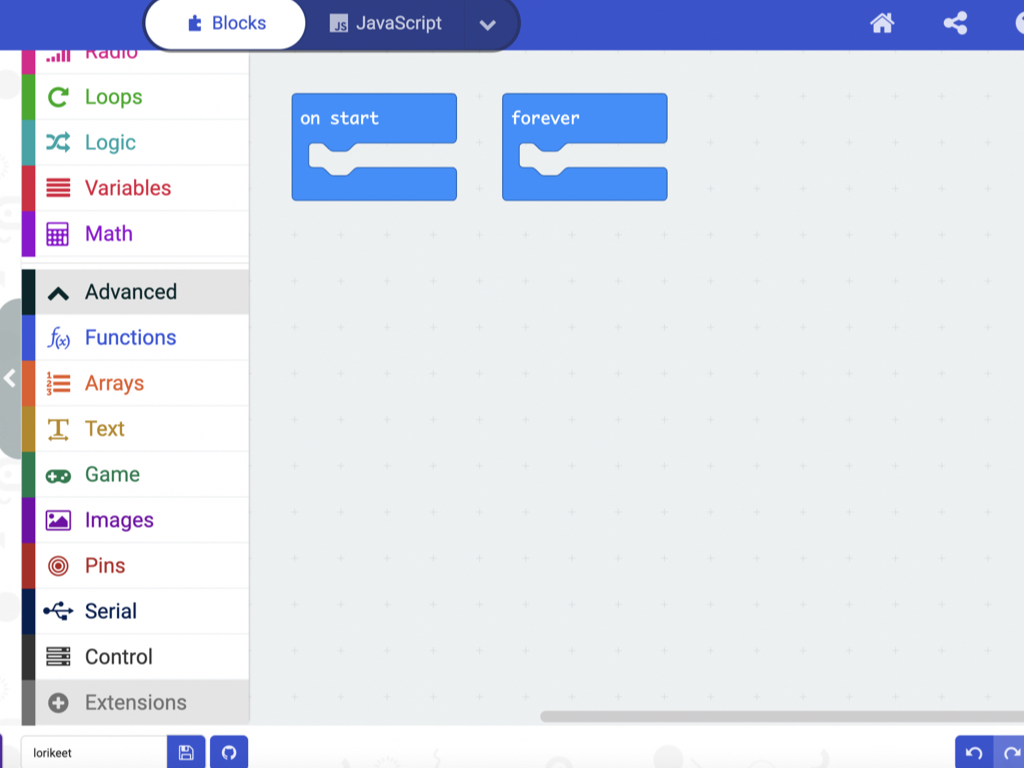
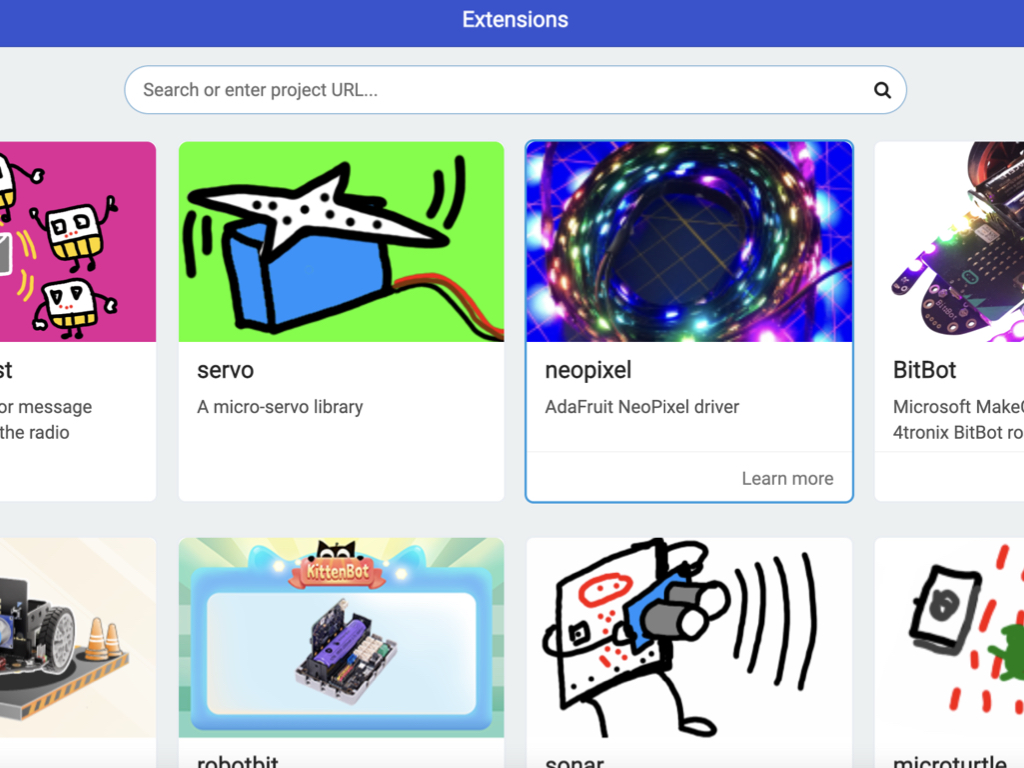
Navigate to on Advanced > Extensions Click on the Extensions button Click on the neopixel library
/**
* Program that use the NeoPixel Extension to display a rainbow of colours over 5 LEDs
*
*
*/
// Initialise the Lorikeet stick with 5 LEDs
let strip = neopixel.create(DigitalPin.P0, 5, NeoPixelMode.RGB)
strip.showRainbow(1, 360)
basic.forever(function () {
    strip.rotate(1)
    strip.show()
    basic.pause(200)
})
Copy and paste the following Javascript code into the Microsoft MakeCode editor. You can input this after clicking the Javascript button found at the top of the editor screen. Press the Download button to download the hex file. After connecting the micro:bit to your computer, the micro:bit should show up as a drive in your file explorer (Windows/Chromebook) or on your desktop (Mac). Simply drag and drop this hex file into the drive and you are done! You can also see the Blocks equivalent of this program by clicking on the 'Blocks' button up the top.
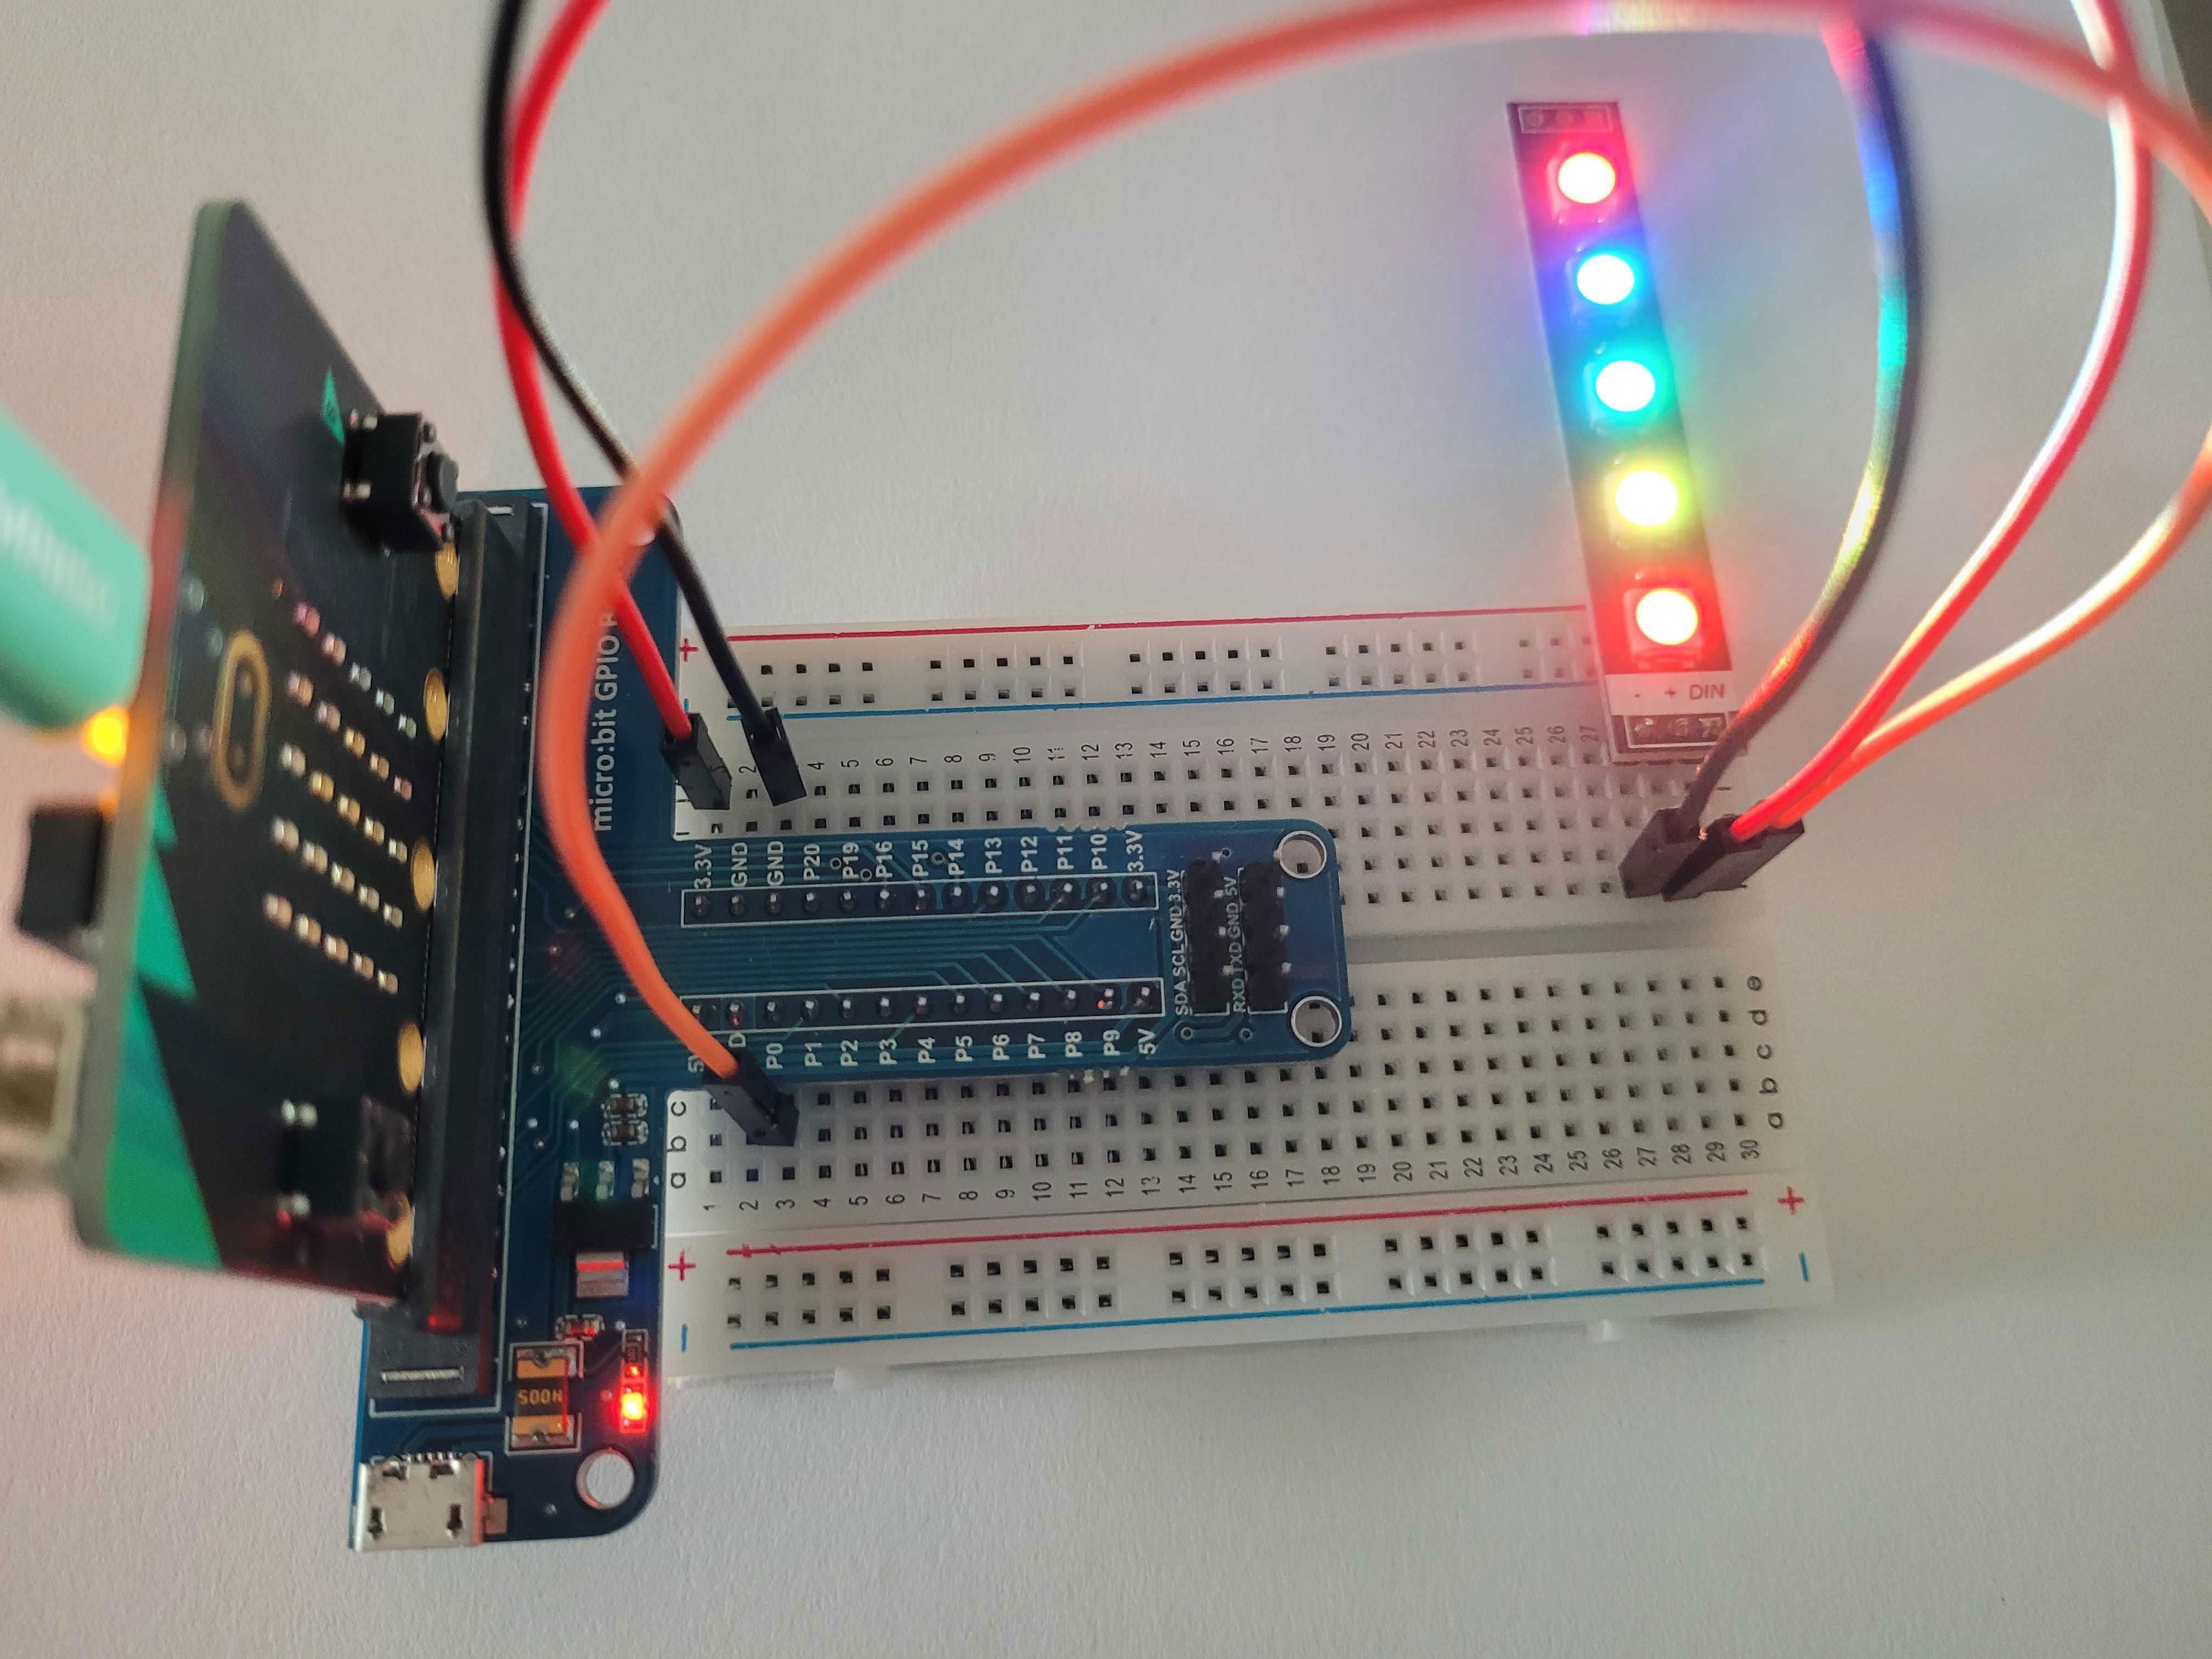
Congratulations! The LEDs on the Lorikeet should now light up in repeating patterns. There's lots of ways to program the Lorikeet with the micro:bit. Can you create another program to show only specific colours? How about an alternating pattern between two colours?