Temperature Sensor with micro:bit
Get detailed temperature readings with the micro:bit
Written By: Cherie Tan
Difficulty
Medium
Steps
10
We can get an estimate of the temperature using the Micro:bit, though what is actually provided is the temperature of the silicon die on its main CPU. But what if you wanted to get even more accurate temperature readings?
In this guide, we will use a DS18B20 temperature sensor module with the Micro:bit. This temperature sensor is able to get readings like 23.50 degree celsius rather than just 23 degree celsius.
Complete this guide to get started with using this very useful component, where it could be used for data logging, gardening assistance and more.
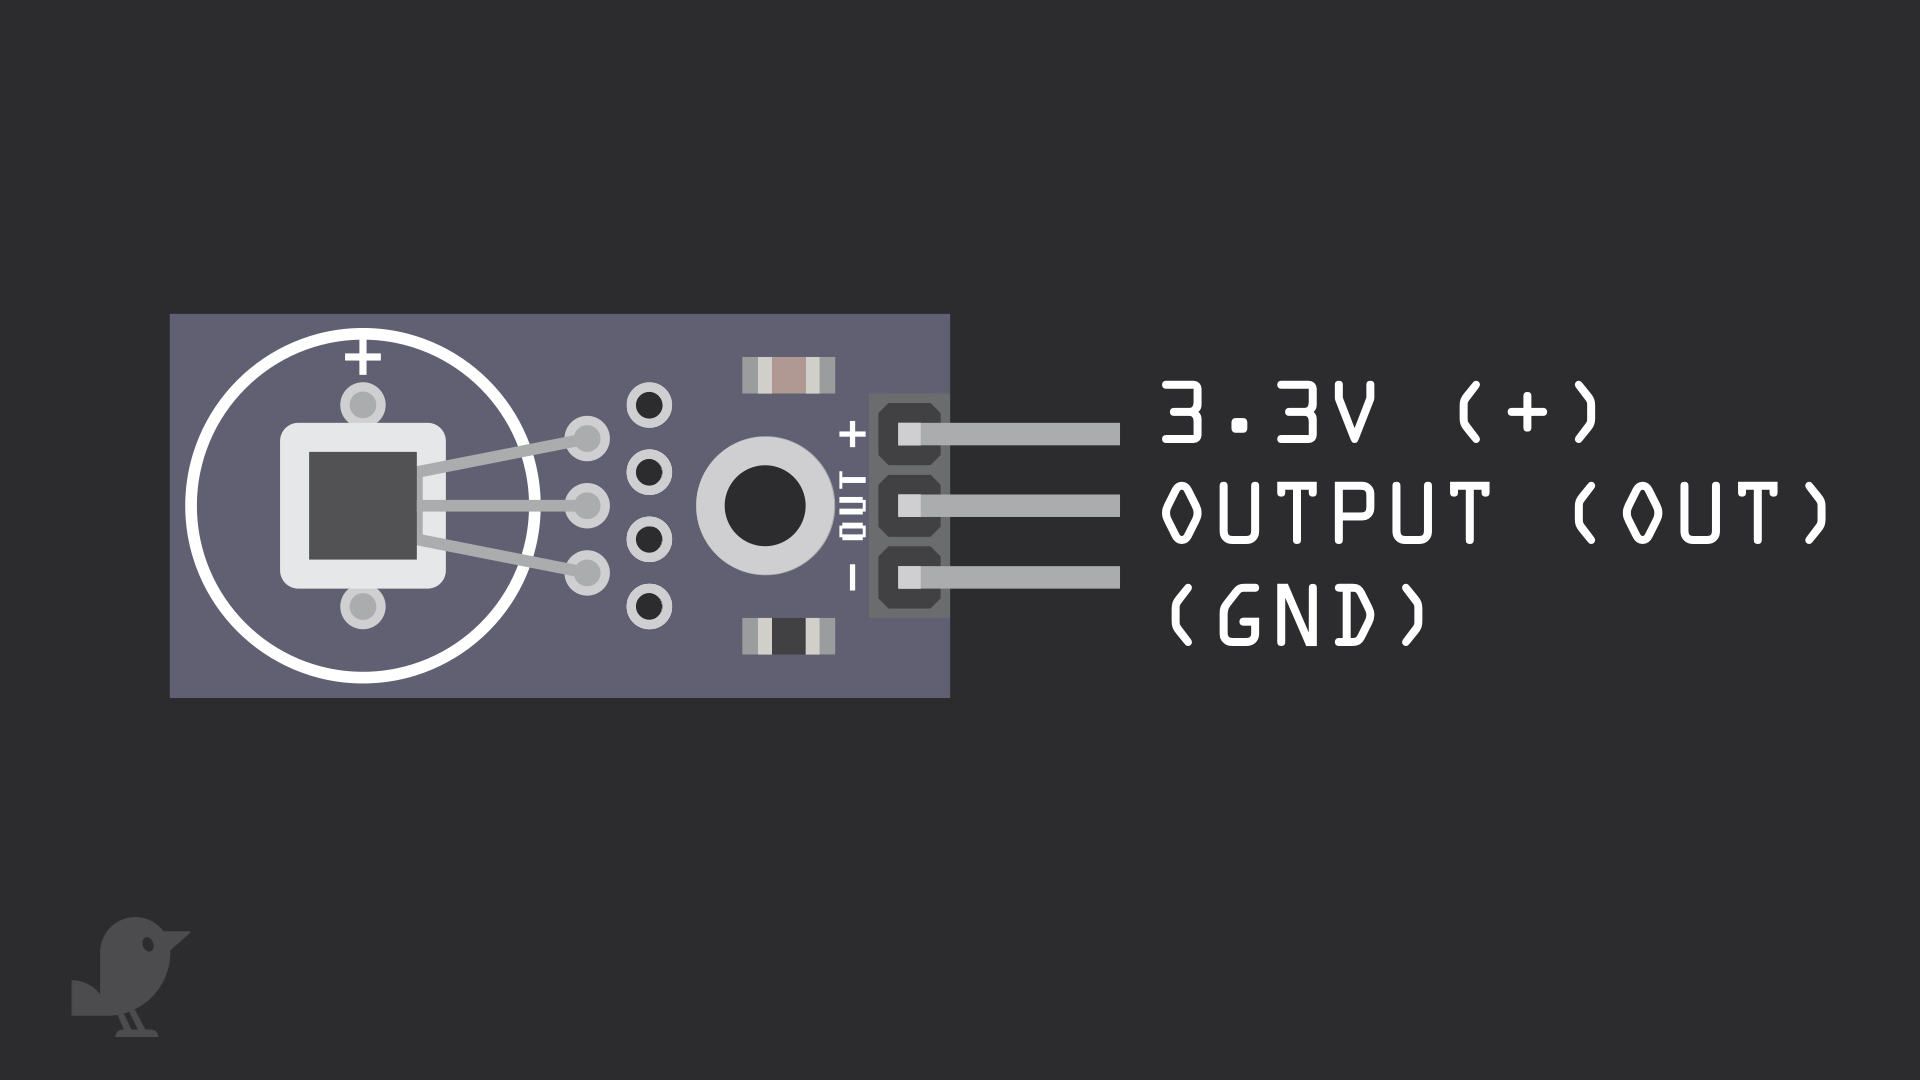
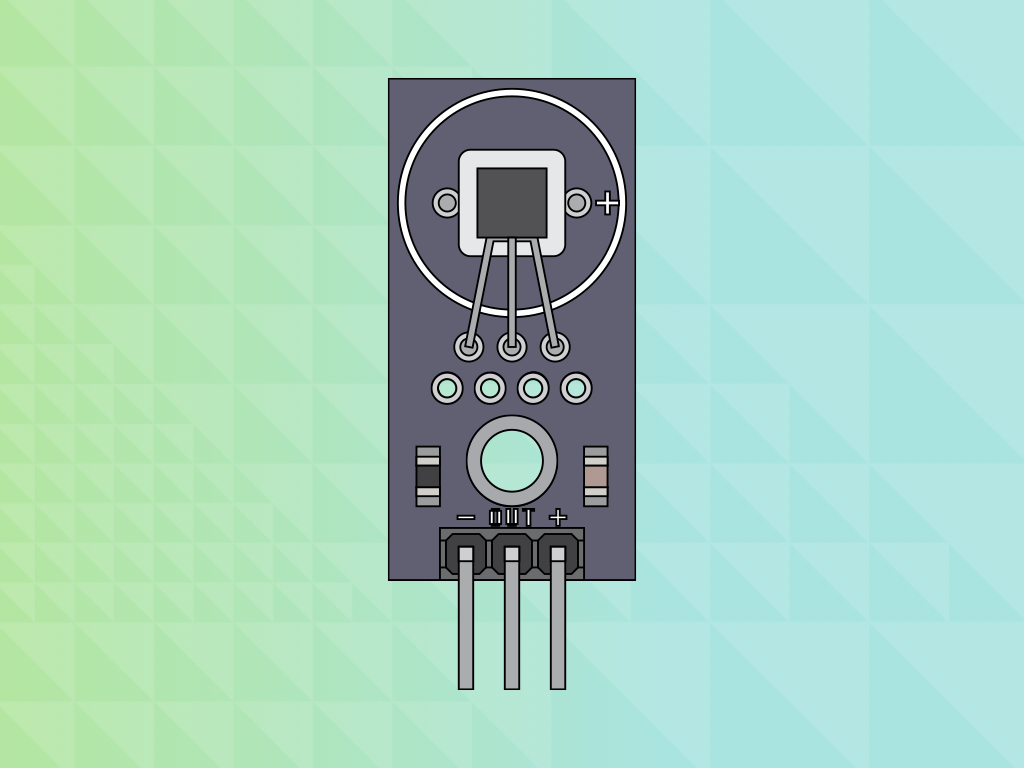
Before we begin, let's take a closer look at the DS18B20 Digital Temperature Sensor Module! It has three pins:
GND: This pin is labelled as '-' on the module, it is also called 'GND'. What is 'GND'? In electronics, we define a point in a circuit to be a kind of zero volts or 0V reference point, on which to base all other voltage measurements. This point is called ground or GND.
Out: The DS18B20 temperature sensor uses the 1-Wire protocol, and only requires a single data line. This is the data out pin where the temperature data will be output. Later, we will connect this to a GPIO pin on the micro:bit.
+ : This is connected to 3.3V on the micro:bit.
Voltage is the difference in potential between two points. As it is difficult to talk about voltage without a reference point, we need another point to compare it to.

We will use the Arduino IDE to program the Micro:bit. If you have not already got the Arduino IDE installed, please follow our previous guide on how to set up the Arduino IDE for micro:bit.
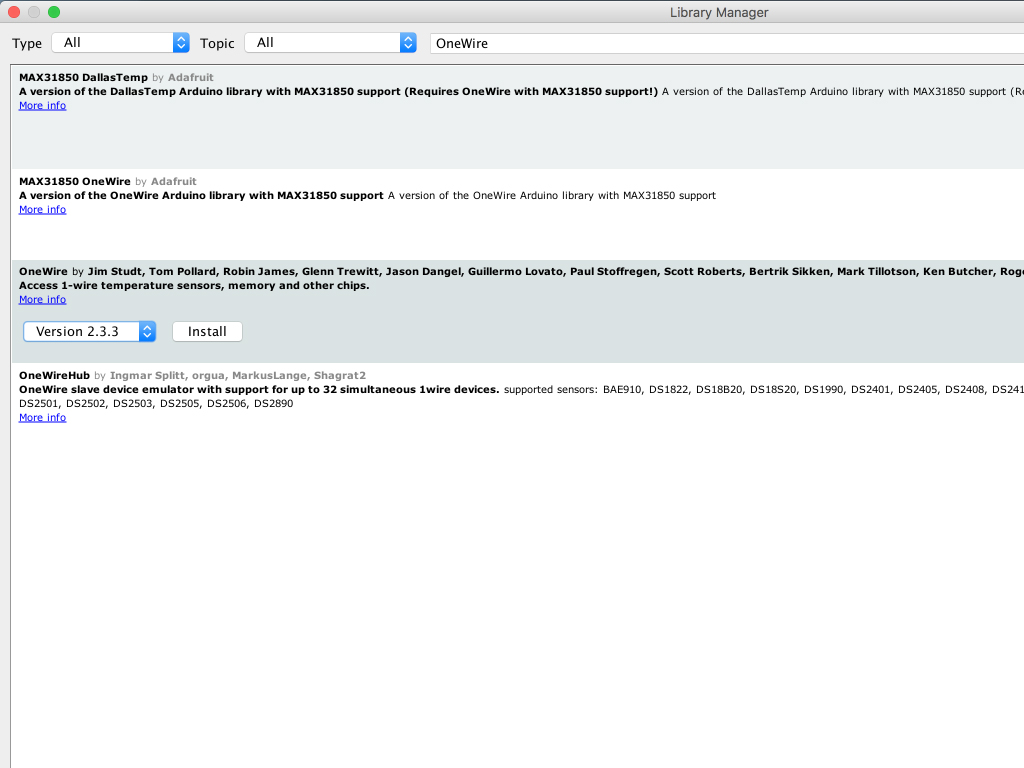
We will now need to install the 1-Wire library on the Arduino IDE to program the temperature sensor. Click on Sketch > Include Library > Manage Libraries...
Type 'OneWire' in the search box
Choose the library 'Onewire by Jim Studt ... '
Click on the 'Install' button
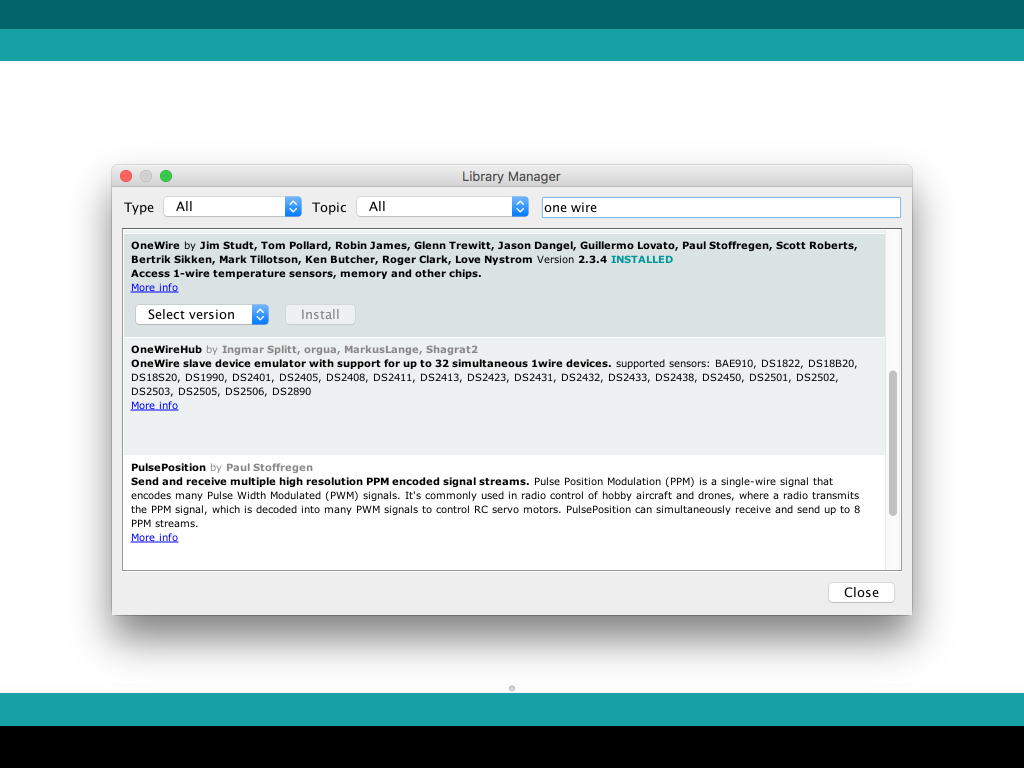
Once finished, it should state 'Installed' and will have automatically been added to the Arduino IDE

Next, go back to the Library Manager, and type 'dallas temperature' in the search box.
Choose 'DallasTemperature by Miles Burton'
Click on the 'Install' button
Once complete, it should state 'INSTALLED' and will have automatically been added to your Arduino IDE
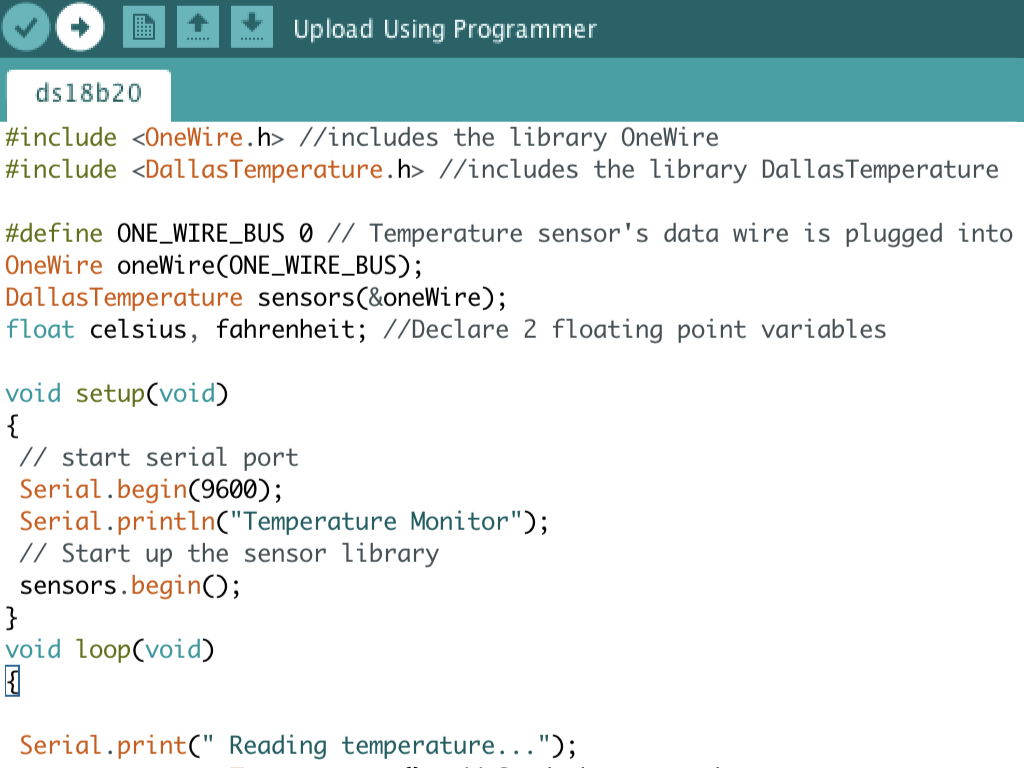
#include <OneWire.h> //includes the library OneWire
#include <DallasTemperature.h> //includes the library DallasTemperature

#define ONE_WIRE_BUS 0 // Temperature sensor's data wire is plugged into pin 0 of micro:bit
OneWire oneWire(ONE_WIRE_BUS);
DallasTemperature sensors(&oneWire);
float celsius, fahrenheit; //Declare 2 floating point variables

void setup(void)
{
 // start serial port
 Serial.begin(9600);
 Serial.println("Temperature Monitor");
 // Start up the sensor library
 sensors.begin();
}
void loop(void)
{

 Serial.print(" Reading temperature...");
 sensors.requestTemperatures(); // Send the command to get temperature reading
 celsius = sensors.getTempCByIndex(ONE_WIRE_BUS); // Put the reading into a variable
 fahrenheit = celsius * 1.8 + 32.0; //convert to f
 Serial.println("COMPLETE");

 Serial.print("Temperature is: ");
 Serial.print(celsius);
 Serial.print(" Celsius, ");
 Serial.print(fahrenheit);
 Serial.print(" Fahrenheit");

 delay(1000); //waits for 1 second
}
First, we include the OneWire and DallasTemperature libraries
We then use #define ONE_WIRE_BUS 0 as the temperature sensor's data wire is plugged into pin 0 of micro:bit
Then, we declare two variables, 'celsius' and 'fahrenheit'
Serial.begin() is used so that the micro:bit can communicate with the computer. We use a rate of 9600, although there are other rates you could use too. You can read more about it here.
To send the command that will get the temperature reading, we use: sensors.requestTemperatures();
To get the temperature in degree Celsius, we use: sensors.getTempCByIndex(ONE_WIRE_BUS);
To convert the temperature to fahrenheit, we take the value of celsius * 1.8 + 32.0
To print the temperature readings in degree celsius and fahrenheit:
- Serial.print(celsius);
- Serial.print(fahrenheit);
Copy this code and upload it to your Arduino using the Arduino IDE.


To upload the sketch to the micro:bit, click on the tick icon on the top left corner of Arduino IDE to verify the code
Then click on the upload icon next to it.
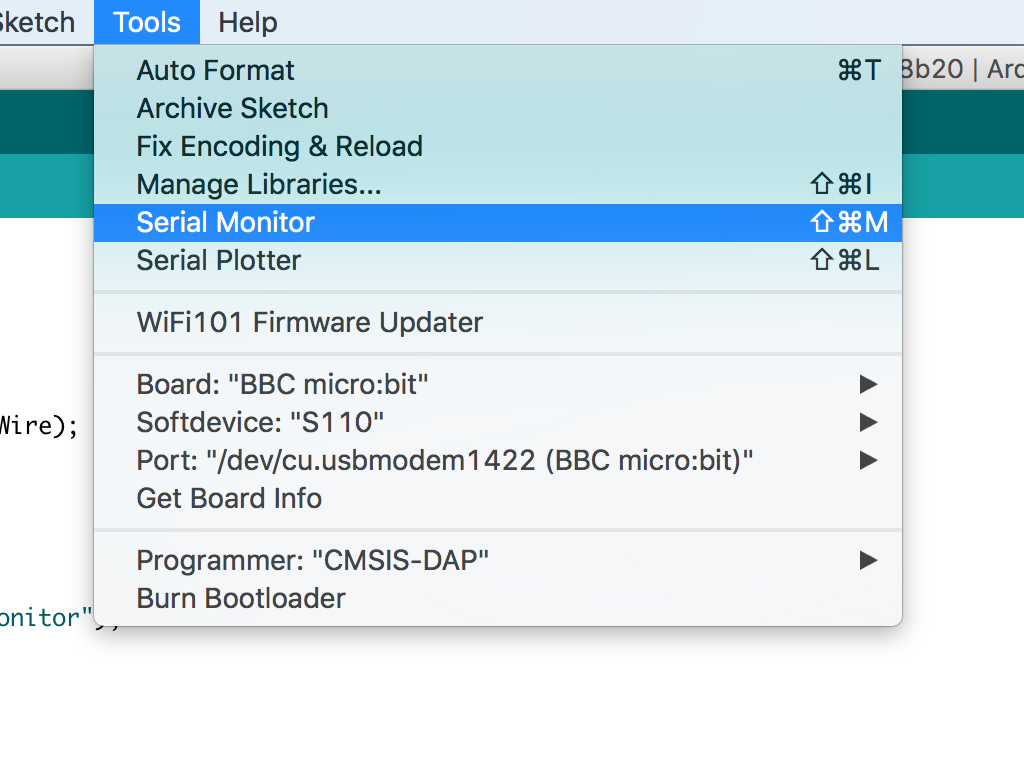
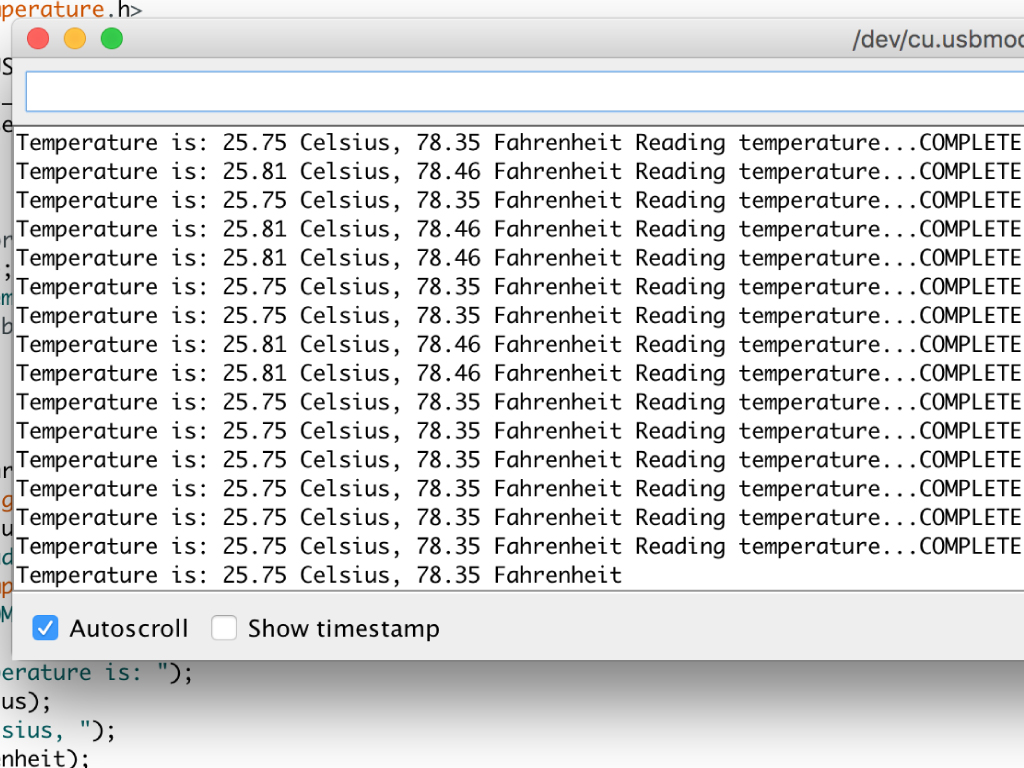

Now that the program has been uploaded to the micro:bit, let's take a look at the temperature readings. You can do so by opening the serial monitor in the Arduino IDE: Click on Tools > Serial Monitor
Please make sure the baud rate is set to 9600 in the serial monitor (this can be set at the bottom right-hand corner of monitor)