Sprite Animation with MakeCode Arcade
Learn to use the animation extension in MakeCode Arcade
Written By: Cherie Tan
Difficulty
Easy
Steps
10
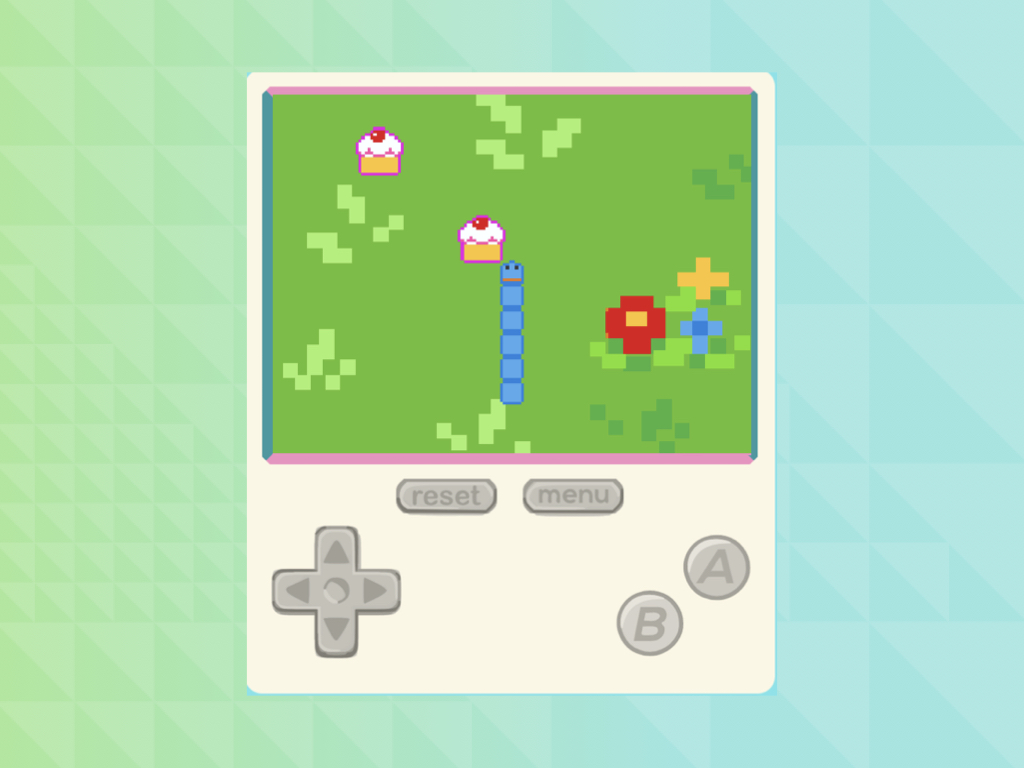
The classic snake game starts off with a short snake that eventually grows in length. The challenge then is to steer the snake and avoid it from colliding against itself.
In this guide, we’ll show you how to get started by animating the snake sprite with the Animation extension in MakeCode Arcade, then program it onto the Meowbit so you can take it with you.
Complete this guide to get started with adding animation to your games.
In this guide, we’ll show you how to get started by animating the snake sprite with the Animation extension in MakeCode Arcade, then program it onto the Meowbit so you can take it with you.
Complete this guide to get started with adding animation to your games.
Back when mobile phones were clunkier and had less functions, there were only a few games that could be played on it. The classic snake game was one of them -- it's a fun, addictive and sometimes infuriating game! It starts off with a short snake that eventually grows in length after it has had some food. The challenge was then to steer the snake and avoid it from colliding against itself. It is the perfect game to get started with, as all you'll need are two sprites and a dash of blocks.
In this guide, we’ll first show you how to create your own animated sprites, then program it onto the Meowbit so you can take it with you.
To begin with, the most important thing to do before creating sprites or coding for your game, is to break down the problem into a series of steps.
This series of steps is called an algorithm which is like a recipe. It tells you about all the ingredients needed, as well as a sequence of commands. If you don't follow the right recipe or algorithm, your cake or program won't come out the way you might have expected!
Let's break down the classic snake game so that it will be more manageable:
The game environment will be 160 by 120 pixels
The snake will be composed of a snake head sprite, and a separate snake body sprite.
The snake can move up, down, left, and right.
There is one kind of food in the game that appears.
In the next guide, we'll look at implementing:
- Every time the snake nibbles on a cupcake, its length increases by 1
- Game over conditions
By looking at these obstacles as a series of steps to get through, you may find patterns that repeat again and again. This is where functions come into play. A function is a short piece of code that we give a name to, so that it can be used again and again in a program, simply by using its name.
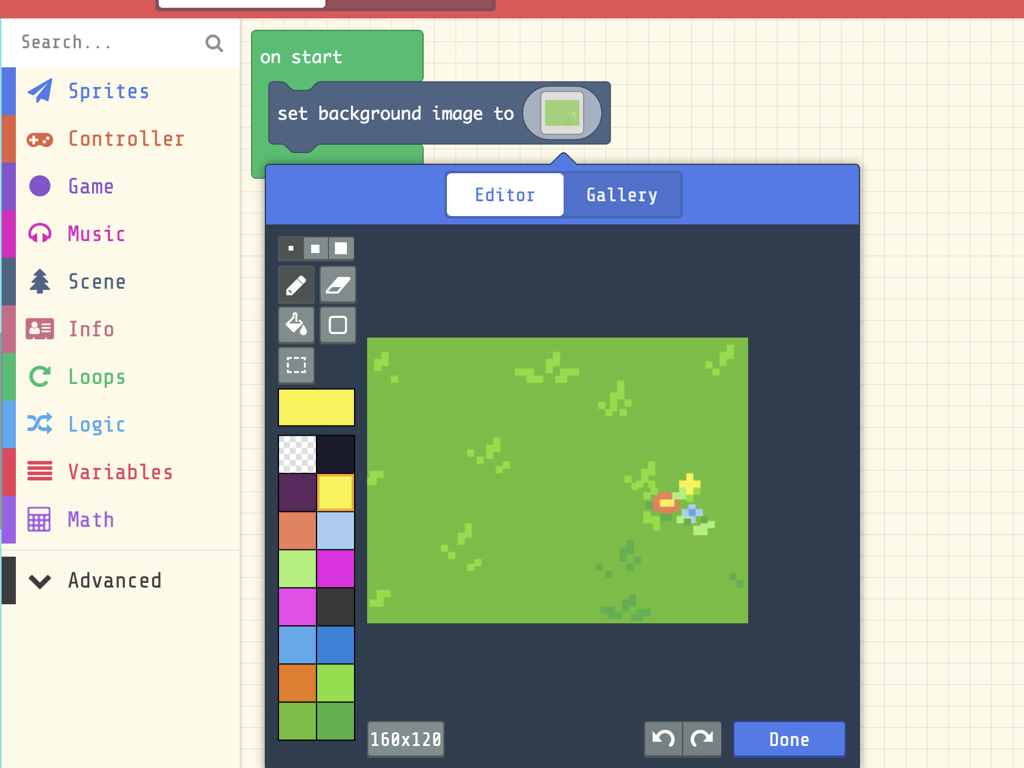
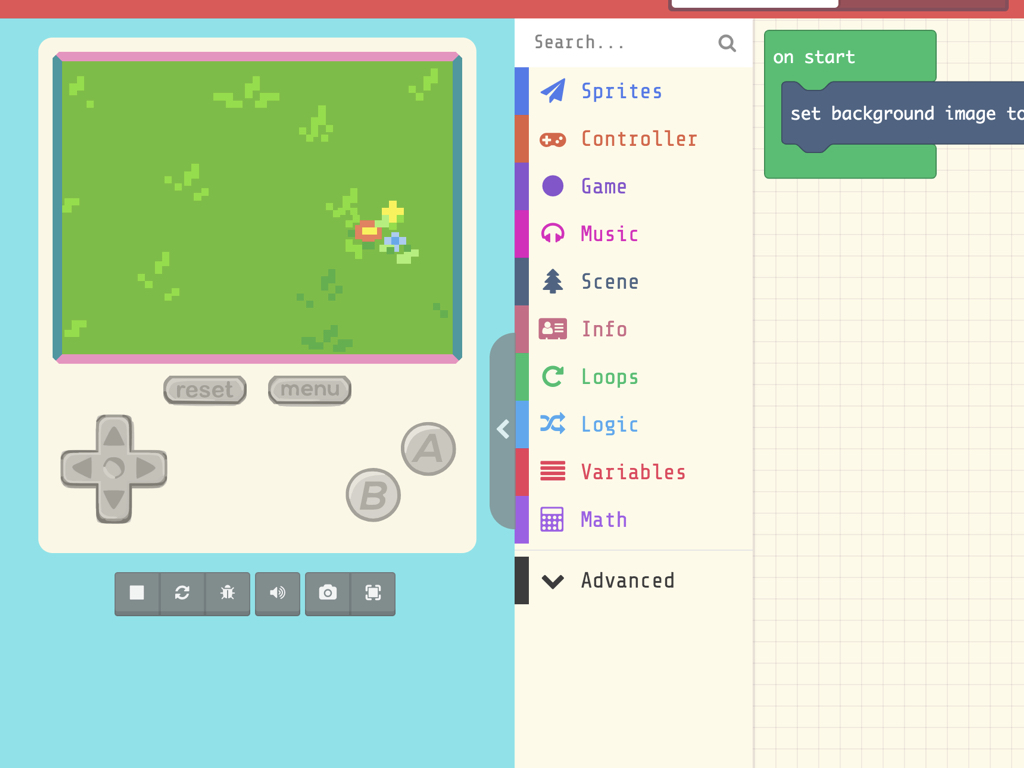
We will first begin by initialising the game settings such as its background colour or image.
So, first, drag and drop a set background image to ... block from the Scene tab.
Alternatively, you may wish to use a 'set background color to ...' block. In this guide, we've used a changed the default palette and created a custom background.
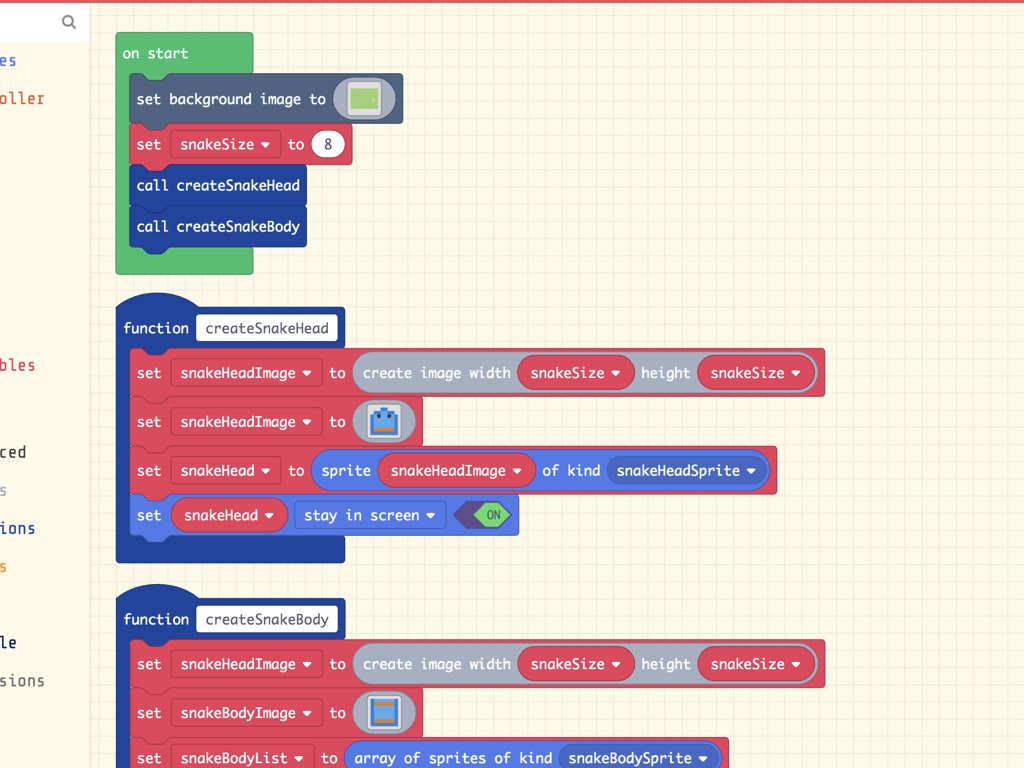
Next, initialise the size of the snake with a new variable called snakeSize, which will be 8 pixels. To create a variable, navigate to Variables > Make a Variable ...
A variable can be thought of as a container that holds information that may be changed and can be used later in our program. In this example, we've named the variable using camel case.
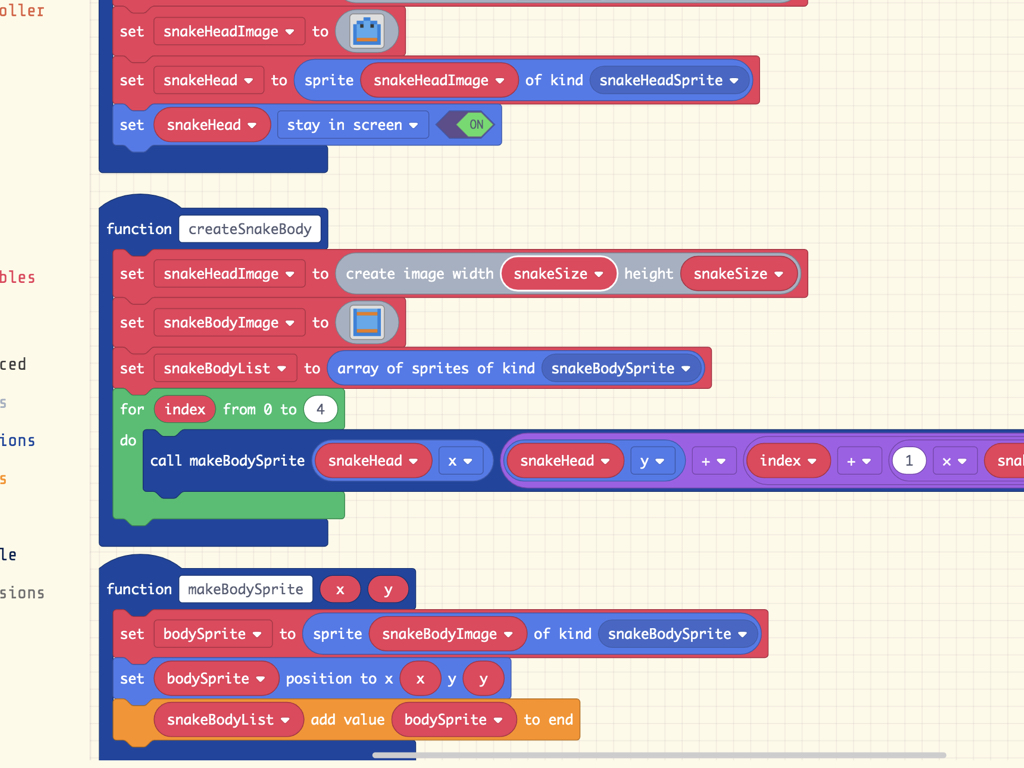
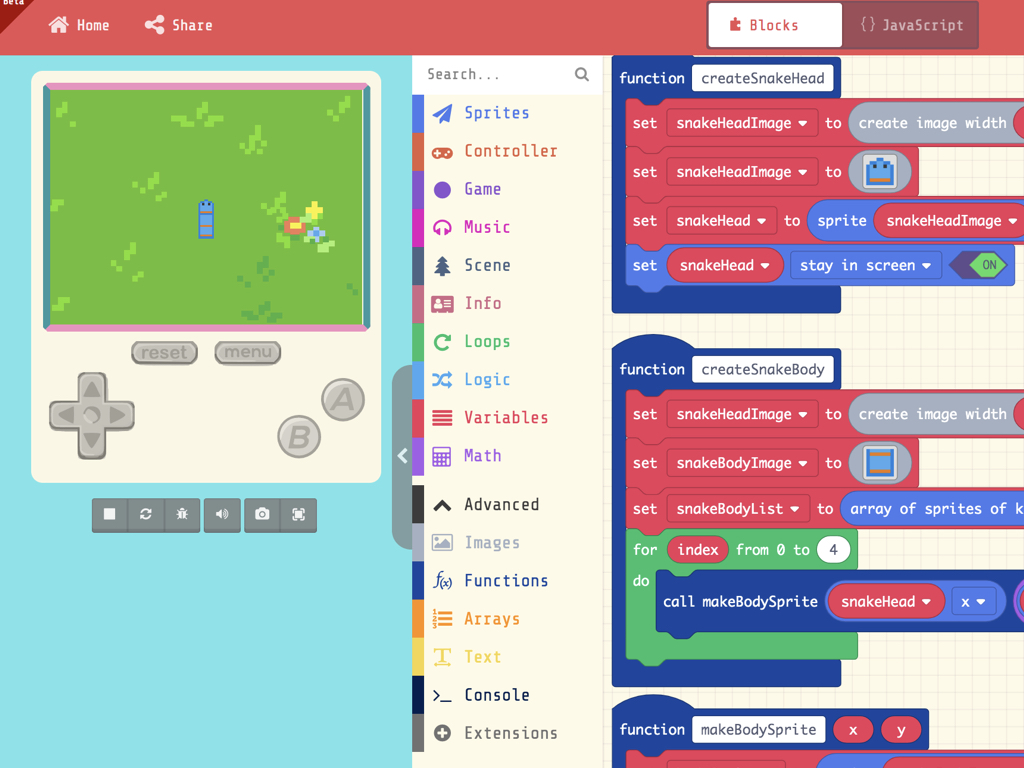
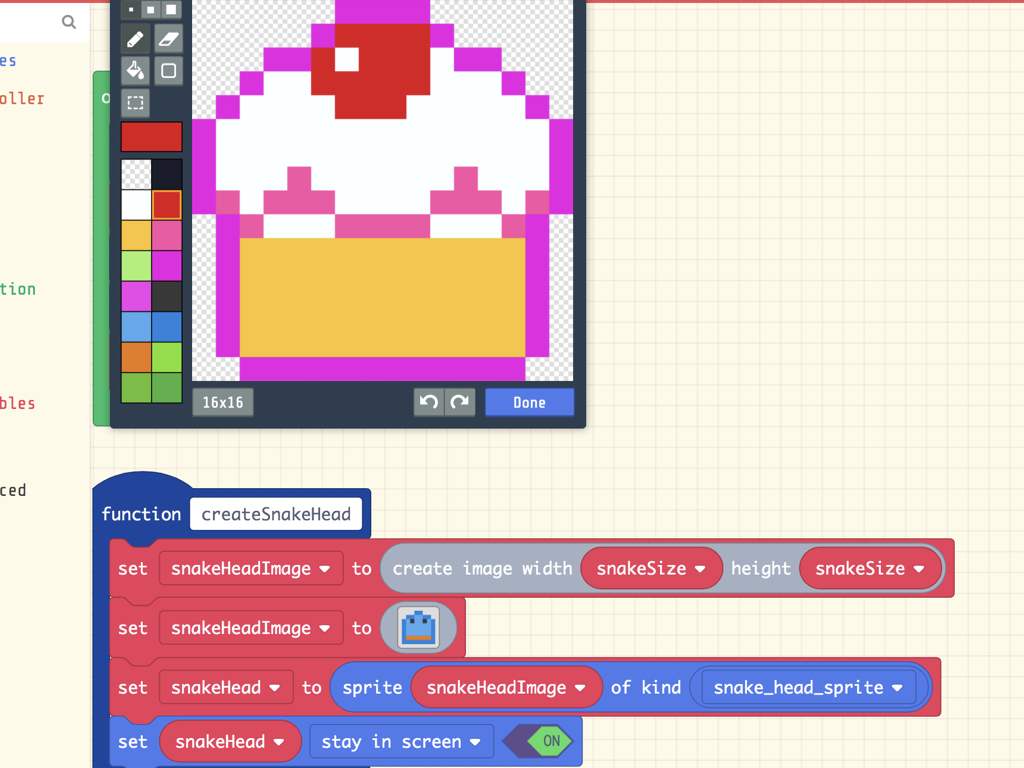
Next, we will create a function to create the snake head sprite. We've placed this in a function as this section of code will be repeated again later in the program. To create a function, navigate to Functions > Make a Function ...
We'll need to create three functions in total. Why not just two? Creating the snake's body is a little more complicated as the snake has only one head that stays constant throughout the game, whereas the body may grow in size. As a result, we'll need an extra function called "makeBodySprite". The growing body sprite is stored in an array, and this function takes two arguments - x and y.
This makeBodySprite function is called within a for loop, to create four sprites, each positioned below the previous sprite. Where is the first sprite positioned? Just below the snake head sprite.
This makeBodySprite function is called within a for loop, to create four sprites, each positioned below the previous sprite. Where is the first sprite positioned? Just below the snake head sprite.
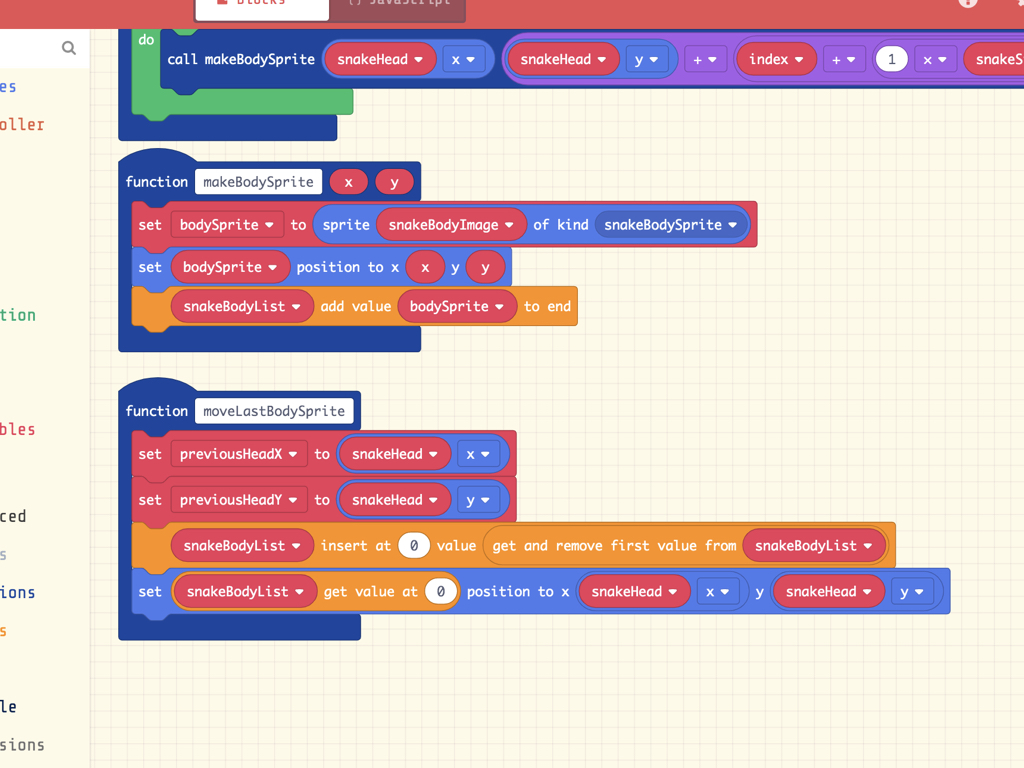
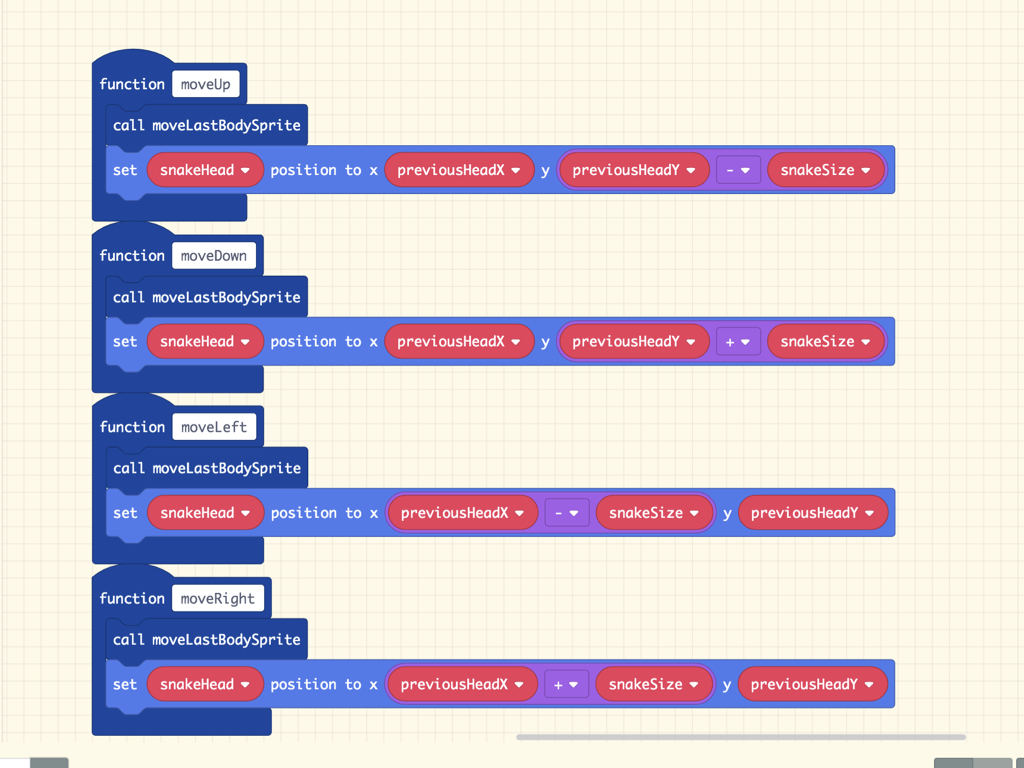
Next, let's add code to get the snake moving on button press. It will be able to move up, down, left, or right according to the button pressed. To make it look like the snake is moving, body sprites will be placed where the head sprite was initially. Then, we'll remove one body sprite form the end of the snake sprite as a whole.
So we will create five functions in total: moveRight, moveLeft, moveUp, move Down, and moveLastBodySprite.

While this will move our snake sprite, if you take a look at the game preview right now, the sprite images won't look right; the snake head sprite won't be looking at the right direction when it is moving downwards, for example. For the snake head sprite to look like it is rotating in the right direction, we'll need to add some animations! This can be easily done by using the animation extension in the MakeCode Arcade editor.
Click on Extensions
Click on Animation
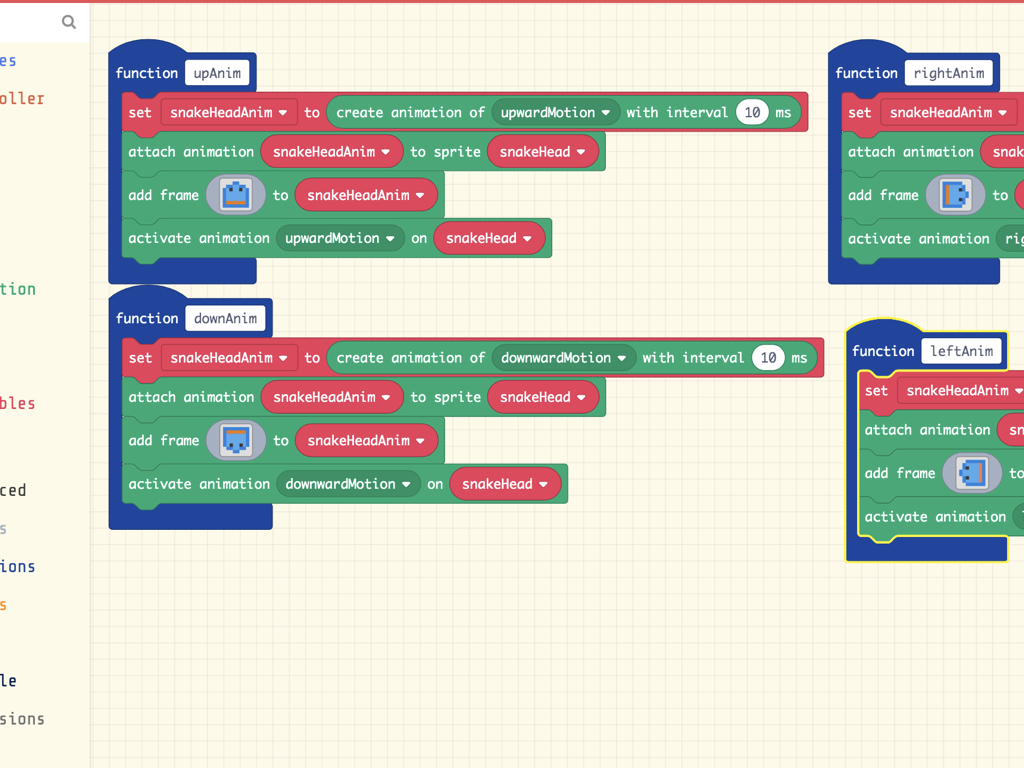
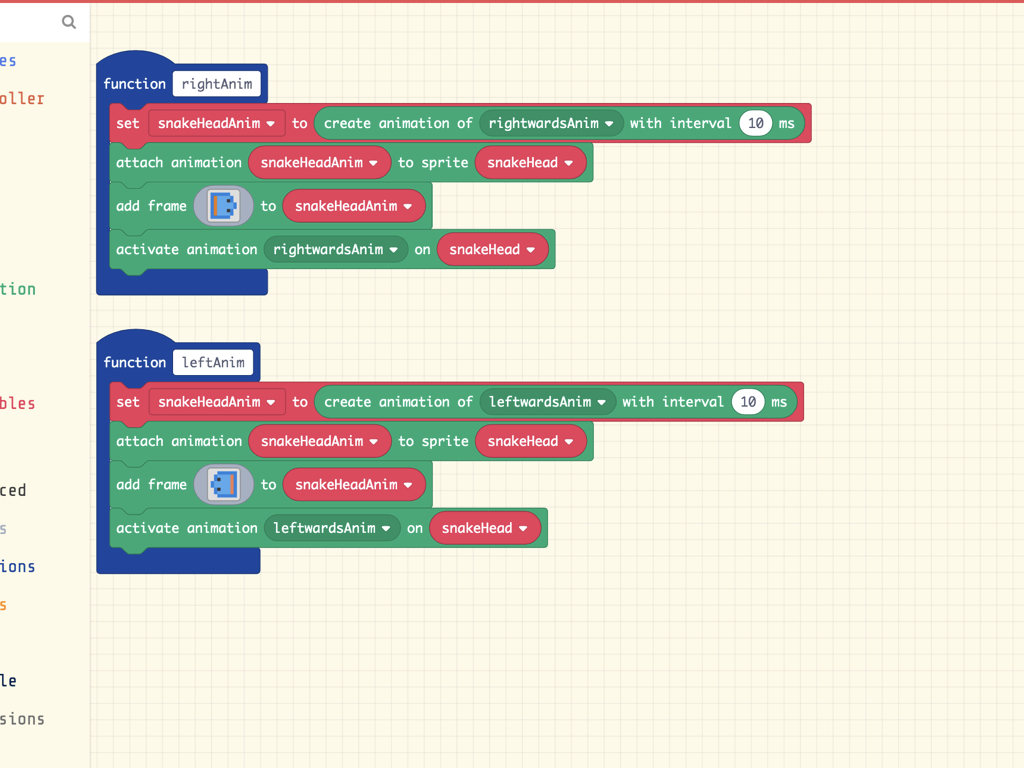
Create four new functions, and name them upAnim, downAnim, rightAnim, and leftAnim.
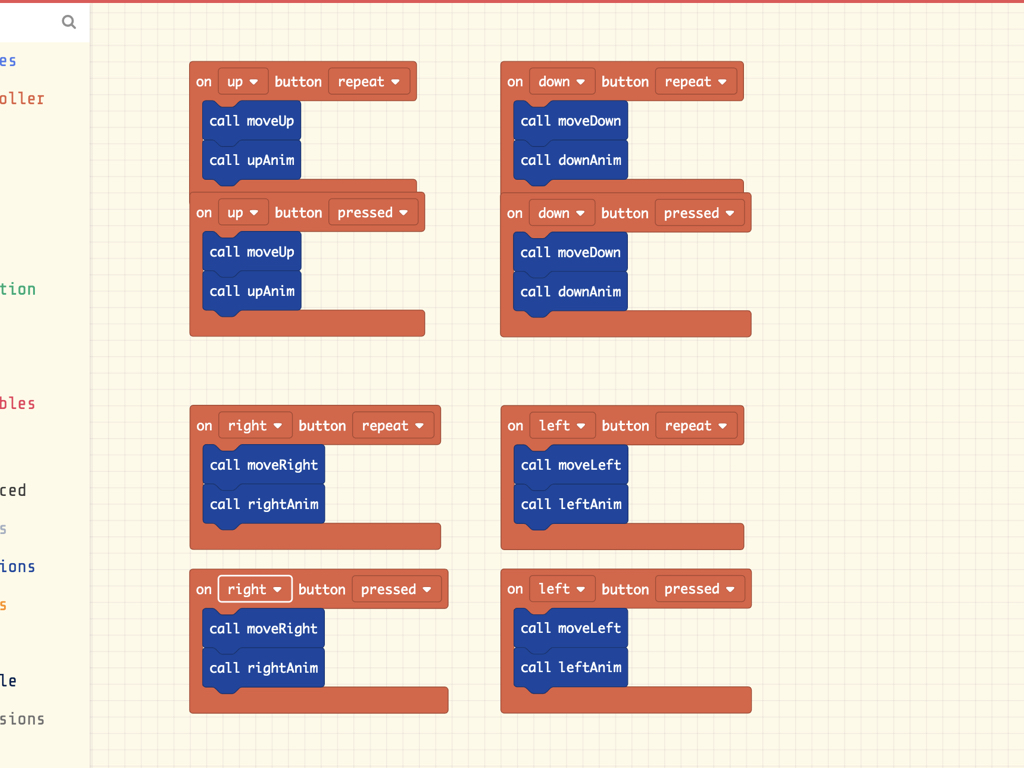
Drag and drop eight "on ... button ..." blocks from the Controller tab into the editor, and add the following blocks as shown.
Two of each controller blocks will be used for one button i.e. right, left, up, and down. This gives us two button events for each button: First, let's imagine the up button is is pressed and released, it will register an upward movement. Second, when the up button is held down repeatedly, it will register the movement as the moveUp function may be called many times. This is the same for the other buttons.
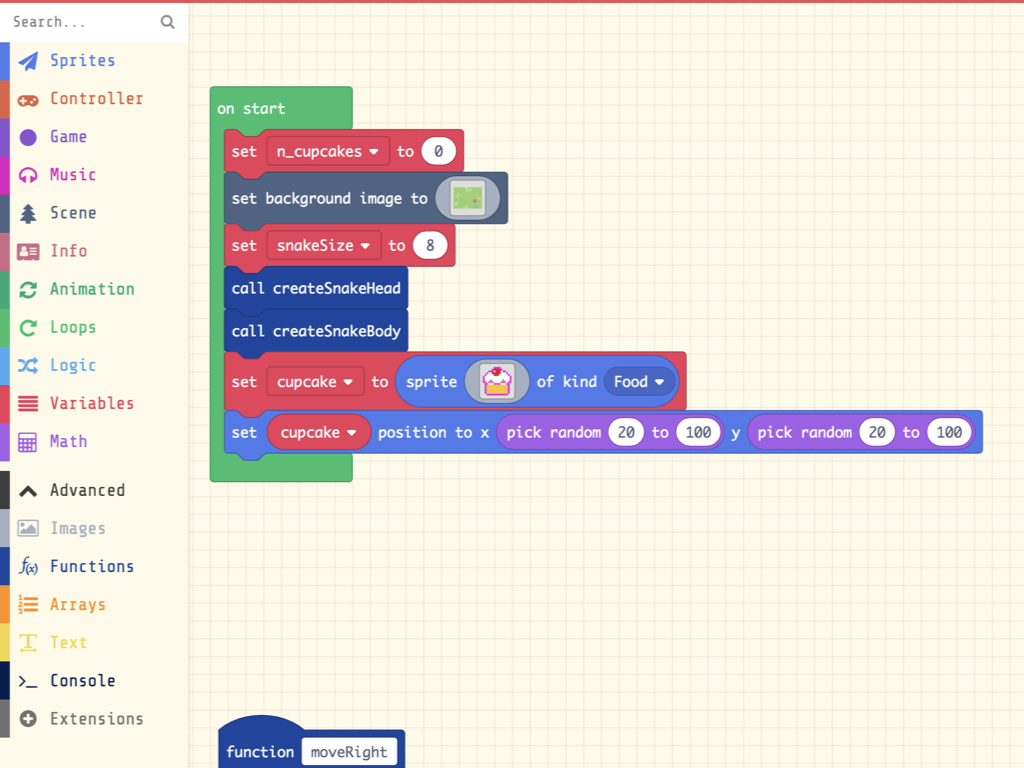
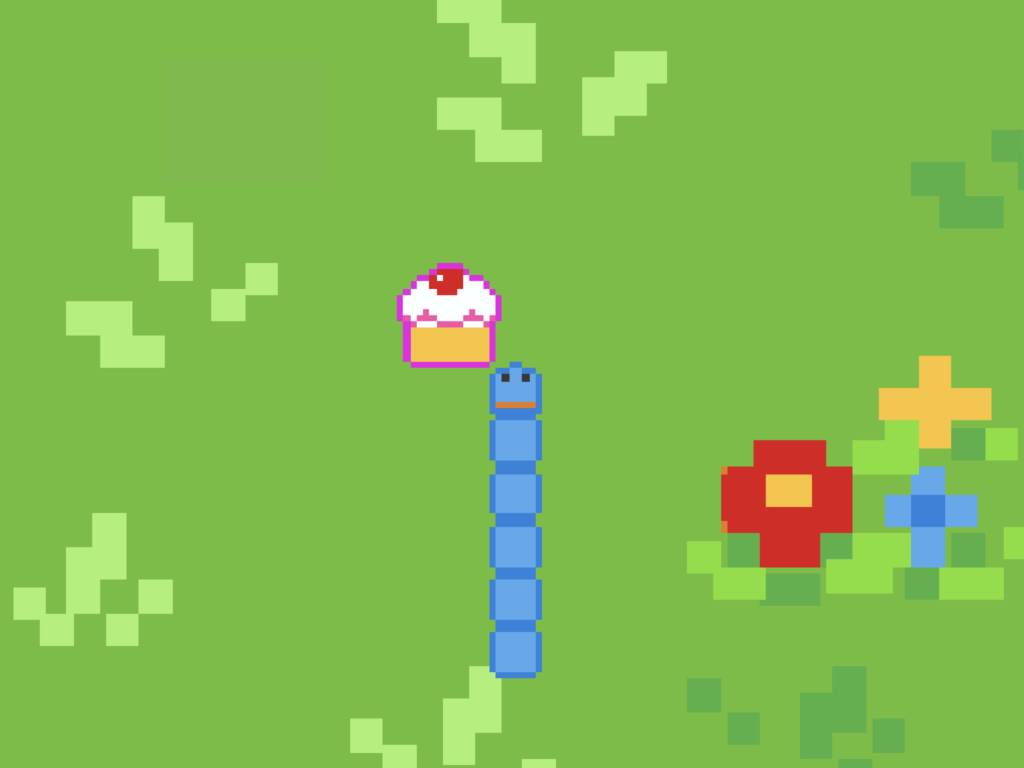
Next, create a new variable called 'cupcake'
Get out a 'set ... to ... sprite ... of kind ... ' block and assign it the 'cupcake' variable.
Create a cupcake sprite of kind Food.
Next, set the position of the cupcake to be randomly generated on start with 'pick random ... to ...' blocks
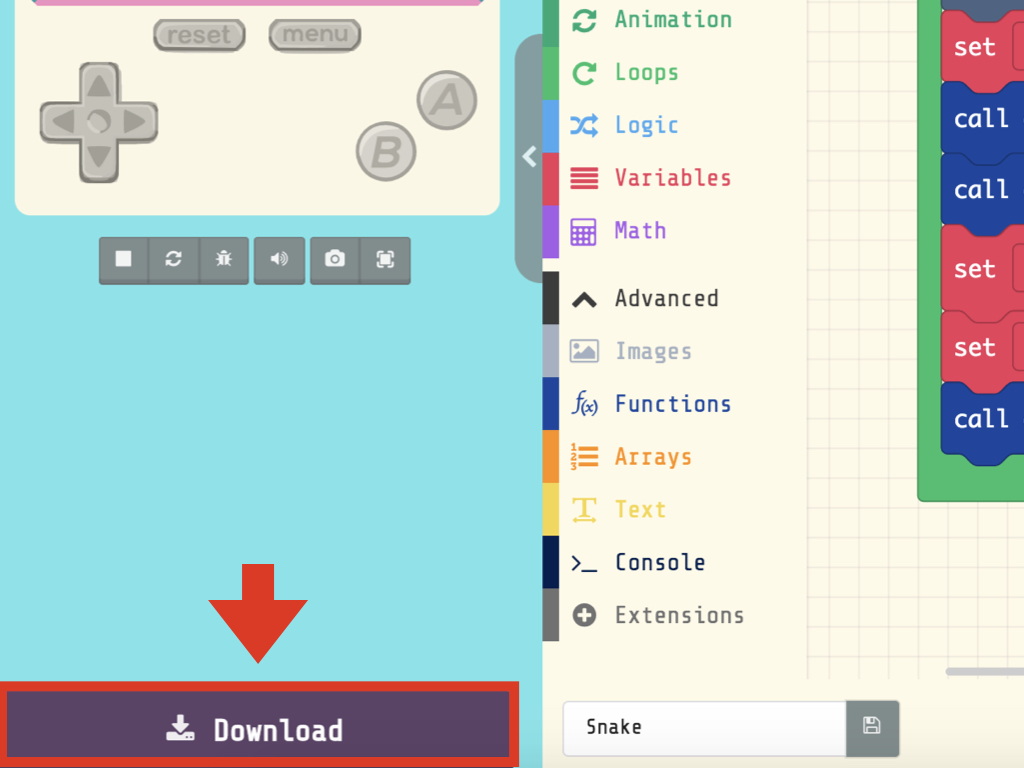
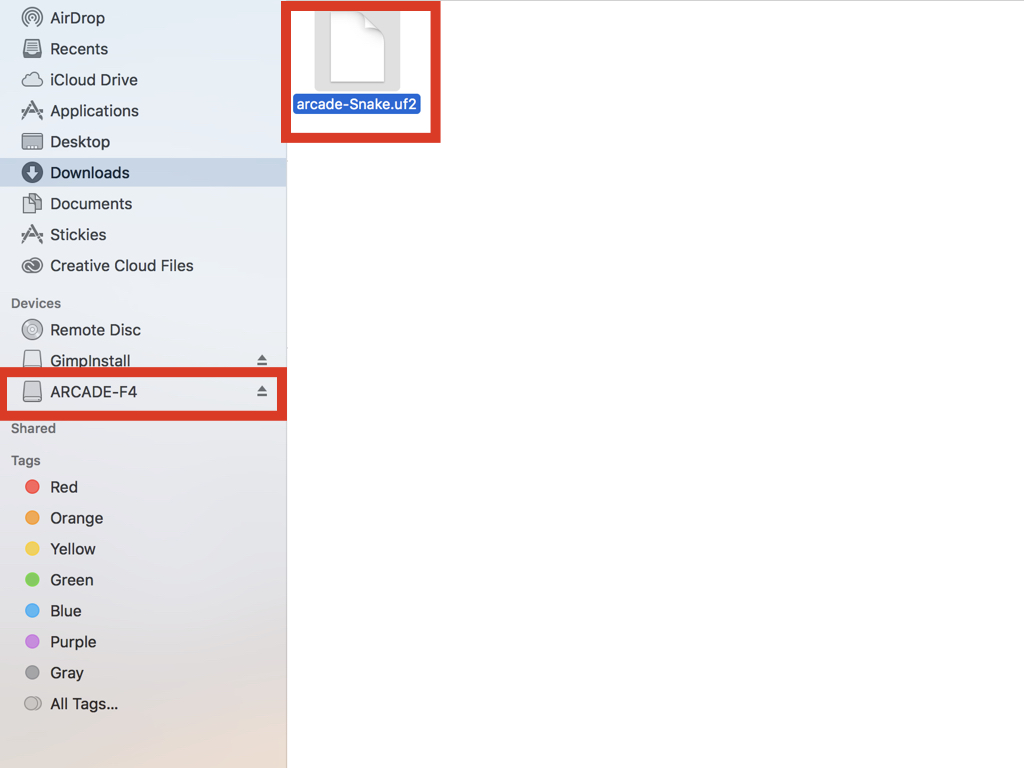
Click on the Download button
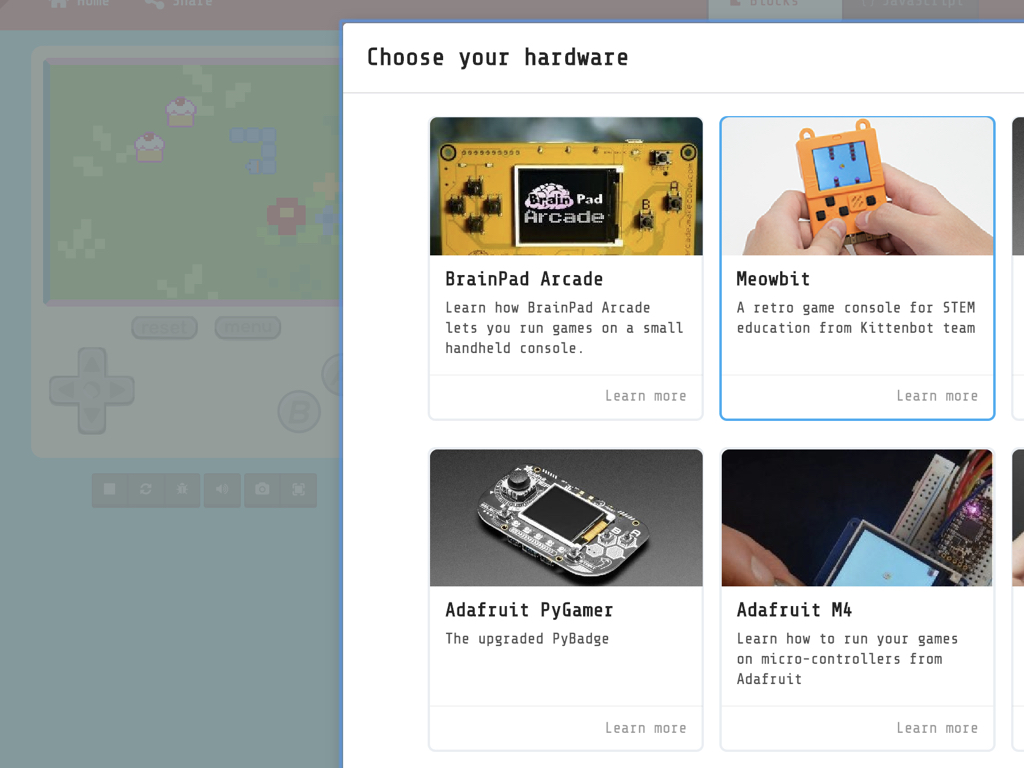
Click on Meowbit
Drag and drop the arcade-Snake.uf2 file to ARCADE-F4
While the snake sprite is animated, and the cupcake sprite is now appearing on screen, they haven't been programmed to do anything to the game score as yet. In the next guide, we'll finish up with creating a complete game where we'll look into adding a game scoring system, a key component in game mechanics.