Sound Sensor with micro:bit
Program the micro:bit to detect sound using Arduino IDE
Written By: Cherie Tan
Difficulty
Easy
Steps
16
Sound is a type of energy made by vibrations. When we hear something, we are sensing the vibrations in the air.
In this guide, learn how to use a sound sensor module with the micro:bit. Program it in the Arduino IDE or MakeCode editor. When the vibration or sound level goes above the threshold level, an LED will light up.
Complete this guide to get started with creating your own sound detection device using the micro:bit
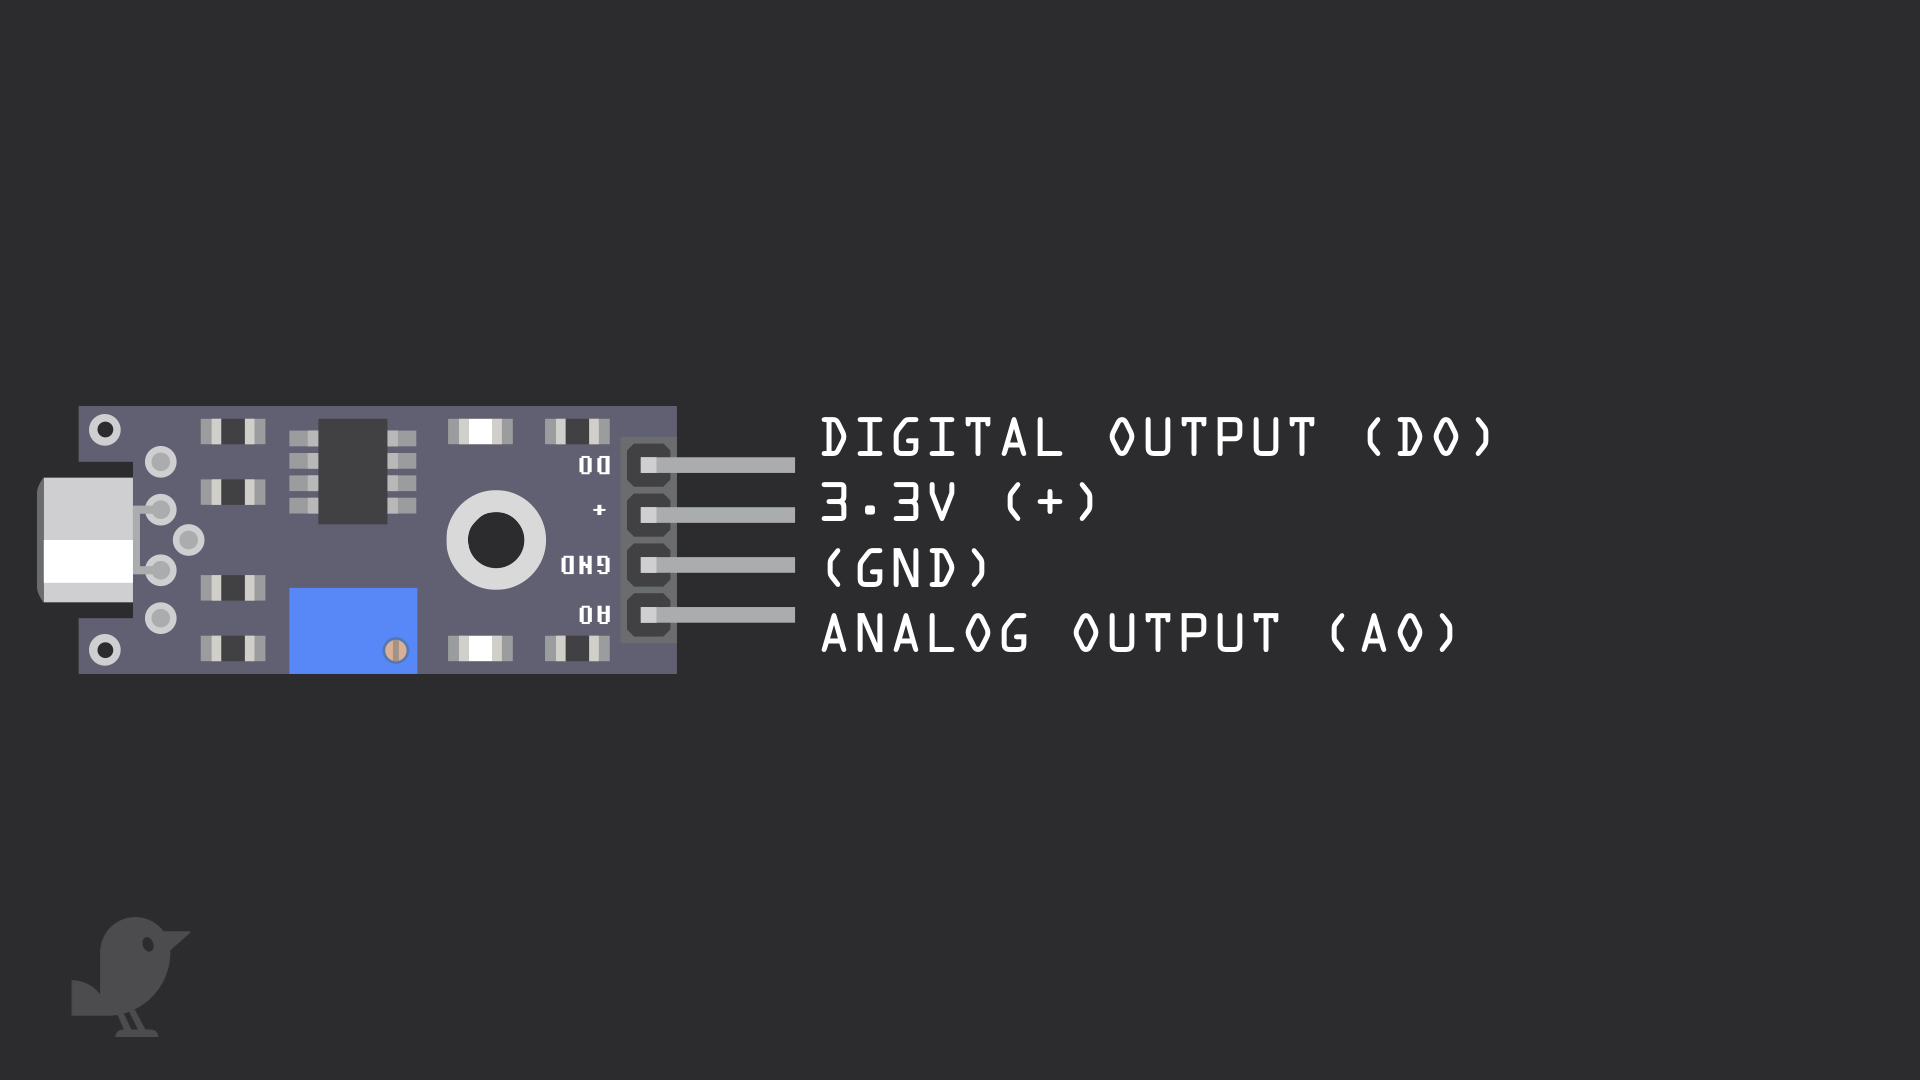
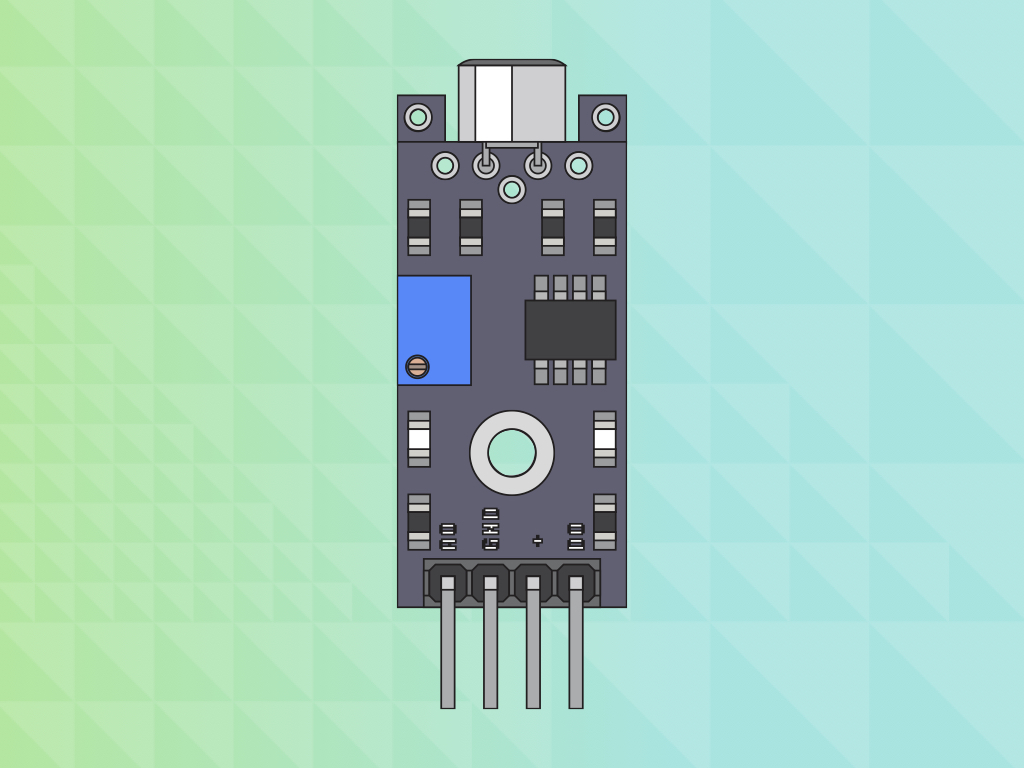
Let's take a closer look at the Sound Sensor Module. It has four pins:
DO: Digital Output
3.3V : This pin is marked as '+' on the module. We'll connect it to 3.3V on the micro:bit
GND: In electronics, we define a point in a circuit to be a kind of zero volts or 0V reference point, on which to base all other voltage measurements. This point is called ground or GND.
AO: Analog Output
Voltage is the difference in potential between two points. As it is difficult to talk about voltage without a reference point, we need another point to compare it to.
let soundLevel = 0
basic.forever(function () {
    soundLevel = pins.analogReadPin(AnalogPin.P1)
    basic.showNumber(soundLevel)
    basic.pause(100)
})
basic.forever(function () {
    if (soundLevel >= 32) {
        pins.digitalWritePin(DigitalPin.P2, 1)
    } else {
        pins.digitalWritePin(DigitalPin.P2, 0)
    }
    basic.pause(100)
})
Open up the MakeCode Editor.
Click on 'New Project'
Add the following code in the Javascript interface.
Click on Tools > Serial monitor
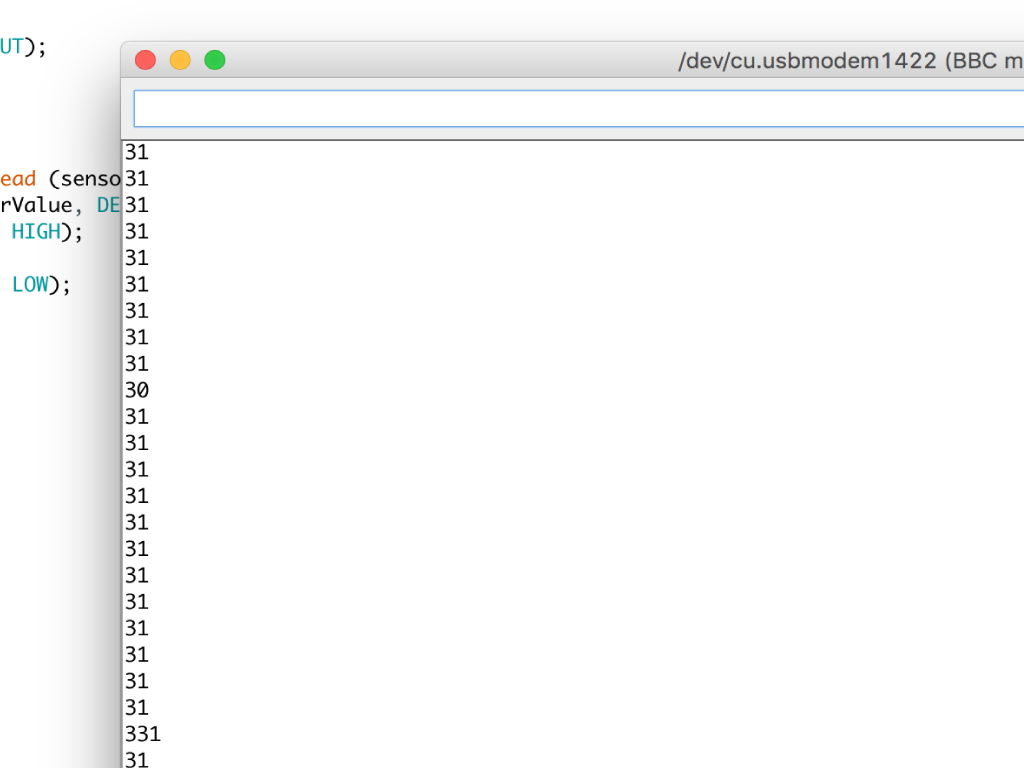
Now you can see the the output values you are getting in a quiet room.
Now you can see the the output values you are getting in a quiet room.
const int sensorPin = 1; // pin for sound sensor
const int ledPin = 2; // select the pin for the LED
int sensorValue = 0; // variable to store the value coming from the sensor

void setup ()
{
  pinMode(sensorPin, INPUT);
  pinMode(ledPin, OUTPUT);
  Serial.begin (9600);
}

void loop ()
{
  sensorValue = analogRead (sensorPin);
  if (sensorValue >= 32){
    digitalWrite (ledPin, HIGH);
    }
  else{
    digitalWrite (ledPin, LOW);
  }
  Serial.println (sensorValue, DEC);
  delay(1000);
}
The code has been updated so that when the sensorValue goes above or equal 32, the LED will light up. If not, the LED will not light up. Upload this sketch to the micro:bit.

We can also use the Arduino IDE to program the micro:bit.
Open up the Arduino IDE.
If you have not already got it installed, please follow our previous guide on how to install and set up the Arduino IDE for the micro:bit!
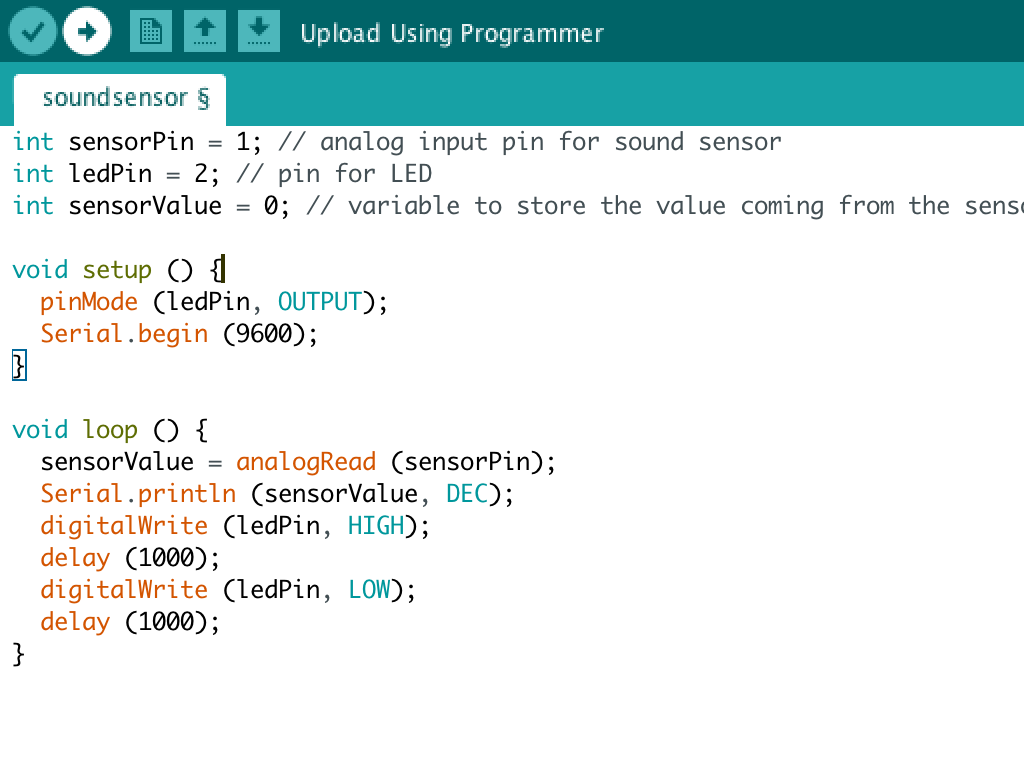
Click on the upload button next to it to upload the sketch
Click on the tick icon on the top left hand-corner to verify the code
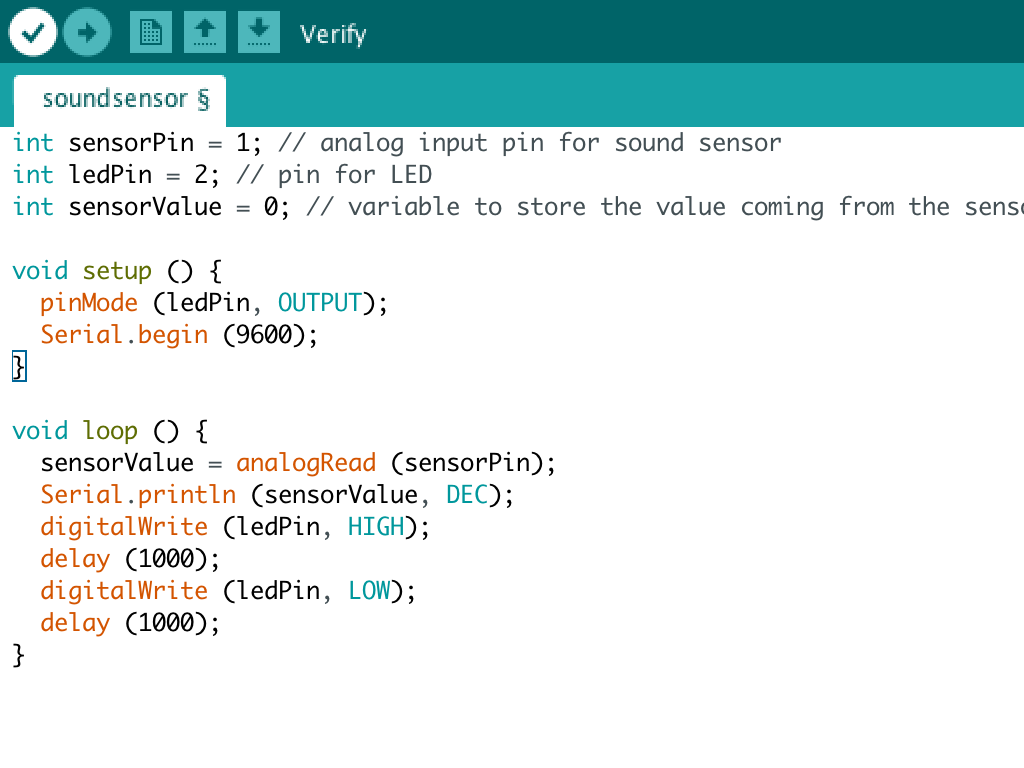
const int sensorPin = 1; // analog input pin for sound sensor
const int ledPin = 2; // pin for LED
int sensorValue = 0; // variable to store the value coming from the sensor

void setup () {
  pinMode(sensorPin, INPUT);
  pinMode(ledPin, OUTPUT);
  Serial.begin (9600);
}

void loop () {
  sensorValue = analogRead (sensorPin);
  Serial.println (sensorValue, DEC);
  digitalWrite (ledPin, HIGH);
  delay (1000);
  digitalWrite (ledPin, LOW);
  delay (1000);
}
We connected the analog pin (AO) of the sound sensor to Pin 1 on the micro:bit, therefore the value of int sensorPin is A1 here.
We connected the positive leg of the LED to pin 2 of the micro:bit, so int ledPin is set to 2.
We will also create a variable, 'sensorValue' to store the value coming from the sound sensor.
- While the circuit has current flowing through it, the LED will blink on and off with a delay of 1 second in between. Feel free to change the delay value. Right now it is set at '1000' which is 1 second.
- Serial.println (sensorValue, DEC);' outputs the analog value to the serial monitor
