1-channel Relay with micro:bit
Turn another circuit on and off with a relay
Written By: Cherie Tan

Difficulty
Easy
Steps
11
A relay is an electromagnetic switch. It is turned on by a small current but can turn on or off a much larger electric current. This is immensely useful as they can be used both as switches as well as amplifiers (converting small currents to large currents).
In this guide, you will learn to connect a relay to the micro:bit and get it to turn a light on and off.
You can use relays are used in all sorts of things, and you can find them used in cars and computer boards just to name a few examples.
Before we begin, let's talk about what a relay is exactly. A relay is an electromagnetic switch that has contacts in it that can trigger a circuit to be open or close.
It's the kind of switch that can be controlled by means of a control signal.
The two states of a relay:
Open state: When open, that means the circuit is interrupted and so no current flows.
Closed state: When closed, current can flow.
It's the kind of switch that can be controlled by means of a control signal.
The two states of a relay:
Open state: When open, that means the circuit is interrupted and so no current flows.
Closed state: When closed, current can flow.
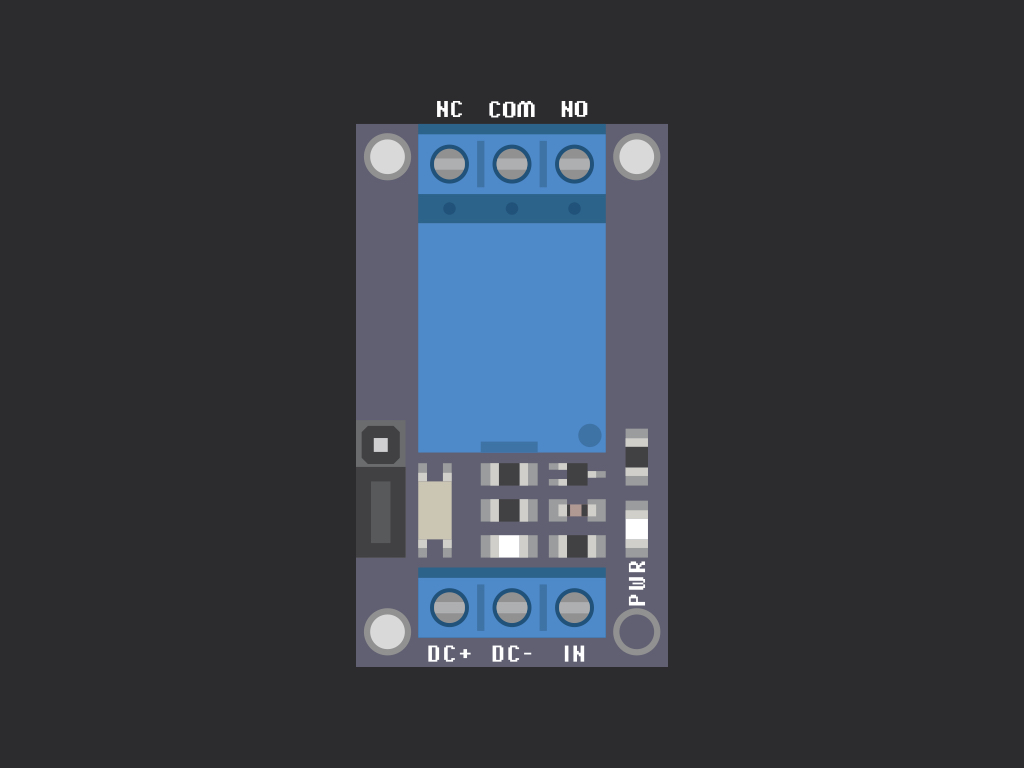
Now take a look at the relay module and you might notice that there are six connections.
Three of these control the state of the relay:
Direct Current + (DC+): In this guide, we connected it to 3.3V
Direct Current - (DC-): Connected to GND.
Input (IN): This is the signal connection that is used to control the relay.
Direct Current + (DC+): In this guide, we connected it to 3.3V
Direct Current - (DC-): Connected to GND.
Input (IN): This is the signal connection that is used to control the relay.
Three of the other connections control the circuit:
NC - Stands for 'Normally closed'. it is connected to COM when there is a trigger in the relay.
NO - Stands for 'Normally open'. It is normally connected to COM when there is no trigger in the relay.
COM - Stands for 'Common'. it is the part of the relay that moves.
When a relay is off, COM is connected to NC. NO is not connected here.
When the relay turns on, it moves from NC to NO.
basic.forever(function () {
    pins.digitalWritePin(DigitalPin.P0, 0)
    basic.pause(1000)
    pins.digitalWritePin(DigitalPin.P0, 1)
    basic.pause(1000)
})
Copy and paste this code into the Javascript interface
We use P0 here because the relay's 'IN' pin is connected to Pin 0 of the micro:bit.
The connection to NO means a HIGH or '1' signal will turn the LED on.


