WiFi Module with micro:bit
Written By: Cherie Tan

Difficulty
Easy
Steps
16
The Internet of Things or IoT for short, is a network of physical devices connected to the internet. By creating a network of devices, such as sensors or other physical devices embedded with computing systems, all these devices are connected and can exchange data seamlessly. Learn to add WiFi capability to your micro:bit with an ESP8266 WiFi module, and create your own IoT system. Complete this guide to send data such as the micro:bit's light level and temperature readings over the internet using Thingspeak!

This is the WiFi module, it has 6 pins and they are labelled as such:
- 1. Ground
- 2. TX
- 3. GPIO 2
- 4. CH_EN
- 5. GPIO 0
- 6. Reset
- 7. VCC (+3.3V)
- 8. RX.
We'll be using four of these pins today to connect the micro:bit to the Wifi module!
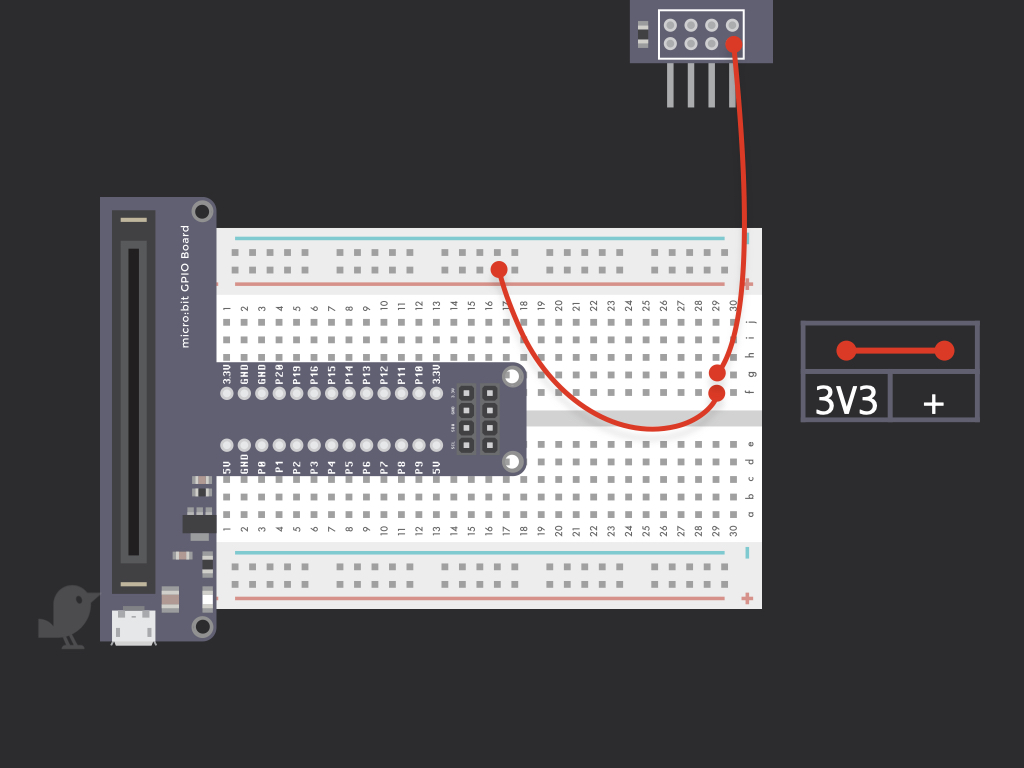
Connect a red jumper wire from 3V3 on the Wifi Module to the breadboard as shown. It should be connected to the + power rail on the breadboard. This will later be connected to 3.3V on the micro:bit.
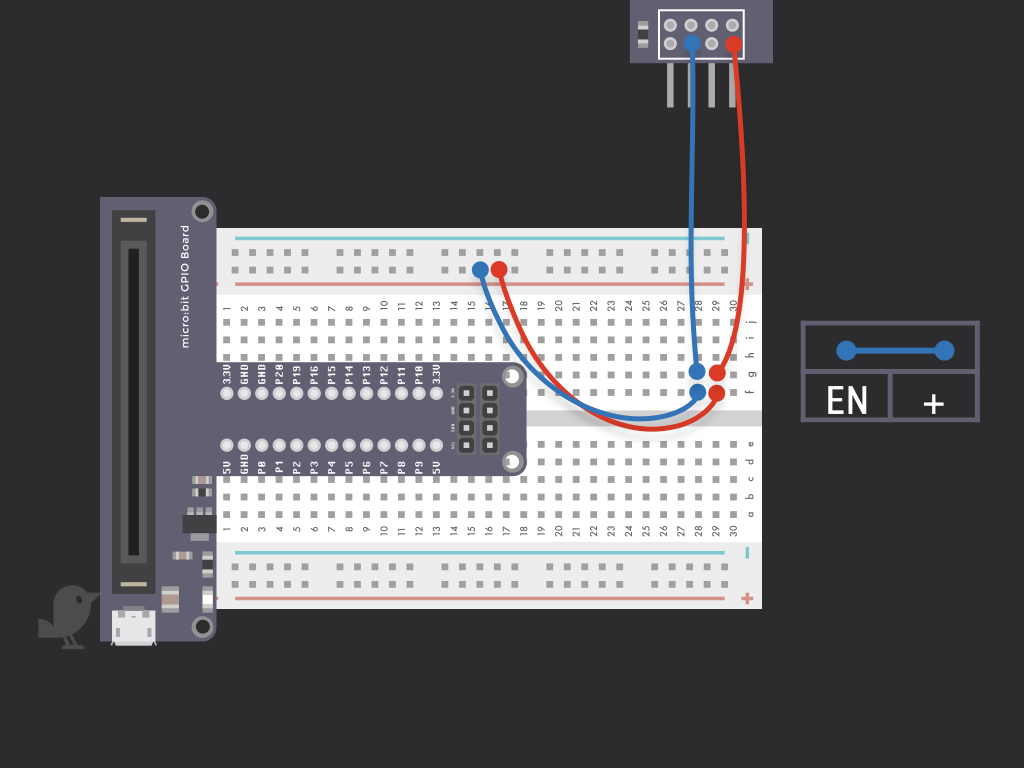
Next, connect EN on the WiFi Module to the + power rail on the breadboard
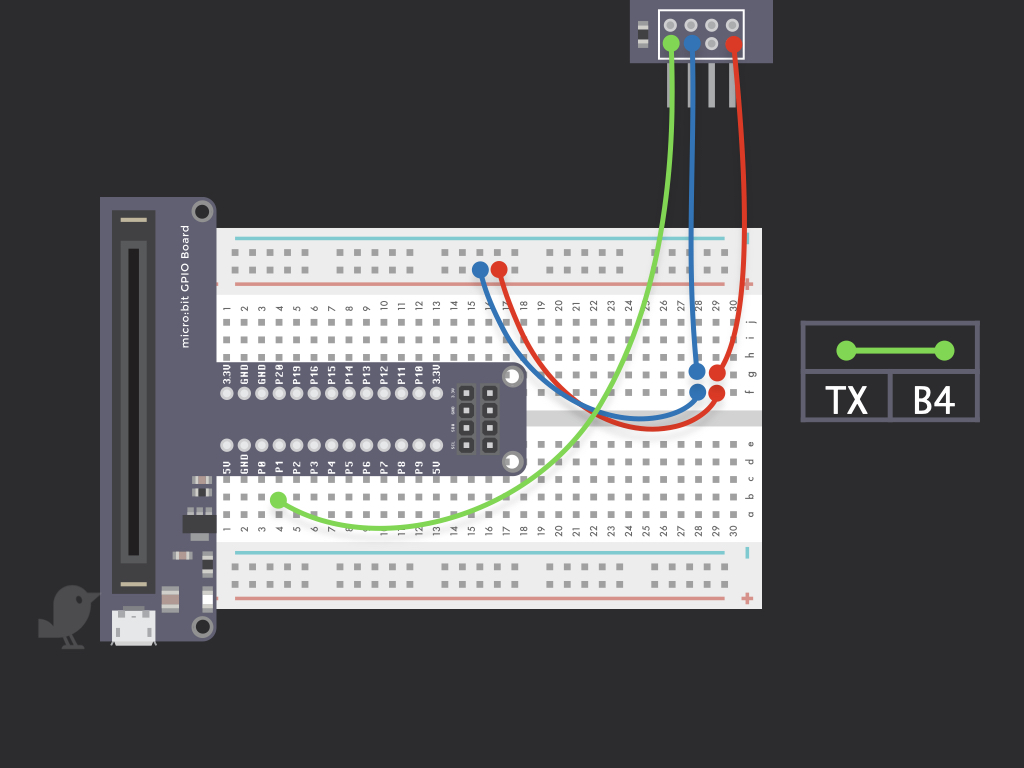
Connect TX on the module to B4 on the breadboard, so it should be connected to P1 on the micro:bit


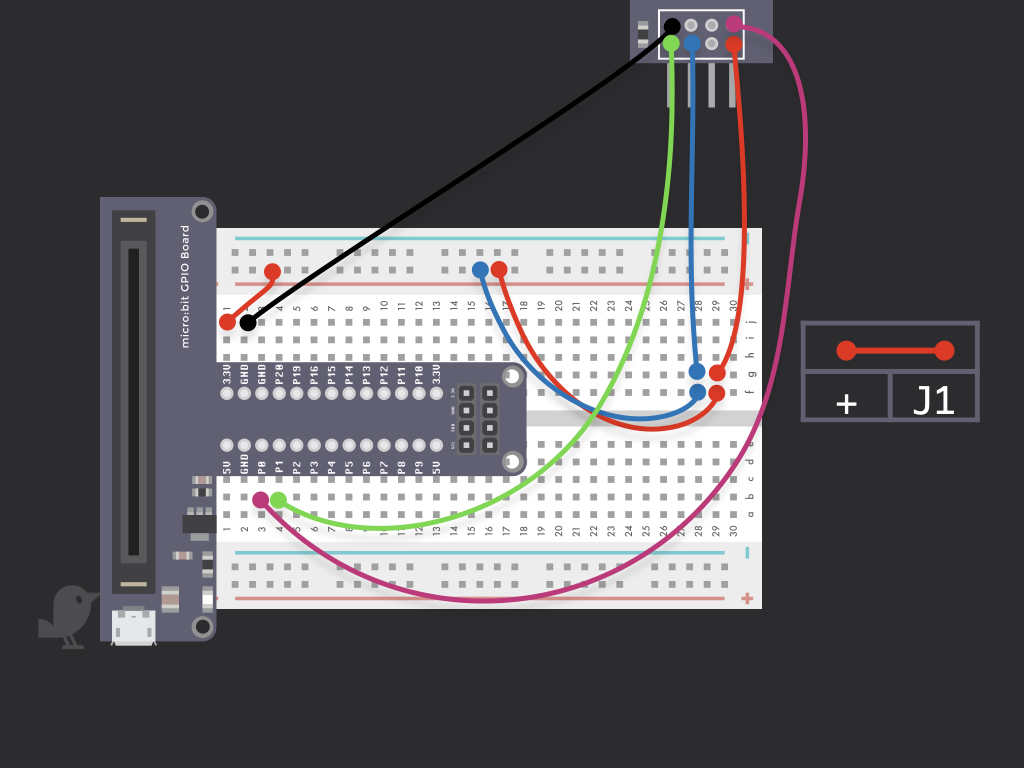
Finally, remember to connect a red jumper wire from the + power rail to 3.3V on the micro:bit
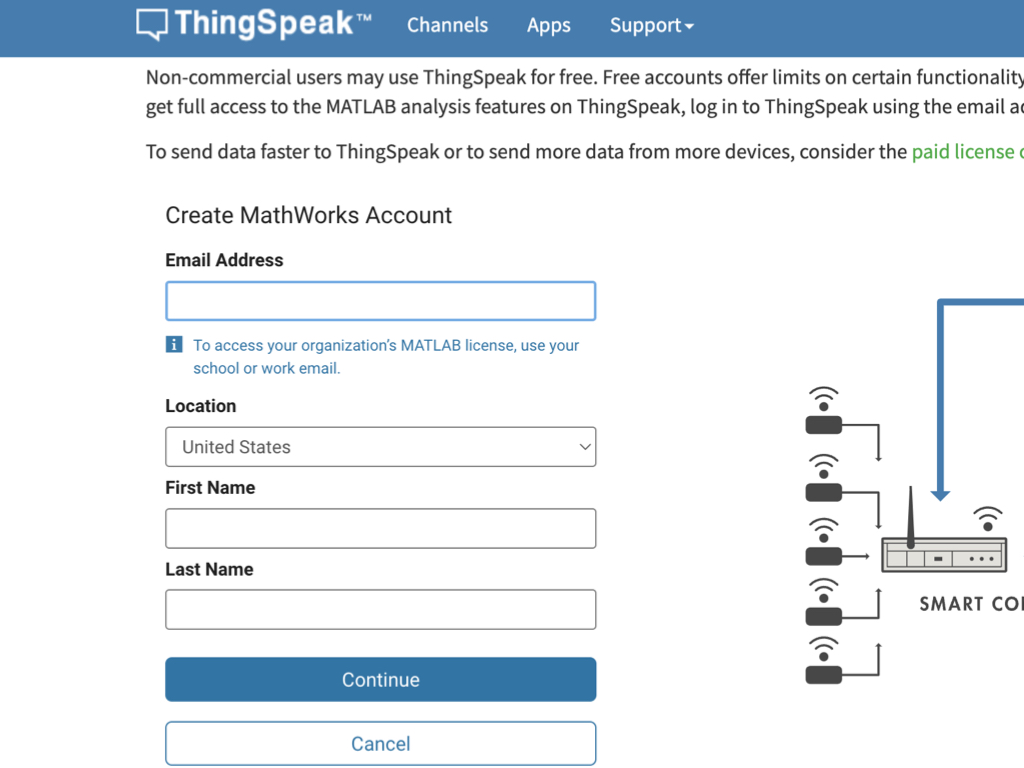
Go to ThingSpeak's website and sign up for an account: https://thingspeak.com/
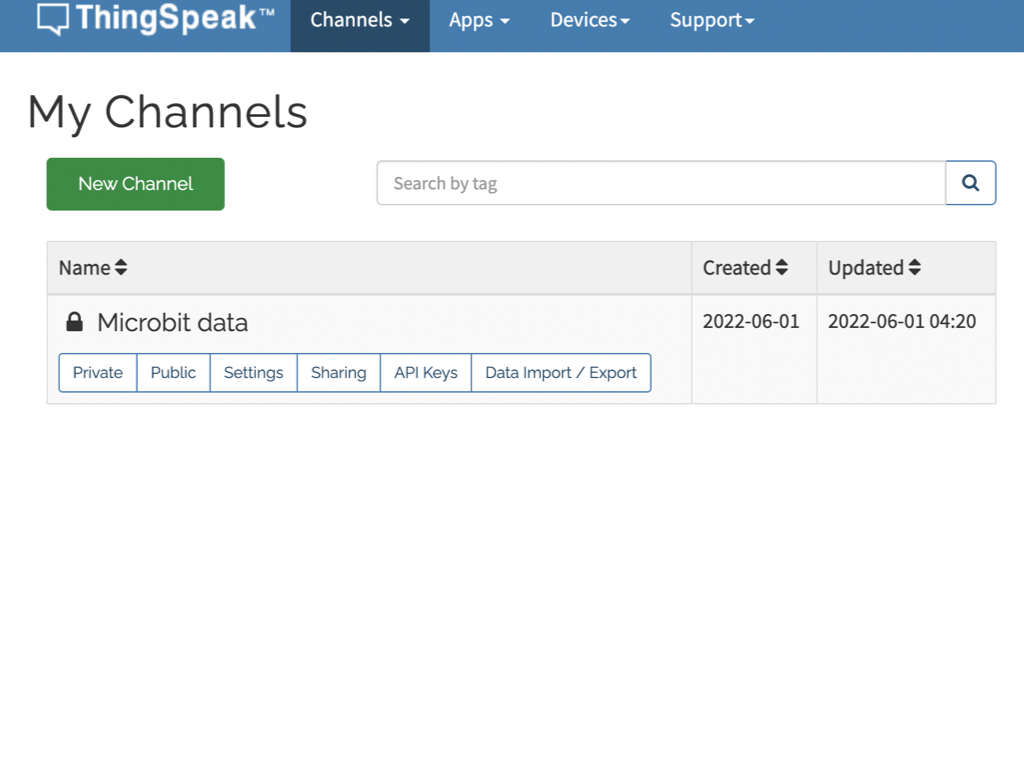
Click on the Channels button up the top where the navigation bar is. Next, click on New Channel button to create a new channel for the micro:bit Set up the settings for the channel, name field 1 : Light level Next name field 2: Temperature Remember to finalise changes by clicking the Save changes button down below
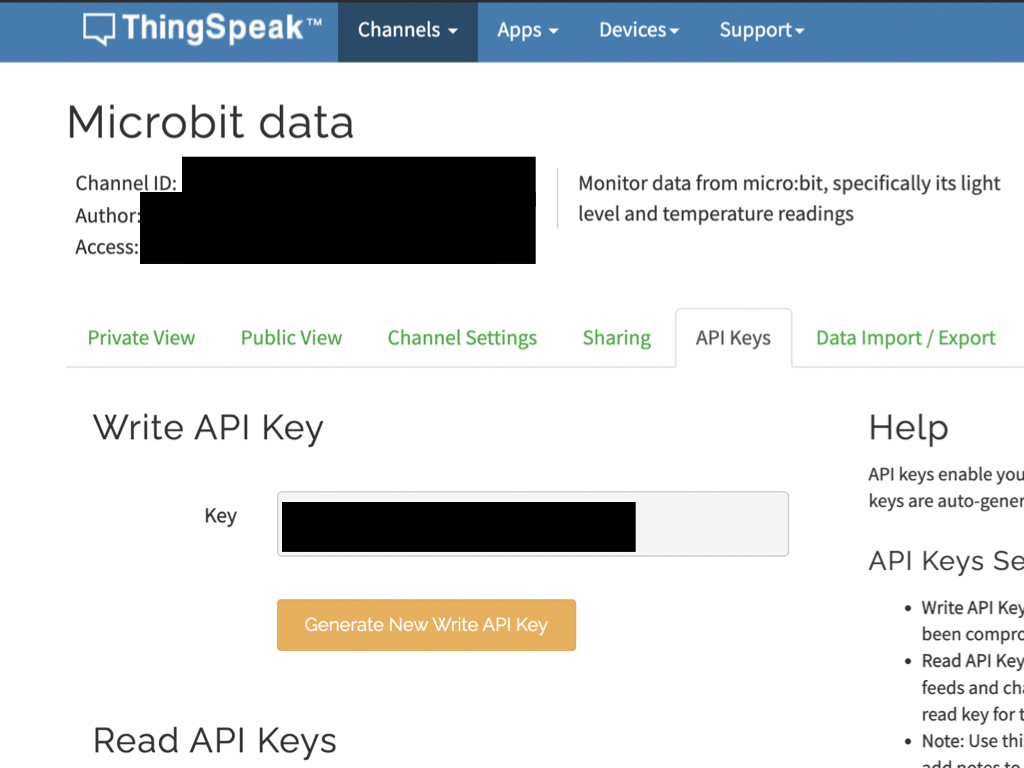
Now click on API Keys tab to find your newly created channel's Write API Key, copy this.
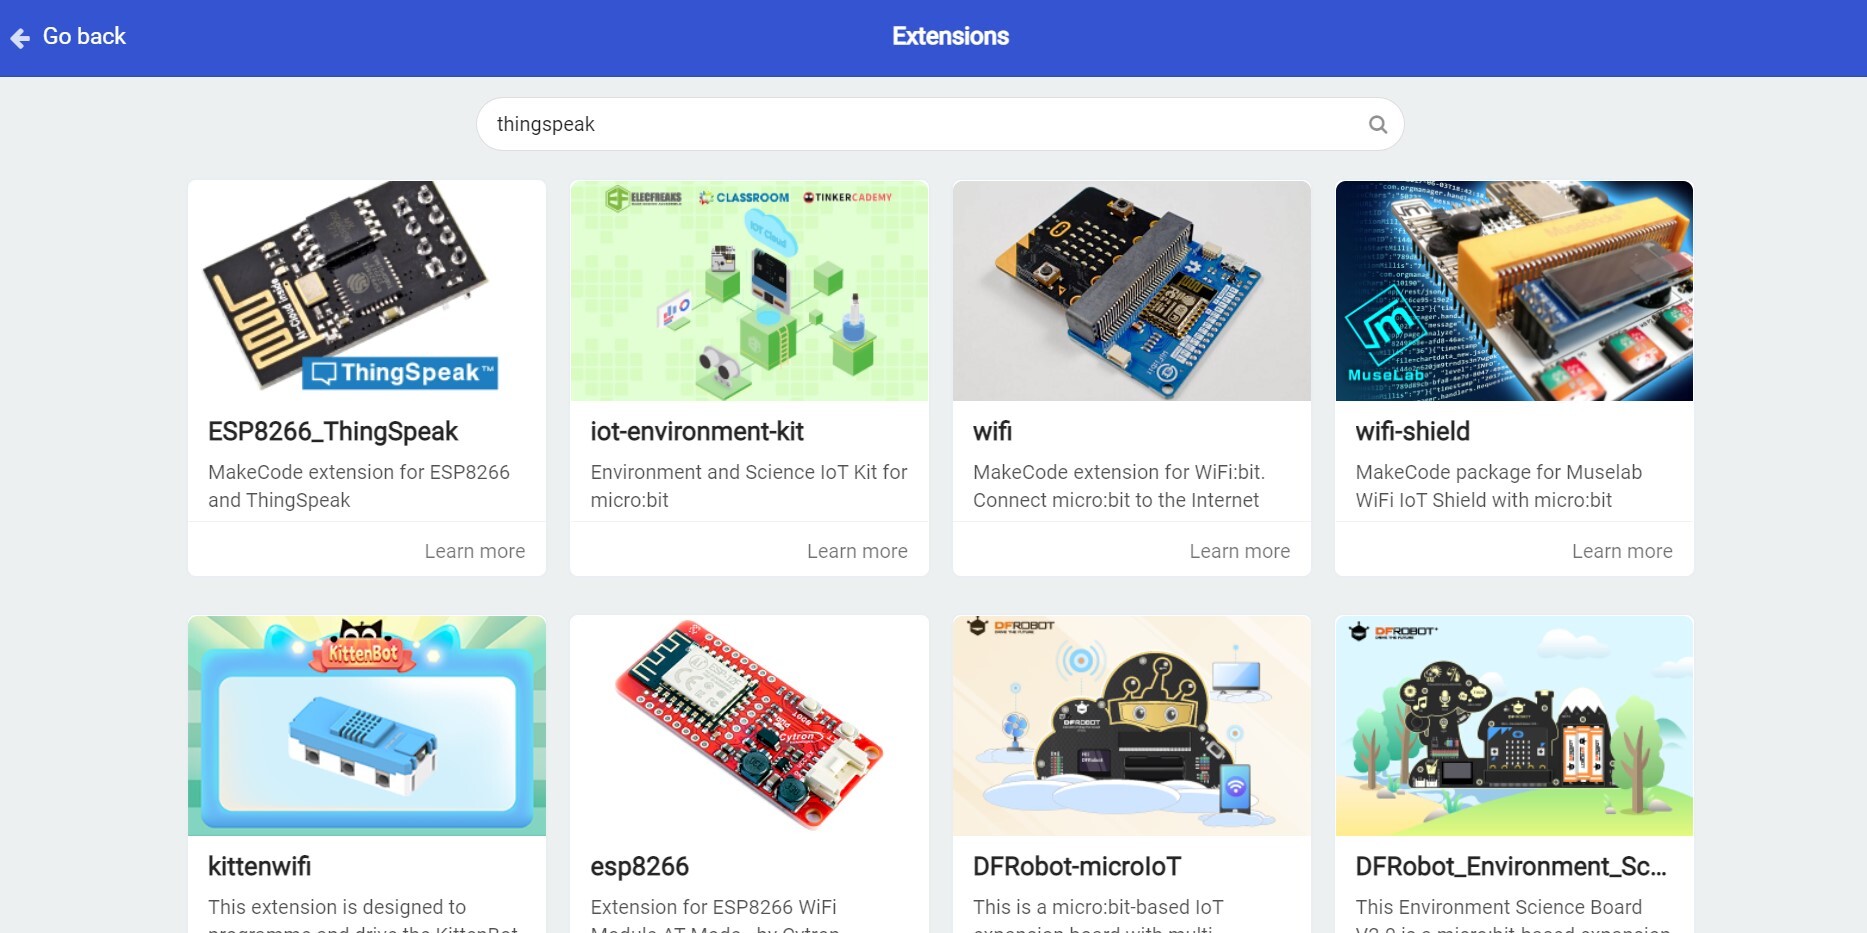
Go over to MakeCode editor: https://makecode.microbit.org/#editor Click on Advanced > Extensions Search for thingspeak in the search field. Then click on ESP8266_ThingSpeak to add it to the editor.
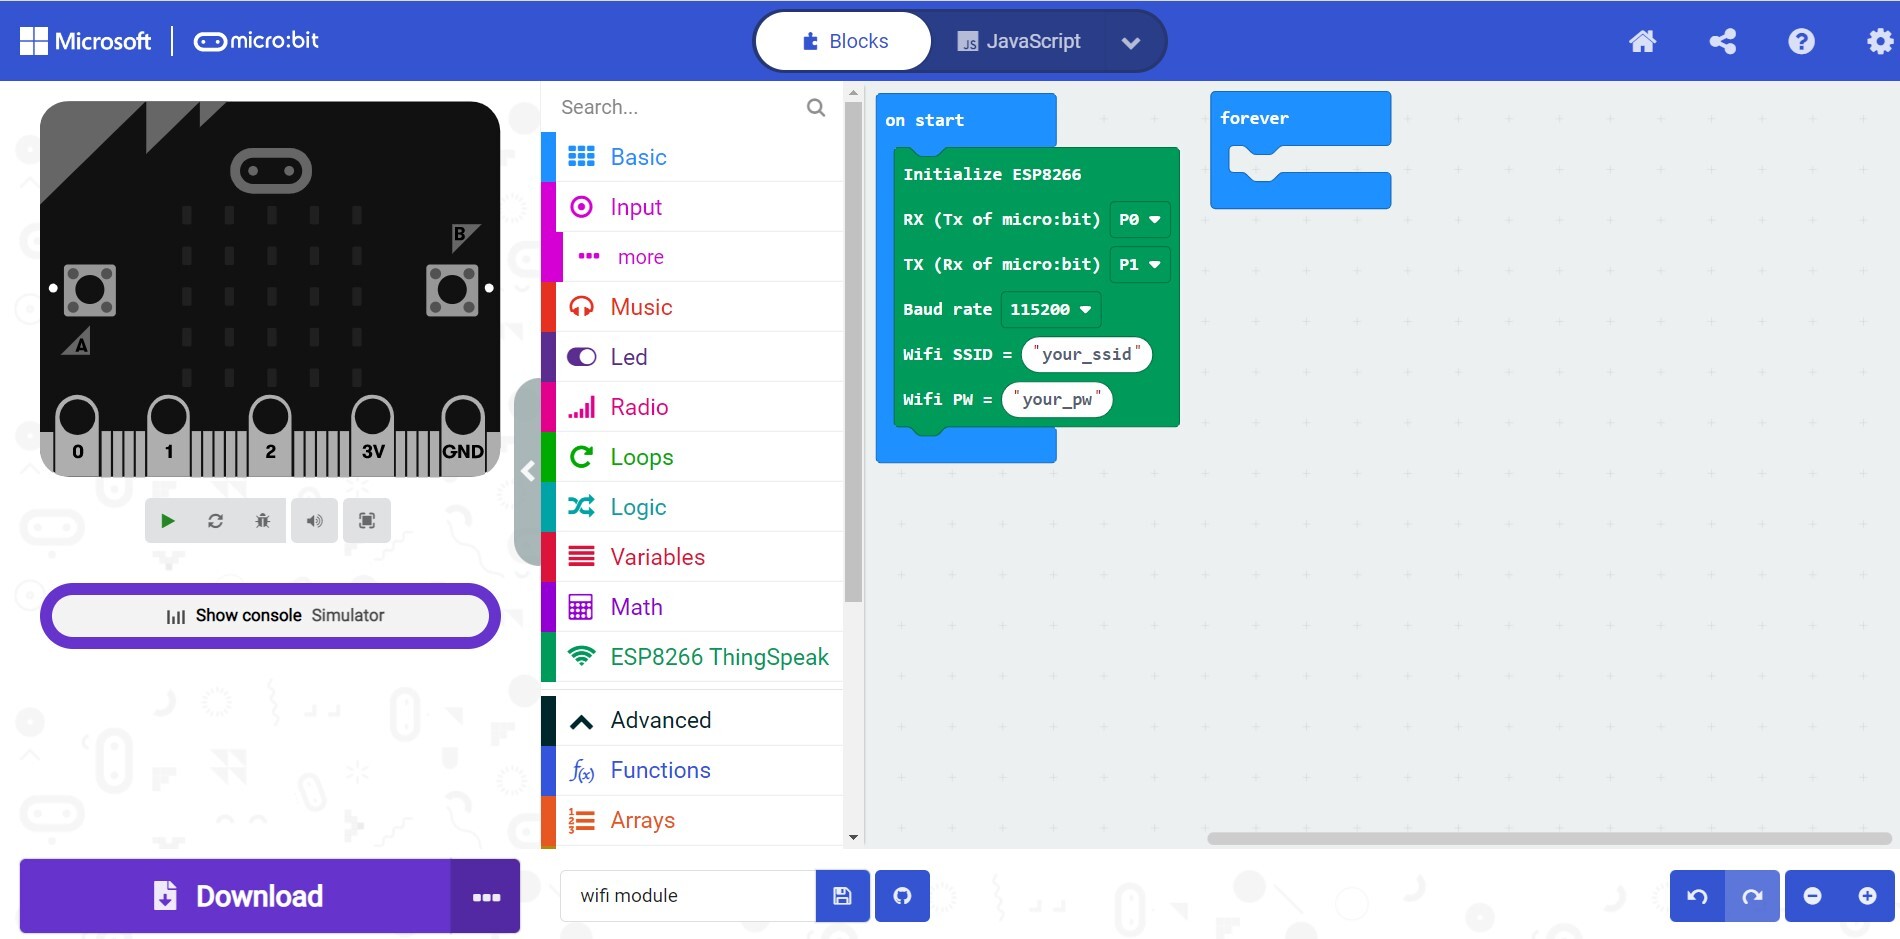
Click on ESP8266 ThingSpeak tab, and look for the initialize esp8266 block. Drag and drop this block into on start.

Drag and drop an upload data to Thingspeak block into the forever block. From the Input tab, drag and drop a light level block into Field 1. Drag and drop a temperature block into Field 2. Finally, remember to paste the Write API Key you got in your channel into Write API Key. Also make sure to add your WiFi network's SSID and password details into the Wifi SSID and WiFi PW fields accordingly.
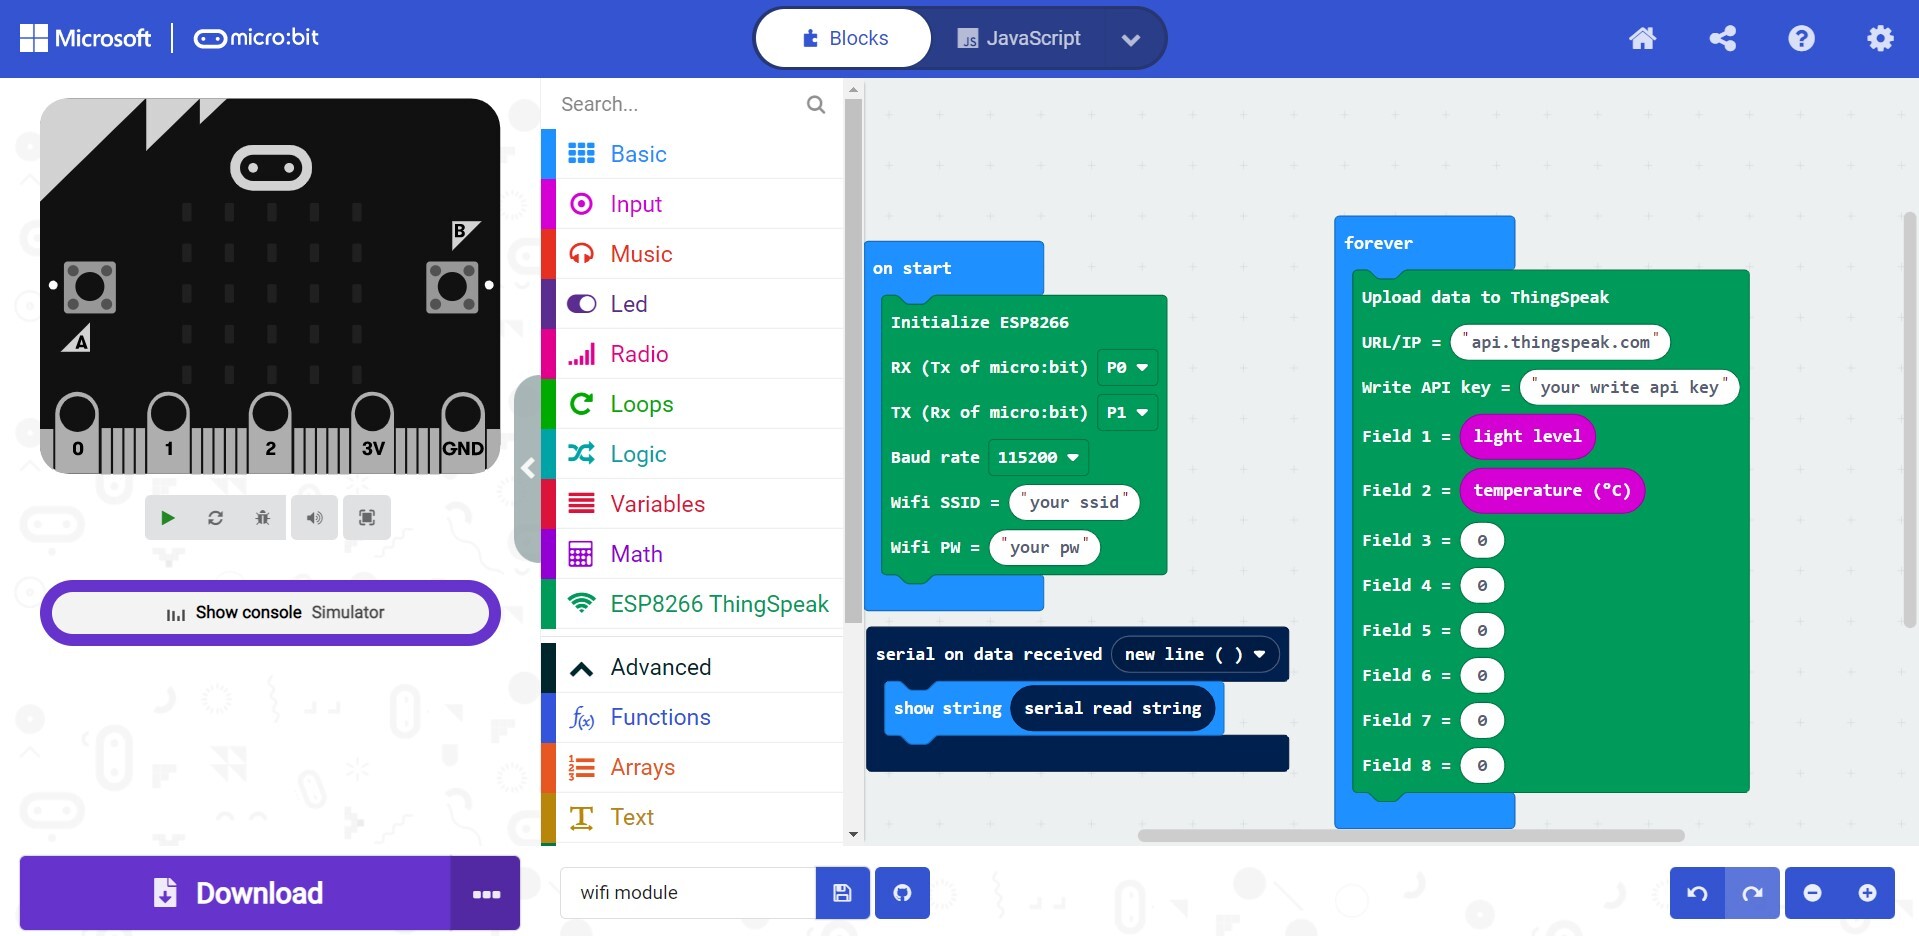
Finally, click on Serial tab and drag and drop a serial on data received new line block. From Basic tab, drag and drop a show string block into the serial on data received block. Now add a serial read string block into show string. You can find this in the Serial tab.
To make this project portable, connect the battery pack to the micro:bit so that it can run without being connected to your computer.
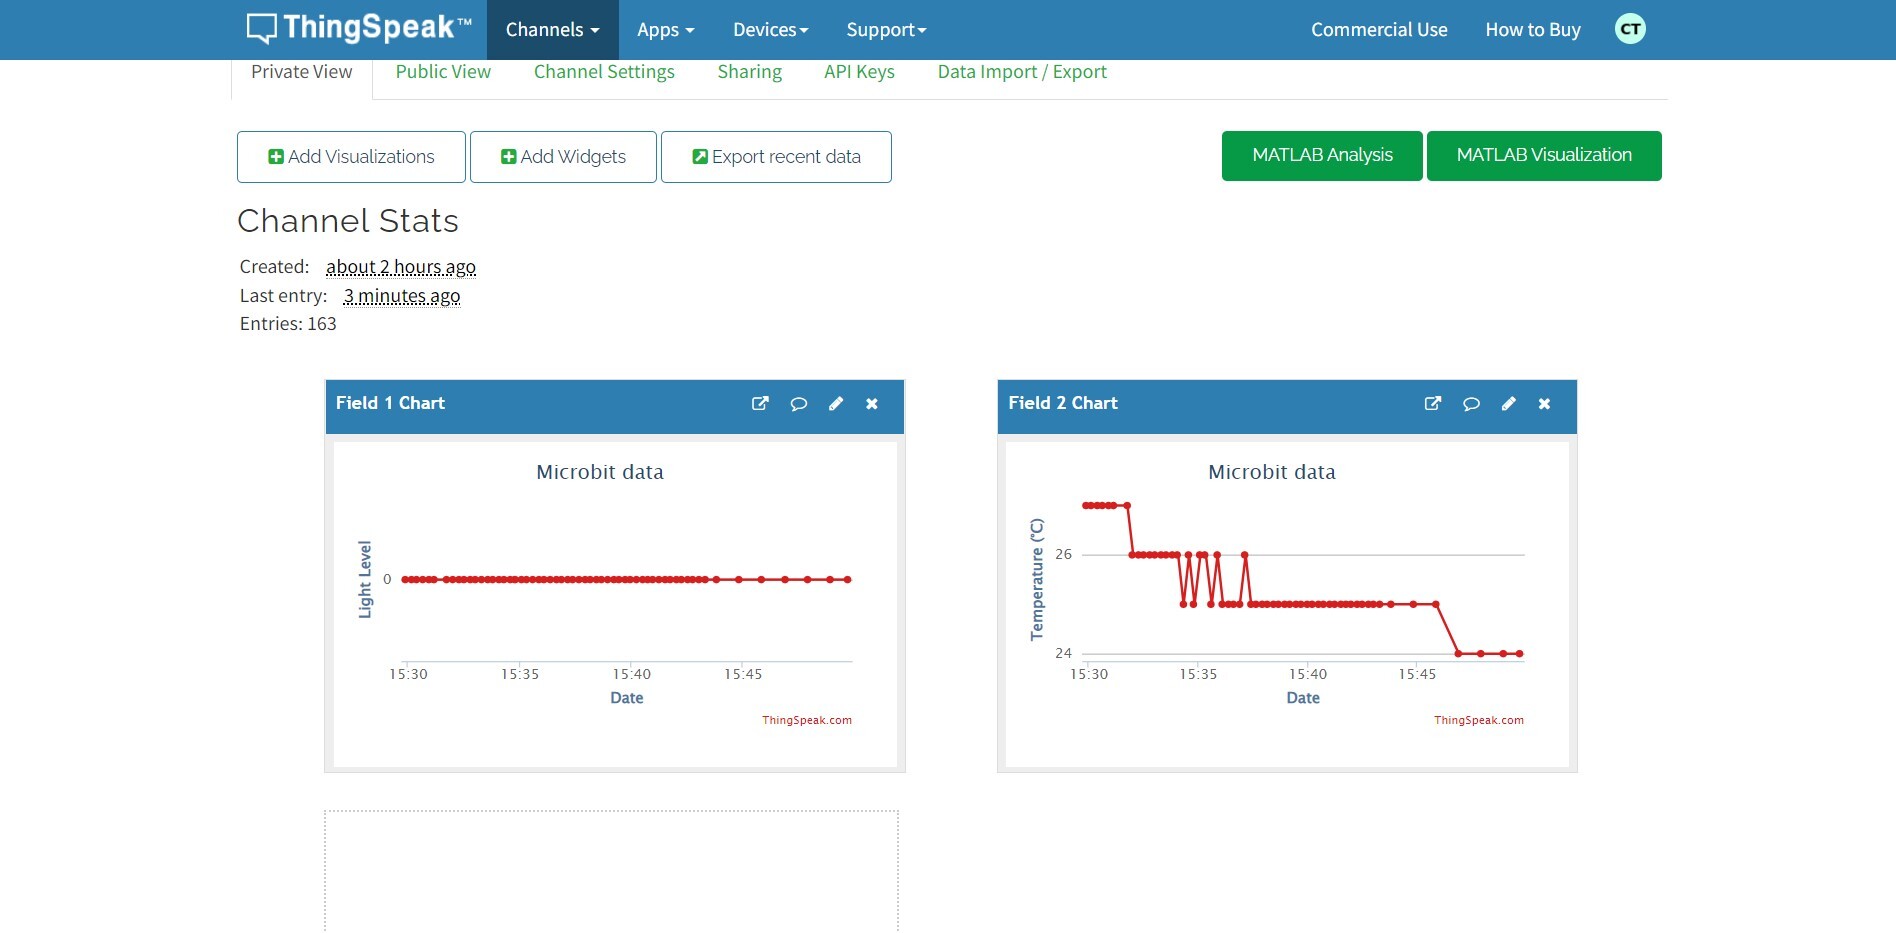
With your micro:bit connected via USB to your computer, click the Download button in the editor to get the hex file. Then drag and drop this into the MICROBIT drive. Go over to ThingSpeak dashboard, and click on Channels and navigate to your newly created channel. The data should now be showing up and updating in Private View. The channel stats should show the micro:bit's light level and temperature data! Congratulations, you have now successfully connected your micro:bit to the internet!