UV Sensor Module with micro:bit
Written By: Cherie Tan

Difficulty
Easy
Steps
6
The micro:bit does not have a photoresistor or light sensor device on it. But did you know that you can use the LEDs of the matrix display to estimate the amount of ambient light? What about UV light? Imagine you are growing a plant at home in a well-lit room. Does it have enough light? After all, ultraviolet light (UV) is extremely important for plant growth. This is something that indoor lighting does not provide. In this project, measure the amount of UV light your plant is exposed to with a UV sensor module and a micro:bit!
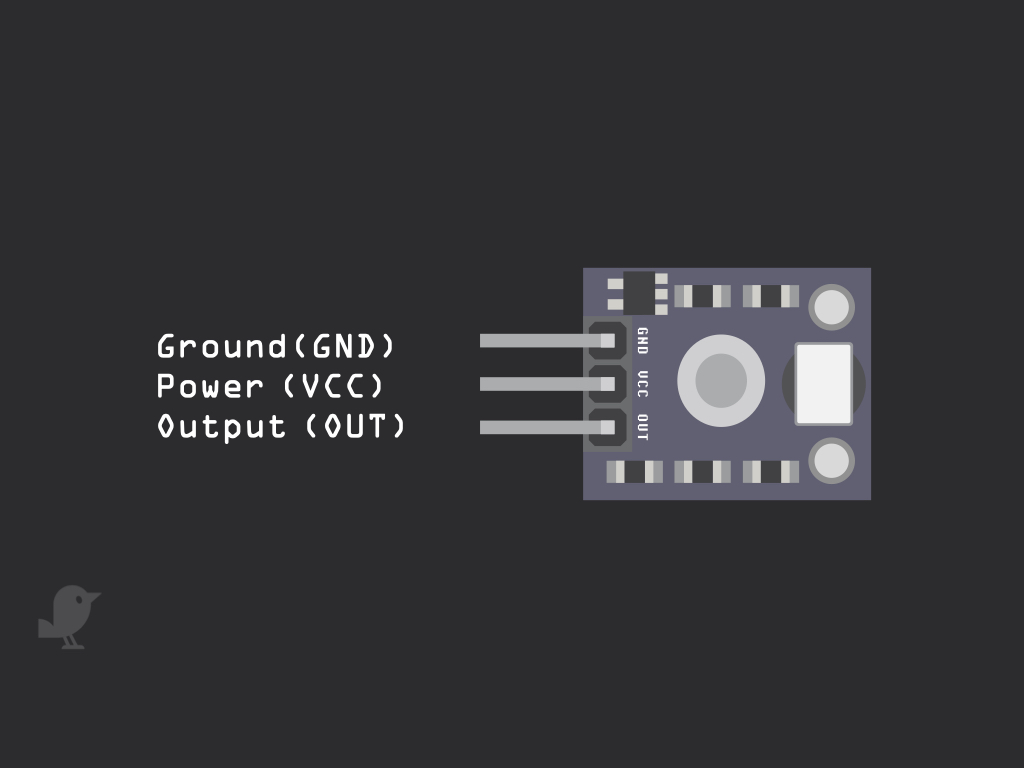
There are three pins on the UV light sensor starting with the Ground (GND) pin : In electronics, we define a point in a circuit to be a kind of zero volts or 0V reference point, on which to base all other voltage measurements. This point is called ground or GND. The next pin, VCC is to be connected to the 3.3V pin on the micro:bit. Note: 'VCC' stands for Voltage Common Collector. The last pin is the output pin (OUT). This is the pin that will output a reading from the UV Light Sensor.
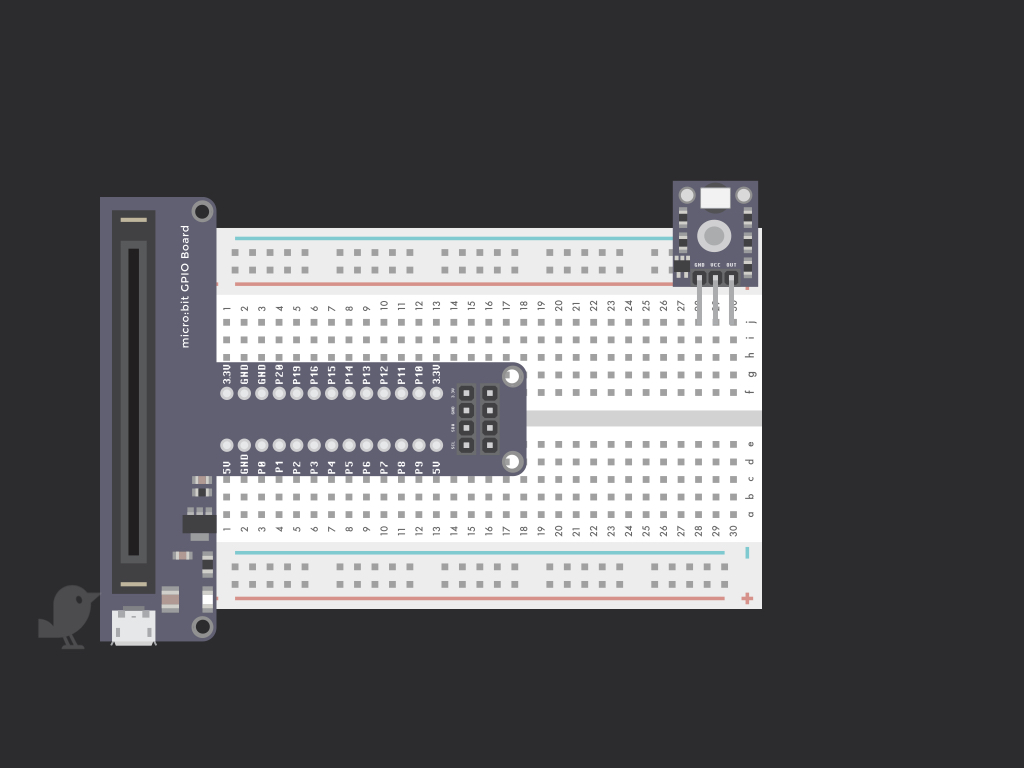
Connect the UV Sensor module to the breadboard as shown. The GND pin should be at J28. The VCC pin at J29 and finally the OUT pin in J30.
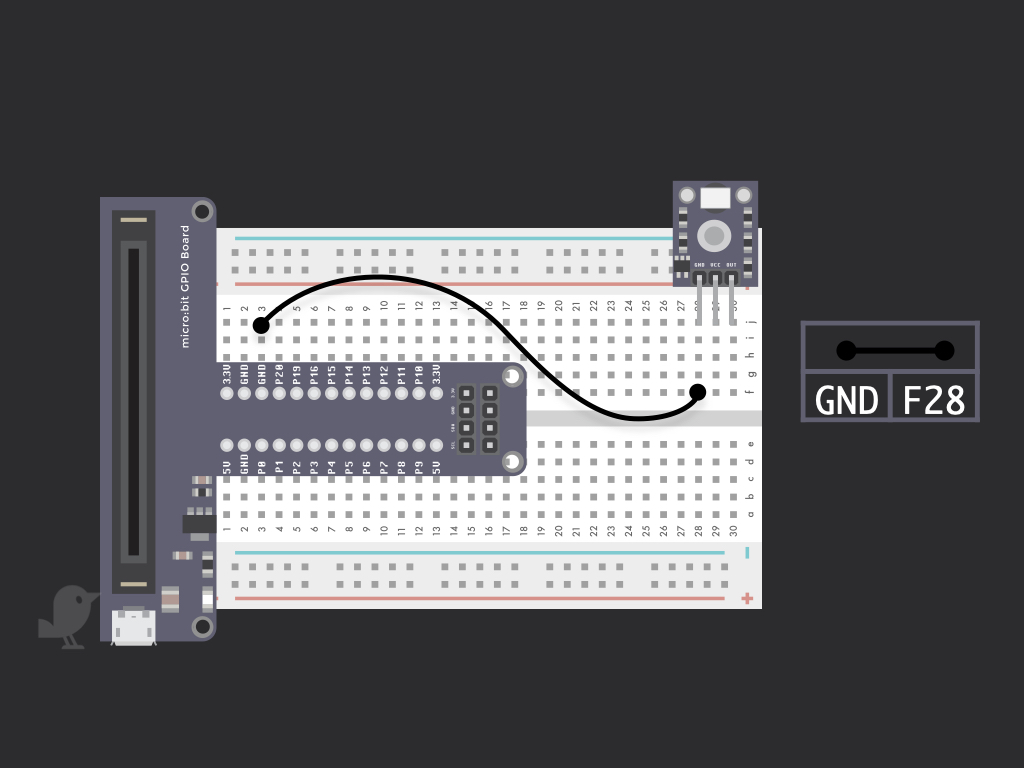
Connect a black jumper wire from F28 to I3 on the breadboard. This will connect the GND pin on the module to the GND pin on the micro:bit.
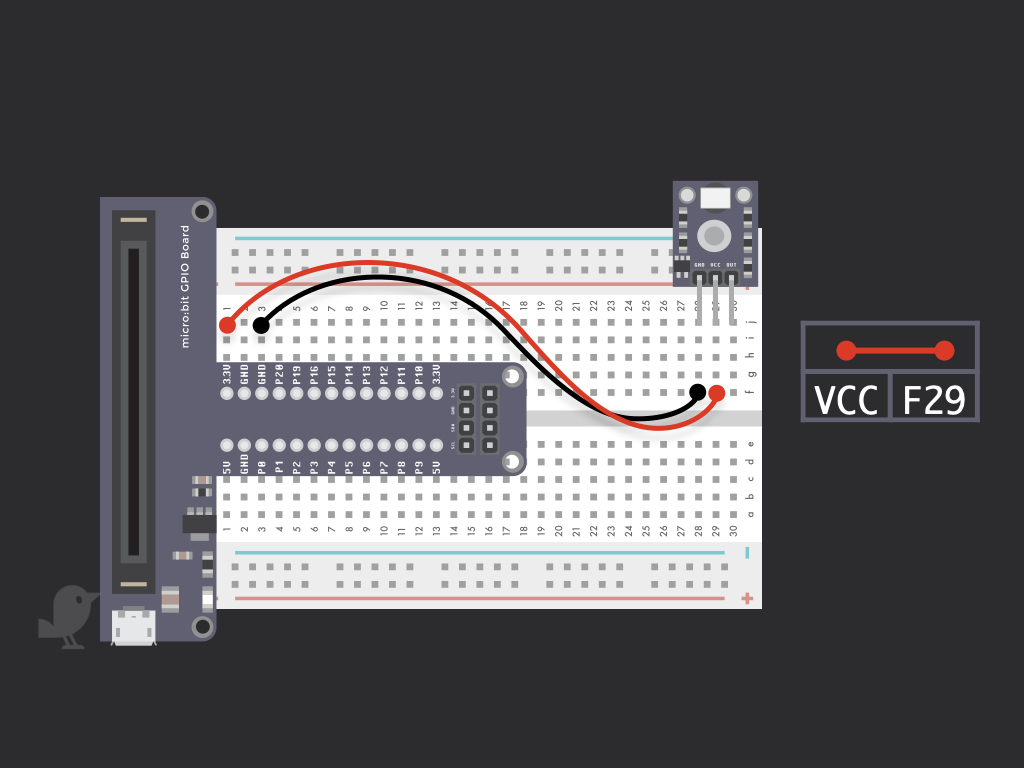
Connect a red jumper wire from F29 to I1 on the breadboard. This connects the VCC pin on the module to 3.3V on the micro:bit.
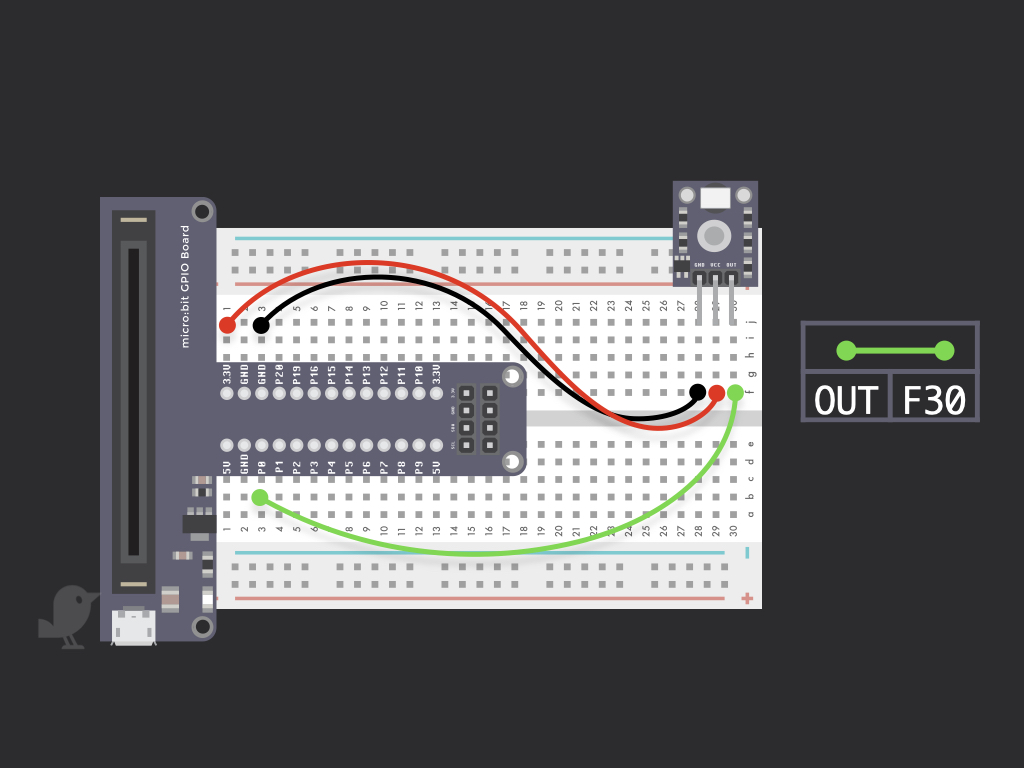
Connect a jumper wire from F30 to B3 on the breadboard. This connects the output pin on the module to P0 on the micro:bit.
let light2 = 0
let UV = 0
input.onButtonPressed(Button.A, function () {
    light2 = input.lightLevel()
    while (light2 == 255) {
        light2 = input.lightLevel()
    }
    basic.showNumber(light2)
    basic.clearScreen()
})
input.onButtonPressed(Button.B, function () {
    UV = pins.analogReadPin(AnalogPin.P0)
    while (UV == 255) {
        UV = pins.analogReadPin(AnalogPin.P0)
    }
    basic.showNumber(UV)
    basic.clearScreen()
})
Copy and paste the following code to the Javascript editor in Microsoft MakeCode. After connecting the micro:bit to your computer, click the download button in the editor. Drag and drop the hex file to the MICROBIT drive found on your computer. This program will read the value of the output pin, that's connected to P0 of the micro:bit on button press (Button B). Press button A and the reading from the UV light sensor will be displayed on the LED matrix!