Raspberry Pi Pico with Lorikeet WS2812B LED Stick
Written By: Cherie Tan

Difficulty
Easy
Steps
8
They look just like any LED, but it's not! The Lorikeet is made of five addressable RGB LEDs with WS2812B control integrated circuit in a 5050 package. They are built right into the LEDs. What this means is that you can control individual LEDs or groups of them. In this guide, we'll show you how to get started with setting up the Lorikeet with the Raspberry Pi Pico. Then you will learn to program it to output several colours. Once you have completed this guide, you will know how to display a variety of colours and patterns with the Lorikeet.
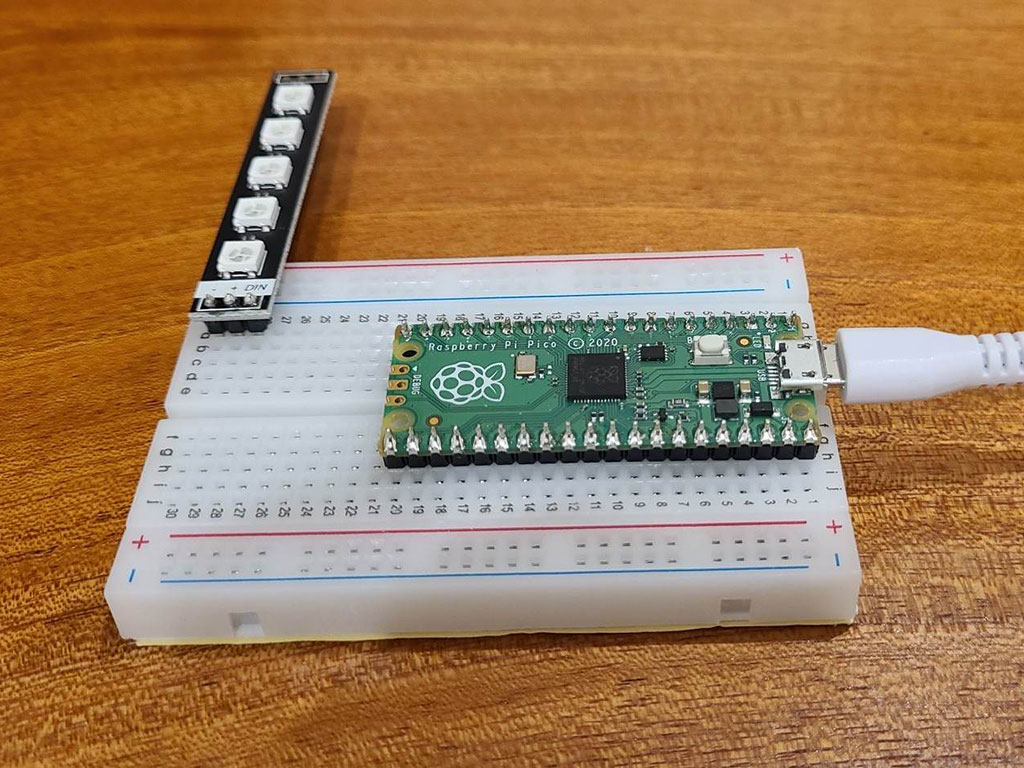
Insert the Raspberry Pi Pico as shown. Its micro USB port should be facing the breadboard as shown. The Pico should be inserted into the Pins on column C and H. Now connect the Lorikeet on the other end. Its pins should be connected to A28 to A30.
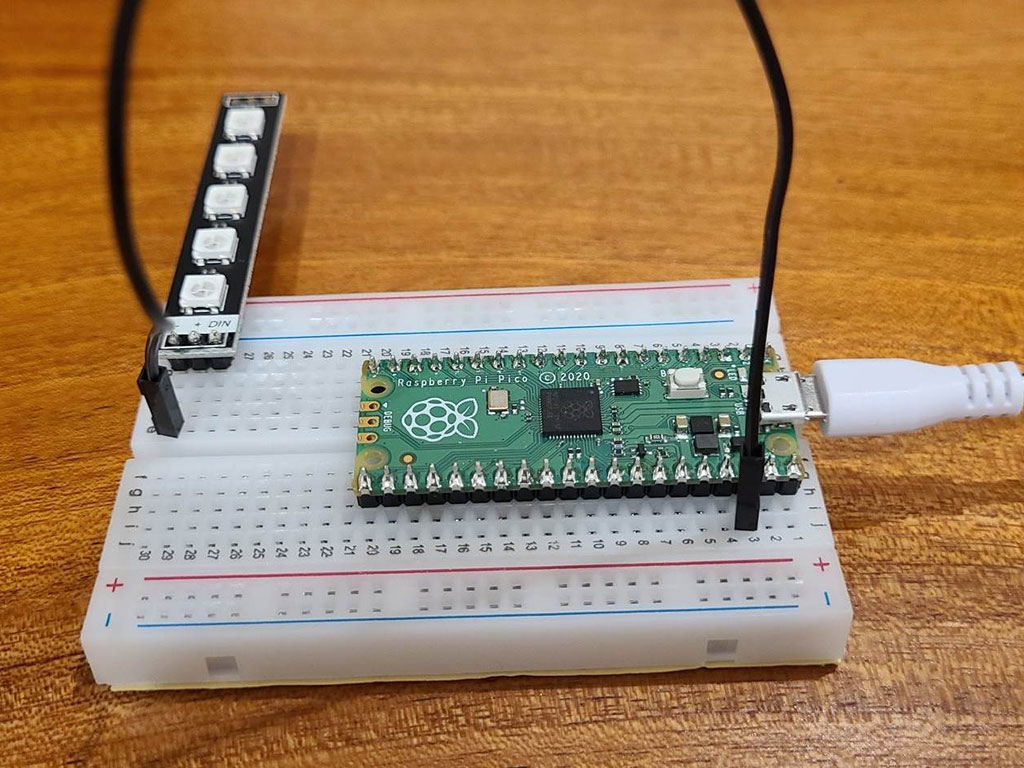
Connect a black jumper wire from - on the Lorikeet to J3 on the breadboard. This connects to the GND pin on the Raspberry Pi Pico.
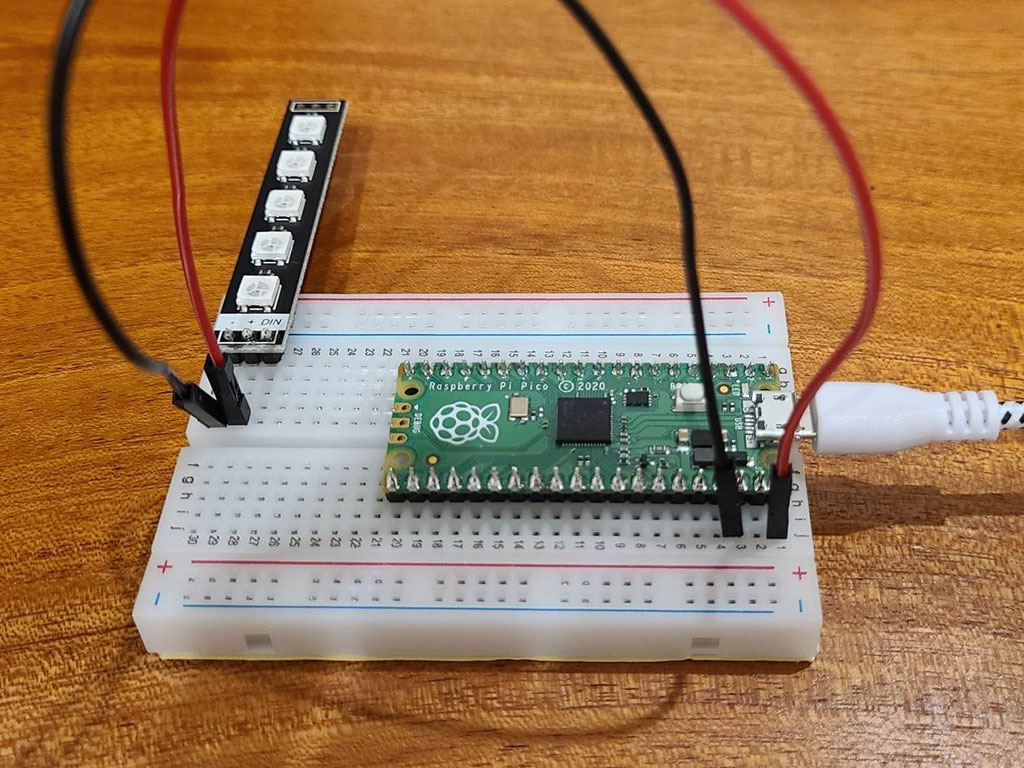
Connect a red jumper wire from + on the Lorikeet to VBUS on the Raspberry Pi Pico. This would be J1 on the breadboard.
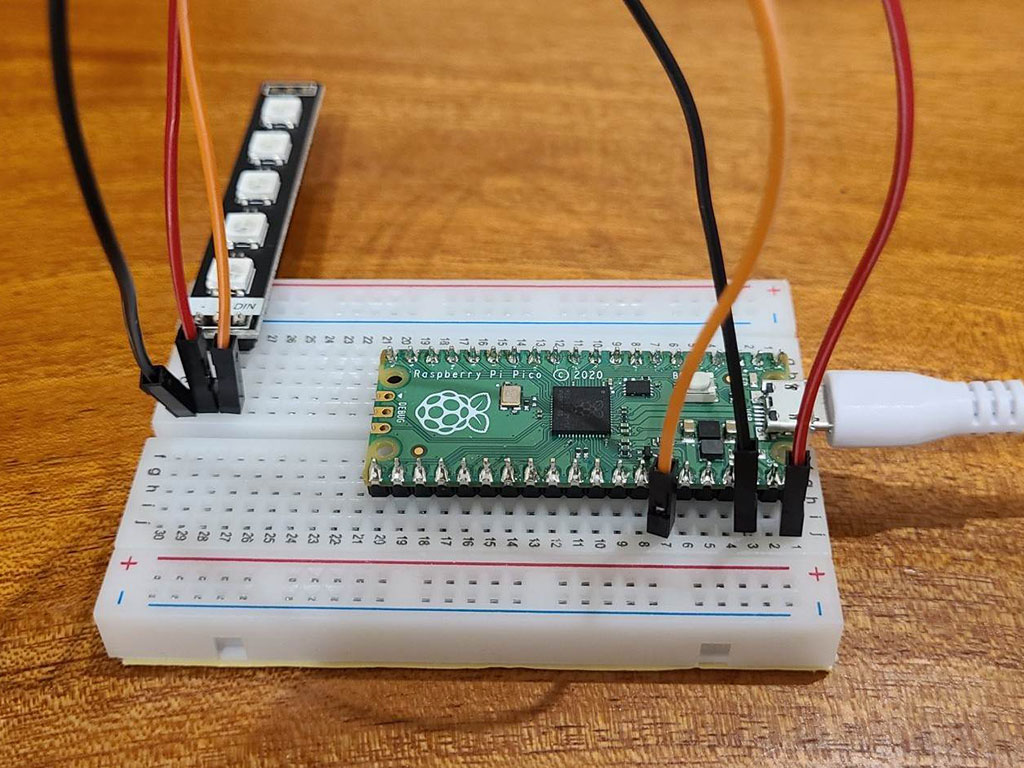
Finally, another jumper wire from DIN on the Lorikeet to J7 on the breadboard, this would connect it to GPIO28 pin on the Raspberry Pi Pico.
import array, time
from machine import Pin
import rp2

# PIO state machine for RGB. Pulls 24 bits (rgb -> 3 * 8bit) automatically
@rp2.asm_pio(sideset_init=rp2.PIO.OUT_LOW, out_shiftdir=rp2.PIO.SHIFT_LEFT, autopull=True, pull_thresh=24)
def ws2812():
    T1 = 2
    T2 = 5
    T3 = 3
    wrap_target()
    label("bitloop")
    out(x, 1)               .side(0)    [T3 - 1]
    jmp(not_x, "do_zero")   .side(1)    [T1 - 1]
    jmp("bitloop")          .side(1)    [T2 - 1]
    label("do_zero")
    nop().side(0)                       [T2 - 1]
    wrap()

# PIO state machine for RGBW. Pulls 32 bits (rgbw -> 4 * 8bit) automatically
@rp2.asm_pio(sideset_init=rp2.PIO.OUT_LOW, out_shiftdir=rp2.PIO.SHIFT_LEFT, autopull=True, pull_thresh=32)
def sk6812():
    T1 = 2
    T2 = 5
    T3 = 3
    wrap_target()
    label("bitloop")
    out(x, 1)               .side(0)    [T3 - 1]
    jmp(not_x, "do_zero")   .side(1)    [T1 - 1]
    jmp("bitloop")          .side(1)    [T2 - 1]
    label("do_zero")
    nop()                   .side(0)    [T2 - 1]
    wrap()


# Delay here is the reset time. You need a pause to reset the LED strip back to the initial LED
# however, if you have quite a bit of processing to do before the next time you update the strip
# you could put in delay=0 (or a lower delay)
#
# Class supports different order of individual colors (GRB, RGB, WRGB, GWRB ...). In order to achieve
# this, we need to flip the indexes: in 'RGBW', 'R' is on index 0, but we need to shift it left by 3 * 8bits,
# so in it's inverse, 'WBGR', it has exactly right index. Since micropython doesn't have [::-1] and recursive rev()
# isn't too efficient we simply do that by XORing (operator ^) each index with 3 (0b11) to make this flip.
# When dealing with just 'RGB' (3 letter string), this means same but reduced by 1 after XOR!.
# Example: in 'GRBW' we want final form of 0bGGRRBBWW, meaning G with index 0 needs to be shifted 3 * 8bit ->
# 'G' on index 0: 0b00 ^ 0b11 -> 0b11 (3), just as we wanted.
# Same hold for every other index (and - 1 at the end for 3 letter strings).

class Neopixel:
    def __init__(self, num_leds, state_machine, pin, mode="RGB", delay=0.0001):
        self.pixels = array.array("I", [0 for _ in range(num_leds)])
        self.mode = set(mode)   # set for better performance
        if 'W' in self.mode:
            # RGBW uses different PIO state machine configuration
            self.sm = rp2.StateMachine(state_machine, sk6812, freq=8000000, sideset_base=Pin(pin))
            # dictionary of values required to shift bit into position (check class desc.)
            self.shift = {'R': (mode.index('R') ^ 3) * 8, 'G': (mode.index('G') ^ 3) * 8,
                          'B': (mode.index('B') ^ 3) * 8, 'W': (mode.index('W') ^ 3) * 8}
        else:
            self.sm = rp2.StateMachine(state_machine, ws2812, freq=8000000, sideset_base=Pin(pin))
            self.shift = {'R': ((mode.index('R') ^ 3) - 1) * 8, 'G': ((mode.index('G') ^ 3) - 1) * 8,
                          'B': ((mode.index('B') ^ 3) - 1) * 8, 'W': 0}
        self.sm.active(1)
        self.num_leds = num_leds
        self.delay = delay
        self.brightnessvalue = 255

    # Set the overal value to adjust brightness when updating leds
    def brightness(self, brightness=None):
        if brightness == None:
            return self.brightnessvalue
        else:
            if brightness < 1:
                brightness = 1
        if brightness > 255:
            brightness = 255
        self.brightnessvalue = brightness

    # Create a gradient with two RGB colors between "pixel1" and "pixel2" (inclusive)
    # Function accepts two (r, g, b) / (r, g, b, w) tuples
    def set_pixel_line_gradient(self, pixel1, pixel2, left_rgb_w, right_rgb_w):
        if pixel2 - pixel1 == 0:
            return
        right_pixel = max(pixel1, pixel2)
        left_pixel = min(pixel1, pixel2)

        for i in range(right_pixel - left_pixel + 1):
            fraction = i / (right_pixel - left_pixel)
            red = round((right_rgb_w[0] - left_rgb_w[0]) * fraction + left_rgb_w[0])
            green = round((right_rgb_w[1] - left_rgb_w[1]) * fraction + left_rgb_w[1])
            blue = round((right_rgb_w[2] - left_rgb_w[2]) * fraction + left_rgb_w[2])
            # if it's (r, g, b, w)
            if len(left_rgb_w) == 4 and 'W' in self.mode:
                white = round((right_rgb_w[3] - left_rgb_w[3]) * fraction + left_rgb_w[3])
                self.set_pixel(left_pixel + i, (red, green, blue, white))
            else:
                self.set_pixel(left_pixel + i, (red, green, blue))

    # Set an array of pixels starting from "pixel1" to "pixel2" (inclusive) to the desired color.
    # Function accepts (r, g, b) / (r, g, b, w) tuple
    def set_pixel_line(self, pixel1, pixel2, rgb_w):
        for i in range(pixel1, pixel2 + 1):
            self.set_pixel(i, rgb_w)

    # Set red, green and blue value of pixel on position <pixel_num>
    # Function accepts (r, g, b) / (r, g, b, w) tuple
    def set_pixel(self, pixel_num, rgb_w):
        pos = self.shift

        red = round(rgb_w[0] * (self.brightness() / 255))
        green = round(rgb_w[1] * (self.brightness() / 255))
        blue = round(rgb_w[2] * (self.brightness() / 255))
        white = 0
        # if it's (r, g, b, w)
        if len(rgb_w) == 4 and 'W' in self.mode:
            white = round(rgb_w[3] * (self.brightness() / 255))

        self.pixels[pixel_num] = white << pos['W'] | blue << pos['B'] | red << pos['R'] | green << pos['G']

    # Converts HSV color to rgb tuple and returns it
    # Function accepts integer values for <hue>, <saturation> and <value>
    # The logic is almost the same as in Adafruit NeoPixel library:
    # https://github.com/adafruit/Adafruit_NeoPixel so all the credits for that
    # go directly to them (license: https://github.com/adafruit/Adafruit_NeoPixel/blob/master/COPYING)
    def colorHSV(self, hue, sat, val):
        if hue >= 65536:
            hue %= 65536

        hue = (hue * 1530 + 32768) // 65536
        if hue < 510:
            b = 0
            if hue < 255:
                r = 255
                g = hue
            else:
                r = 510 - hue
                g = 255
        elif hue < 1020:
            r = 0
            if hue < 765:
                g = 255
                b = hue - 510
            else:
                g = 1020 - hue
                b = 255
        elif hue < 1530:
            g = 0
            if hue < 1275:
                r = hue - 1020
                b = 255
            else:
                r = 255
                b = 1530 - hue
        else:
            r = 255
            g = 0
            b = 0

        v1 = 1 + val
        s1 = 1 + sat
        s2 = 255 - sat

        r = ((((r * s1) >> 8) + s2) * v1) >> 8
        g = ((((g * s1) >> 8) + s2) * v1) >> 8
        b = ((((b * s1) >> 8) + s2) * v1) >> 8

        return r, g, b


    # Rotate <num_of_pixels> pixels to the left
    def rotate_left(self, num_of_pixels):
        if num_of_pixels == None:
            num_of_pixels = 1
        self.pixels = self.pixels[num_of_pixels:] + self.pixels[:num_of_pixels]

    # Rotate <num_of_pixels> pixels to the right
    def rotate_right(self, num_of_pixels):
        if num_of_pixels == None:
            num_of_pixels = 1
        num_of_pixels = -1 * num_of_pixels
        self.pixels = self.pixels[num_of_pixels:] + self.pixels[:num_of_pixels]

    # Update pixels
    def show(self):
        # If mode is RGB, we cut 8 bits of, otherwise we keep all 32
        cut = 8
        if 'W' in self.mode:
            cut = 0
        for i in range(self.num_leds):
            self.sm.put(self.pixels[i], cut)
        time.sleep(self.delay)

    # Set all pixels to given rgb values
    # Function accepts (r, g, b) / (r, g, b, w)
    def fill(self, rgb_w):
        for i in range(self.num_leds):
            self.set_pixel(i, rgb_w)
        time.sleep(self.delay)
Download the zip folder over in this Github page, or simply copy and paste the code on the left. Yes, you will first need this library, so go ahead and paste the neopixel.py code onto your Raspberry Pi Pico in Thonny IDE. Not sure where to get started or what is Thonny IDE? Take a look at our Getting Started with Raspberry Pi Pico guide first.
# Example showing how functions, that accept tuples of rgb values,
# simplify working with gradients

import time
from neopixel import Neopixel

numpix = 30
strip = Neopixel(numpix, 0, 28, "GRB")
# strip = Neopixel(numpsix, 0, 0, "GRBW")

red = (255, 0, 0)
orange = (255, 50, 0)
yellow = (255, 100, 0)
green = (0, 255, 0)
blue = (0, 0, 255)
indigo = (100, 0, 90)
violet = (200, 0, 100)
colors_rgb = [red, orange, yellow, green, blue, indigo, violet]

# same colors as normaln rgb, just 0 added at the end
colors_rgbw = [color+tuple([0]) for color in colors_rgb]
colors_rgbw.append((0, 0, 0, 255))

# uncomment colors_rgbw if you have RGBW strip
colors = colors_rgb
# colors = colors_rgbw


step = round(numpix / len(colors))
current_pixel = 0
strip.brightness(50)

for color1, color2 in zip(colors, colors[1:]):
    strip.set_pixel_line_gradient(current_pixel, current_pixel + step, color1, color2)
    current_pixel += step

strip.set_pixel_line_gradient(current_pixel, numpix - 1, violet, red)

while True:
    strip.rotate_right(1)
    time.sleep(0.15)
    strip.show()
Next, go ahead and do the same here: Copy and paste the colorwave.py example found in the examples folder in the library.
import time
from neopixel import Neopixel

numpix = 5
pixels = Neopixel(numpix, 0, 28, "GRB")

yellow = (255, 100, 0)
orange = (255, 50, 0)
green = (0, 255, 0)
blue = (0, 0, 255)
red = (255, 0, 0)
color0 = red

pixels.brightness(50)
pixels.fill(orange)


while True:
    if color0 == red:
       color0 = yellow
       color1 = red
    else:
        color0 = red
        color1 = yellow
    pixels.set_pixel(0, color0)
    pixels.set_pixel(1, color1)
    pixels.show()
    time.sleep(1)
Now copy and paste the following code into Thonny IDE, save it onto the Raspberry Pi Pico and run it! Please make sure this file is saved in the same folder as the neopixel.py and colorwave.py files for it to work.
