Moisture Sensor Module and micro:bit
Written By: Cherie Tan

Difficulty
Easy
Steps
9
Have a bunch of plants lying around? Want to take good care of them even when you’re away from home? Set up one of these moisture sensors with your micro:bit and monitor your plants’ health with ease. In this guide, you will learn to connect the moisture sensor module to the micro:bit. You will then program it to determine the amount of moisture, and to notify you when the level goes too low. After completing the guide, you can create your own micro:bit plant watering system for your beloved indoor or garden plants.
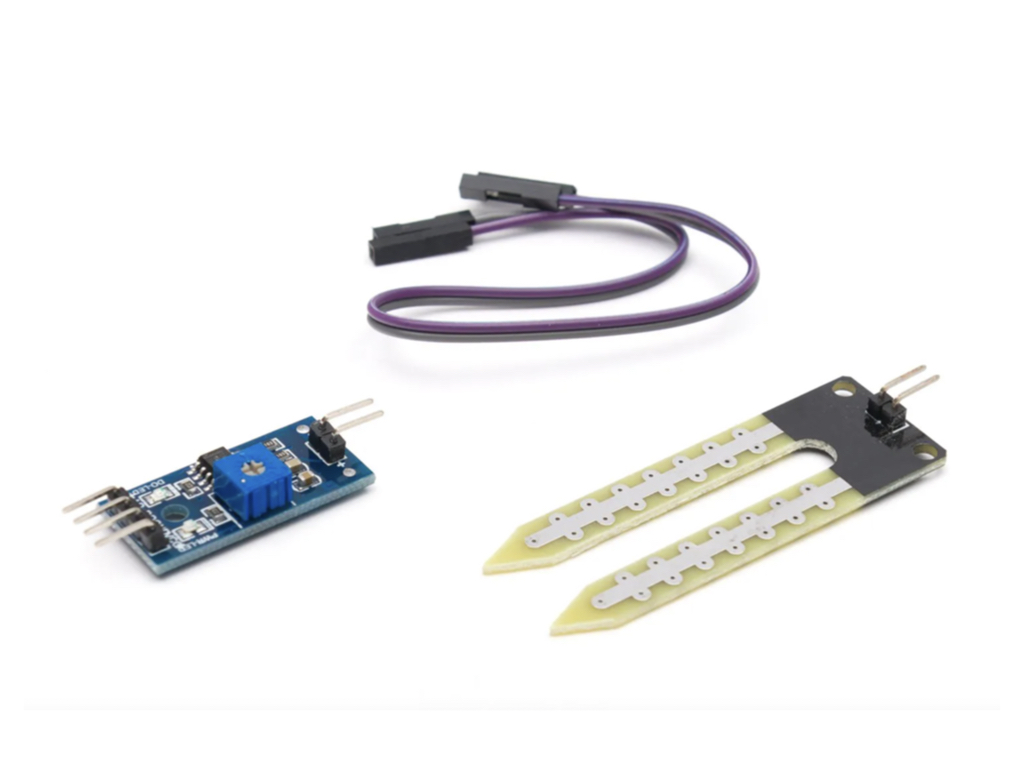
The Micro:bit is great for portable projects like an indoor plant watering system, or something for your garden. This is a soil moisture sensor module. We will show you how to connect it to the micro:bit, and program it to give you consistent readings. The aim of this project is to create a system that will notify you of the moisture level of your plants. We will be using MakeCode to program the Micro:bit.
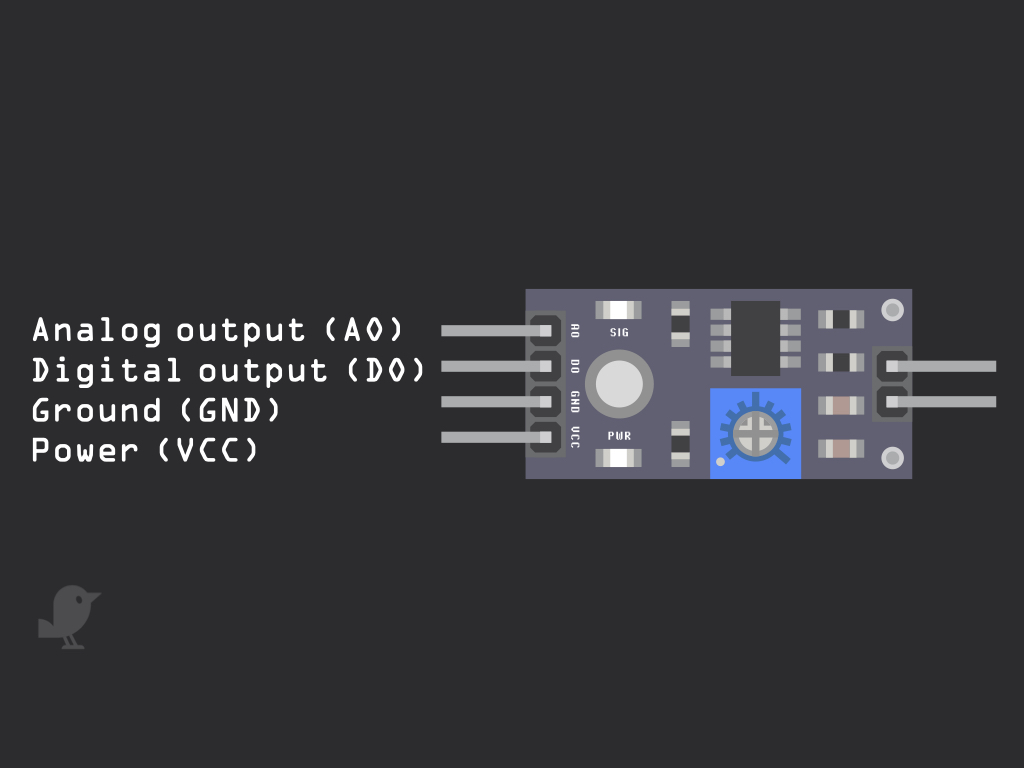
There are four pins on the soil moisture sensor module. The first is the Analog output pin or AO. The second pin is the digital output pin or DO. The next pin is the Ground pin, or GND. The final pin is the pin you connect to 3.3V on the micro:bit.
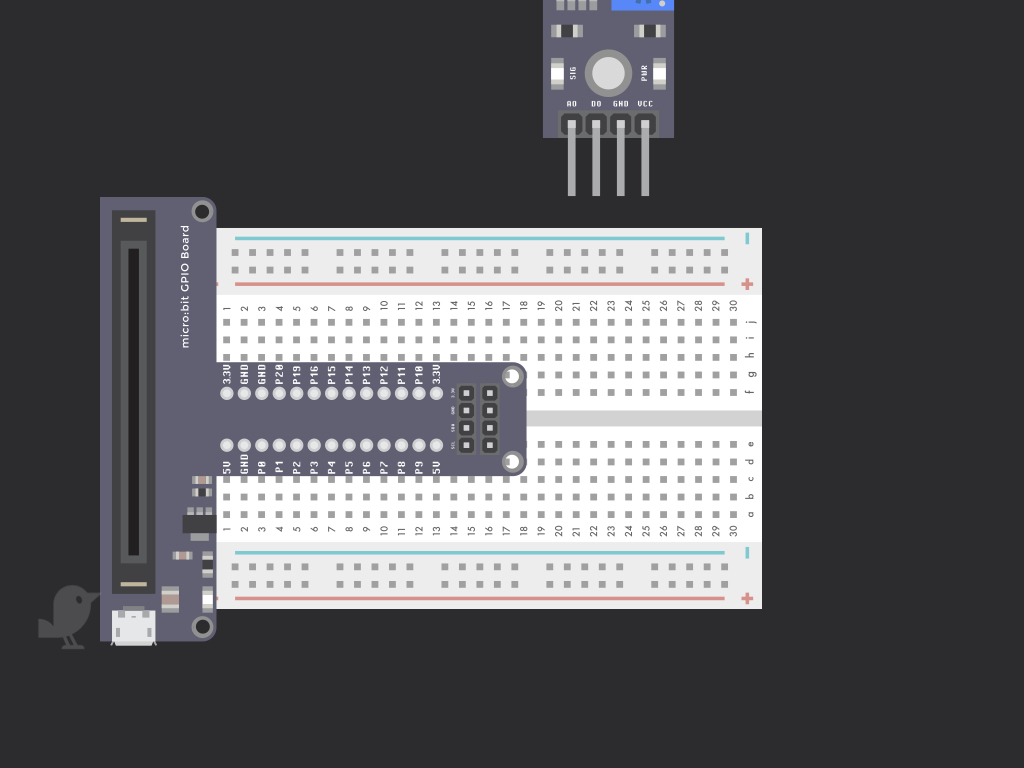
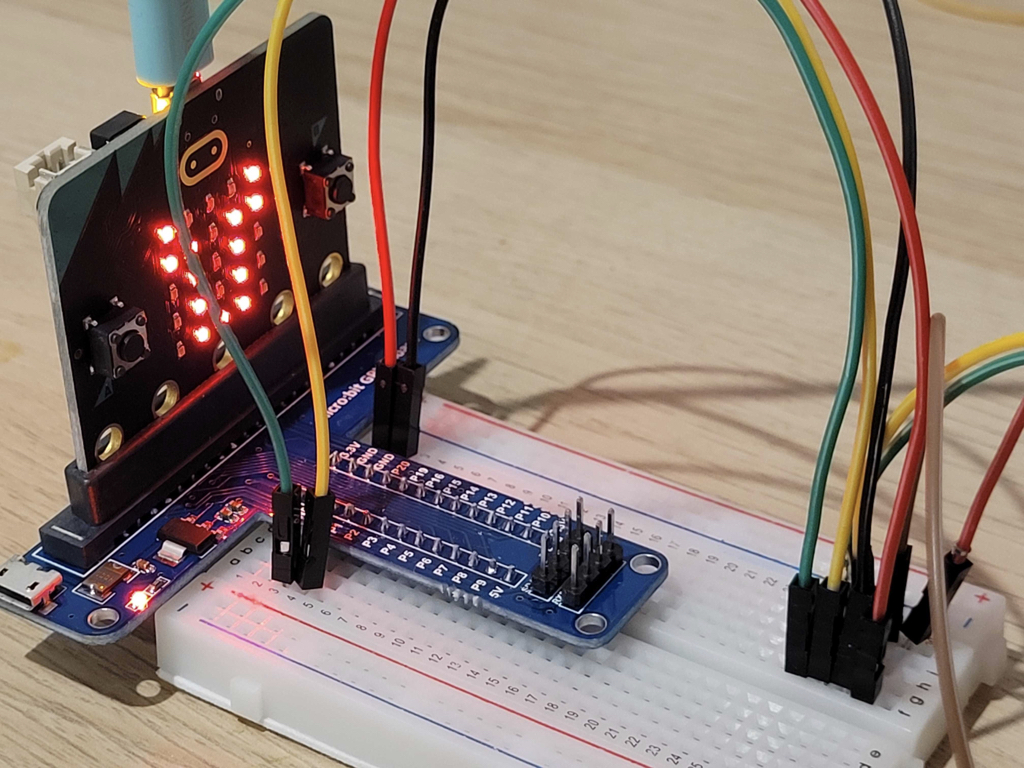
First, connect the GPIO board to the breadboard as shown. Place the module next to it.
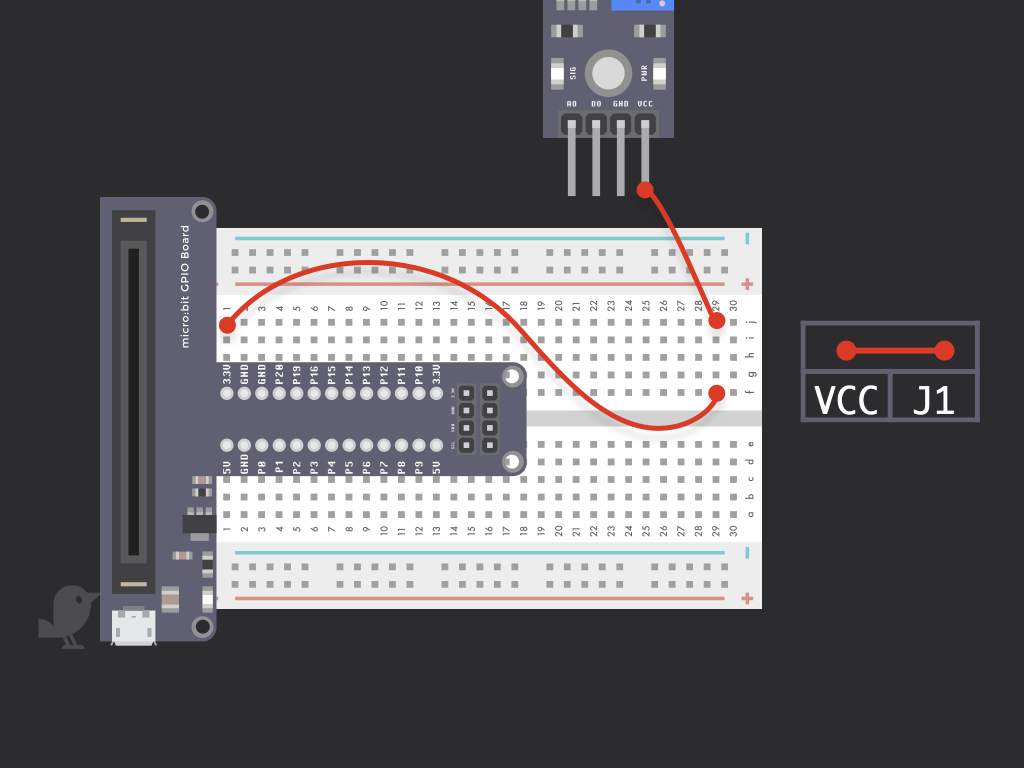
Connect a red jumper wire from the VCC pin of the module to J29. Then connect another red jumper wire from J1 to VCC on the micro:bit.
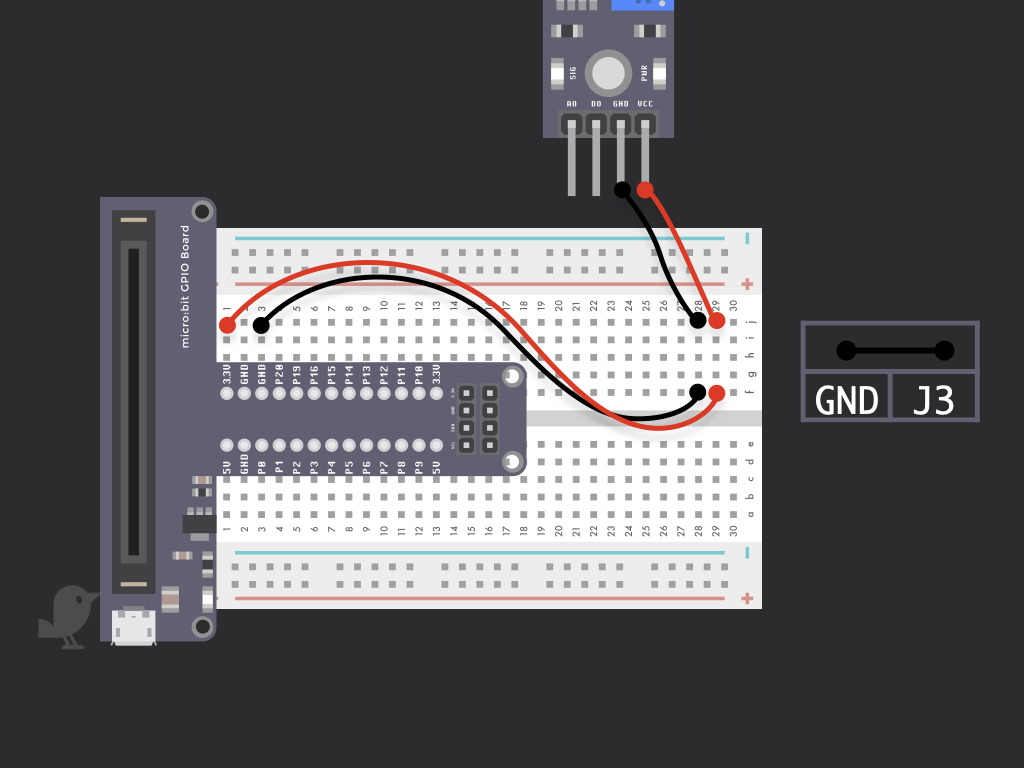
As you did for the first pin, connect a black jumper wire to make a connection between the module and breadboard. Now connect GND on the module to J3 on the breadboard, this will connect it to GND of the micro:bit
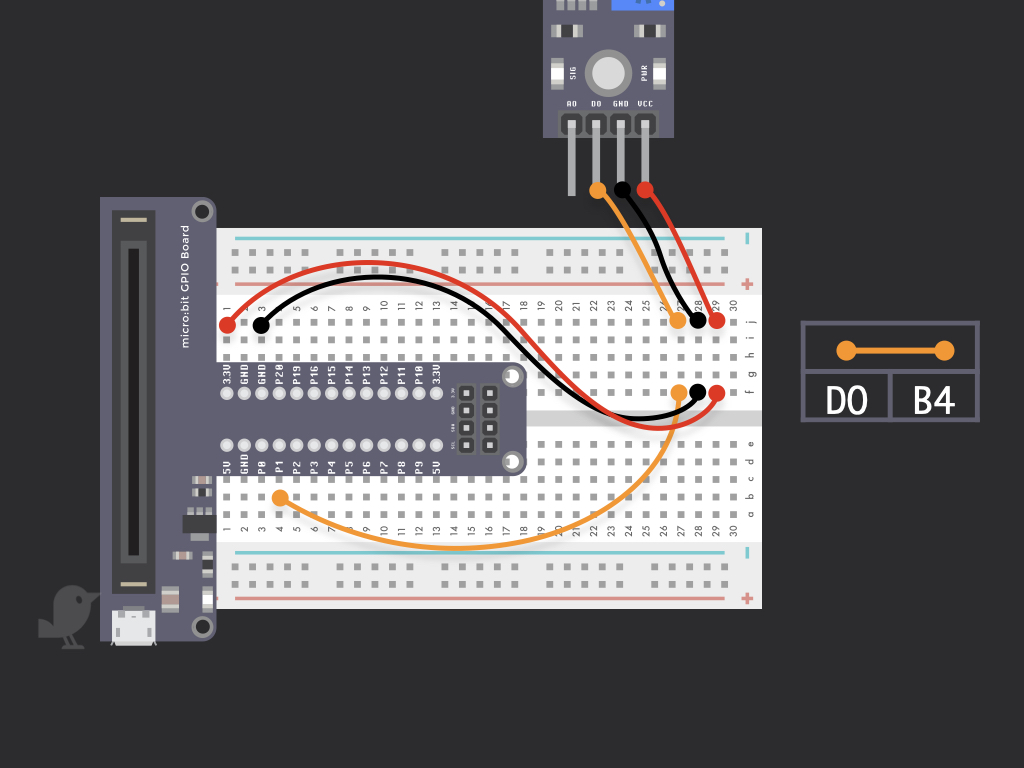
Connect the DO pin to B4 on the breadboard to connect it to P1 of the micro:bit
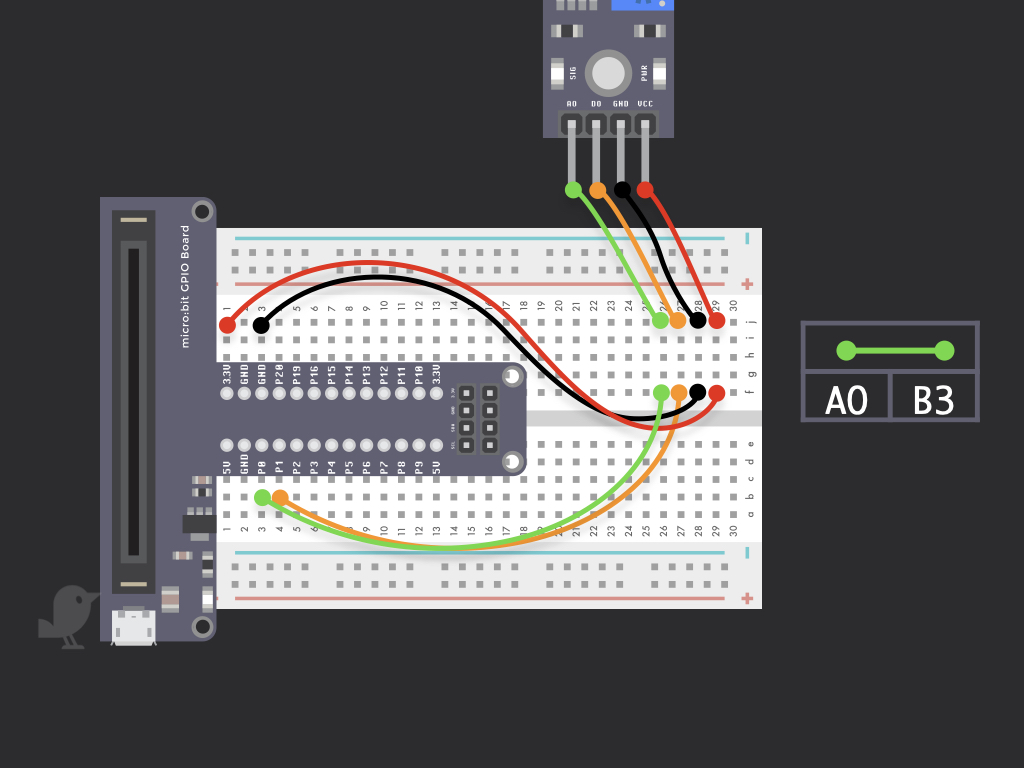
Lastly, connect a jumper wire from AO on the module to B3 on breadboard. This will connect it to P0 of the microbit!
let moistureReading = 0
input.onButtonPressed(Button.A, function () {
    moistureReading = Math.map(pins.analogReadPin(AnalogPin.P0), 0, 750, 0, 100)
    basic.showNumber(Math.round(moistureReading))
    basic.clearScreen()
})
basic.forever(function () {
    moistureReading = Math.map(pins.analogReadPin(AnalogPin.P0), 0, 750, 0, 3)
    basic.pause(100)
    if (moistureReading <= 1) {
        basic.showLeds(`
            # . . . #
            # # . # #
            . # . # .
            . # . # .
            . # # # .
            `)
    } else if (moistureReading > 1 && moistureReading <= 2) {
        basic.showLeds(`
            # . . . #
            # # . # #
            . # # # .
            . # # # .
            . # # # .
            `)
    } else {
        basic.showLeds(`
            # # # # #
            # # # # #
            . # # # .
            . # # # .
            . # # # .
            `)
    }
})
Open up the MakeCode editor and copy and paste the following Javascript code into the editor. If you have not done so, click on the Javascript button up the top of the editor to enter the Javascript editor mode. You can also switch between Javascript, Blocks or Python by clicking on the buttons found at the top of the editor! The code will automatically be updated.
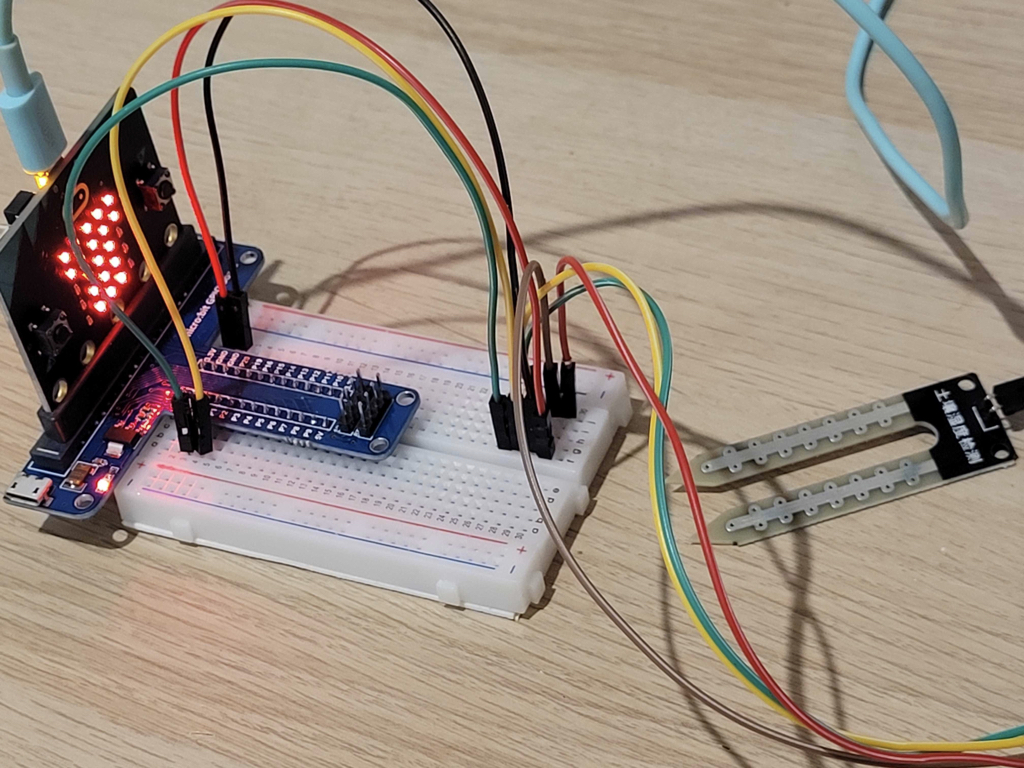
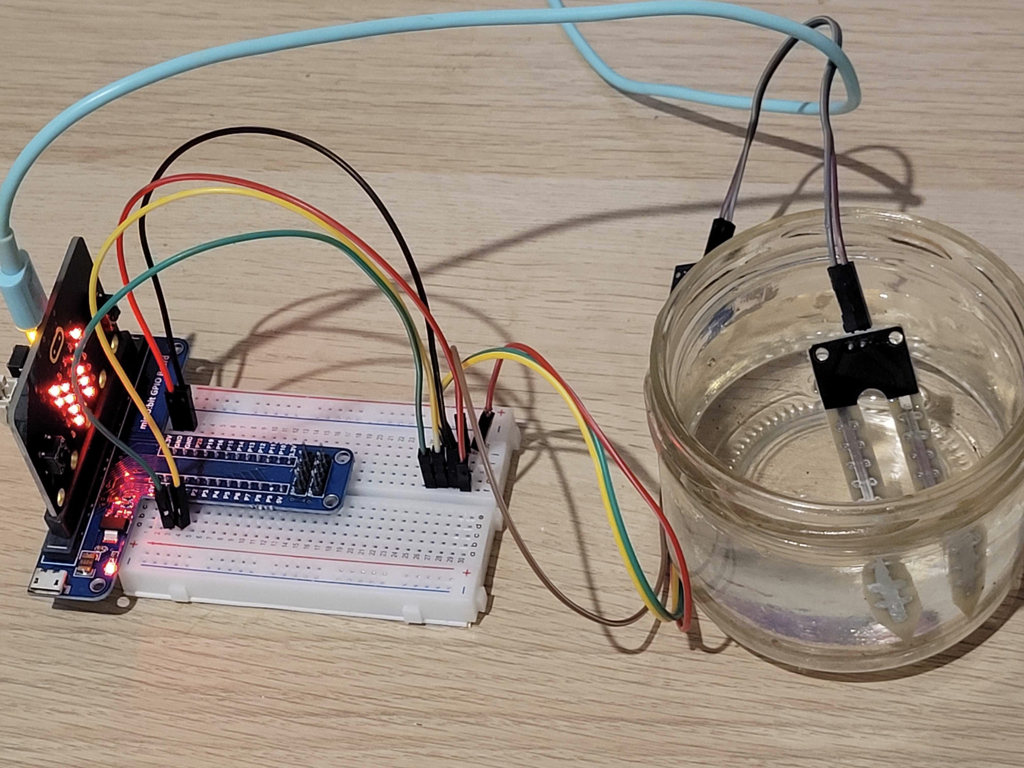
Click on the Download button in the MakeCode editor, then connect the micro:bit to your computer. Drag and drop the hex file onto the MICROBIT drive found on your computer. It is now time to give it a test! If you haven't got a plant ready, get a jar of water. Dip the soil moisture sensor into the jar as shown in the image, and the LED matrix should not update according to the moisture level detected. Congratulations, you have successfully created a moisture detecting system with the micro:bit.