Light Sensor with EagLED
Learn to use the EagLED's light sensor
Written By: Cherie Tan

Difficulty
Easy
Steps
6
The EagLED comes included with a light sensor.
In this guide, learn to use the EagLED's light sensor to turn an LED on and off.
Complete this guide to master the basics involved in using the light sensor with EagLED.

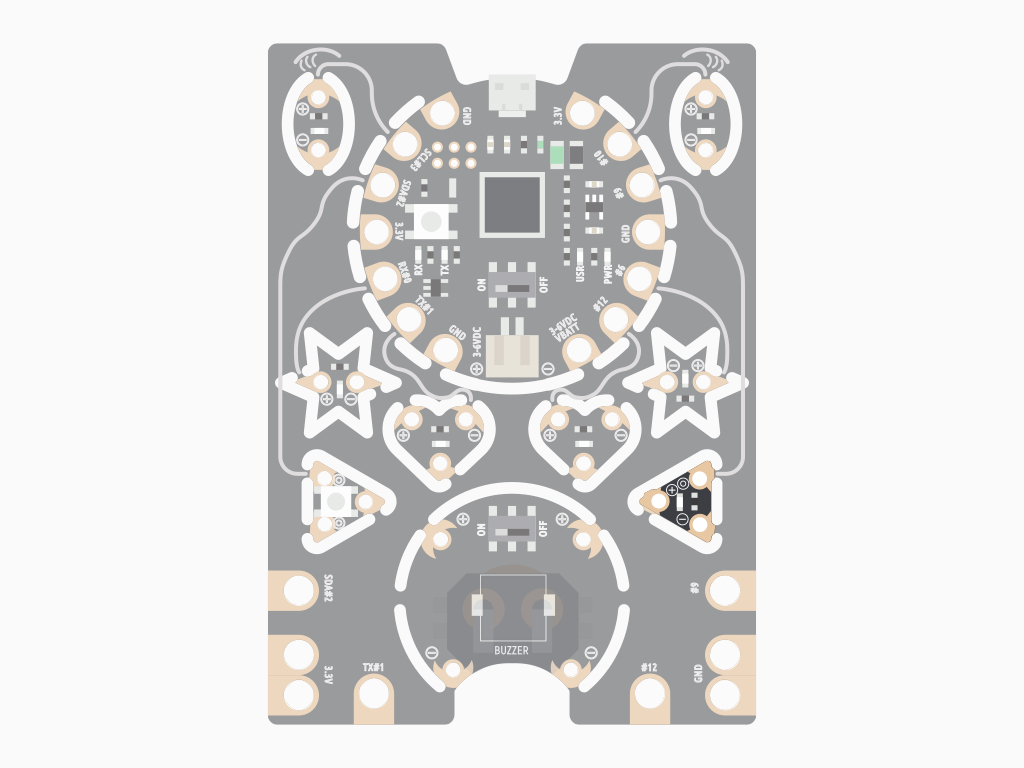
The light sensor can be found on the EagLED as a triangular-shaped board. It has three sewing tab pads. By default, when it hasn't been snapped out, the button can be accessed as Pin 9.
void setup()
{
  Serial.begin(9600);
}
Before we move on to programming the light sensor, let's take a look a closer look at the Serial.begin() function. By using Serial.begin() within void setup(), this enables communication between the EagLED and your computer. Specifically, this function initialises serial connection at 9600 bits per second.
Serial.println(sensorVal);After using Serial.begin() function, this will enable communication between the computer and EagLED, but that's not all! Next, we still need to get the values printed to the serial monitor in the Arduino IDE. This is done by using Serial.println(). This will print the value to the serial monitor so you can see it.
int value = analogRead(lightSensor);
Previously, when using a push button with EagLED, digitalRead() was used! Unlike the pushbutton which outputs a value of '1' or '0', the light sensor is an analog sensor.
This means it will output a range of values from 0 to 1023. As such, use the analogRead() function in this next activity.
int value = analogRead(lightSensor); //This is a very common command used to read the current value on an analog pin and store it in the variable called ‘value’
This means it will output a range of values from 0 to 1023. As such, use the analogRead() function in this next activity.
int value = analogRead(lightSensor); //This is a very common command used to read the current value on an analog pin and store it in the variable called ‘value’
const int lightSensor = A9; // the pin our light sensor is on

void setup()
{
  pinMode(lightSensor, INPUT); // Set the light sensor as an input
  Serial.begin(9600);
}

void loop()
{
  int sensorVal = analogRead(lightSensor); // Take a reading
  Serial.println(sensorVal);
  delay(25);
}
To get it to show the sensor values in the serial monitor, upload this code to the EagLED. First, click on the 'Verify' button in the Arduino IDE.
Then click on the 'Upload' button next to it
In the Arduino IDE, go to Tools > Serial Monitor
What analog values are you getting from the light sensor?
What analog values are you getting from the light sensor?
const int ledPin = 3; // the LED pin
const int lightSensor = A9; // the pin our light sensor is on

void setup()
{
  pinMode(ledPin, OUTPUT); // Set the LED Pin as an output
  pinMode(lightSensor, INPUT); // Set the light sensor as an input
  Serial.begin(9600);
}

void loop()
{
  int sensorVal = analogRead(lightSensor); // Take a reading
  Serial.println(sensorVal);
  if (sensorVal > 50)
  {
    digitalWrite(ledPin, LOW); //Turn the LED off
  }
  else
  {
    digitalWrite(ledPin, HIGH); //Turn the LED on
  }
  delay(25);
}
In the next program, we will get it to:
Read analog values from the light sensor, and use the changes in the values to control the state of the EagLED’s LED. This will make it like an automatic night light!
So when it gets dark enough, an LED will light up.
Read analog values from the light sensor, and use the changes in the values to control the state of the EagLED’s LED. This will make it like an automatic night light!
So when it gets dark enough, an LED will light up.
This can be done by:
Reading the analog light sensor value
Set a threshold value
Make a conditional statement based on the threshold value
Reading the analog light sensor value
Set a threshold value
Make a conditional statement based on the threshold value
Upload this code to the EagLED. First, click on the 'Verify' button in the Arduino IDE
Then click on the 'Upload' button next to it
Cover your hand over the light sensor, the analog value should decrease. Watch the LED turn off when the light level is less than '50'.