Getting Started with the Raspberry Pi Pico
Learn to set up and program the Raspberry Pi Pico
Written By: Cherie Tan

Difficulty
Easy
Steps
8
In this project, learn to connect the Raspberry Pi Pico to your computer so that you can program it in the Thonny IDE in MicroPython. Then you will connect an LED with a resistor to the Raspberry Pi Pico and get it to light up. After completing this guide, you will have some experience with using the Pico to control electronic components such as LEDs.
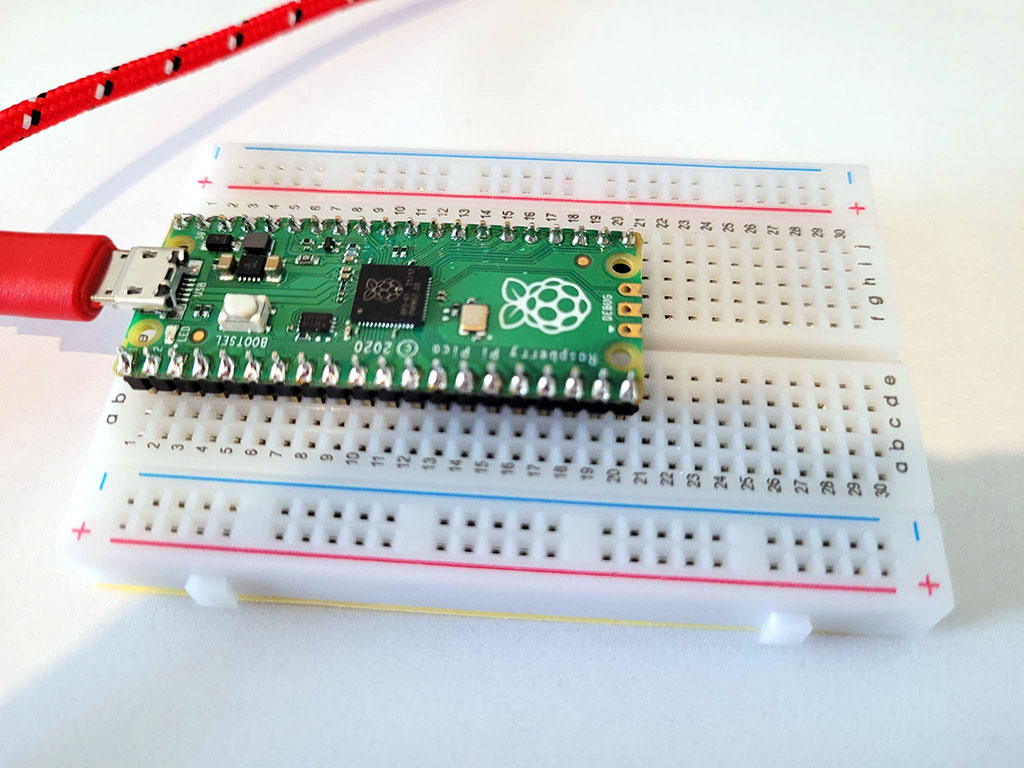
This is the Raspberry Pi Pico! It may or may not come with headers already soldered on to yours. But in your Raspberry Pi Pico Electronics Kits, it should come with headers already pre-soldered so you can easily attach them onto the included breadboard like so.
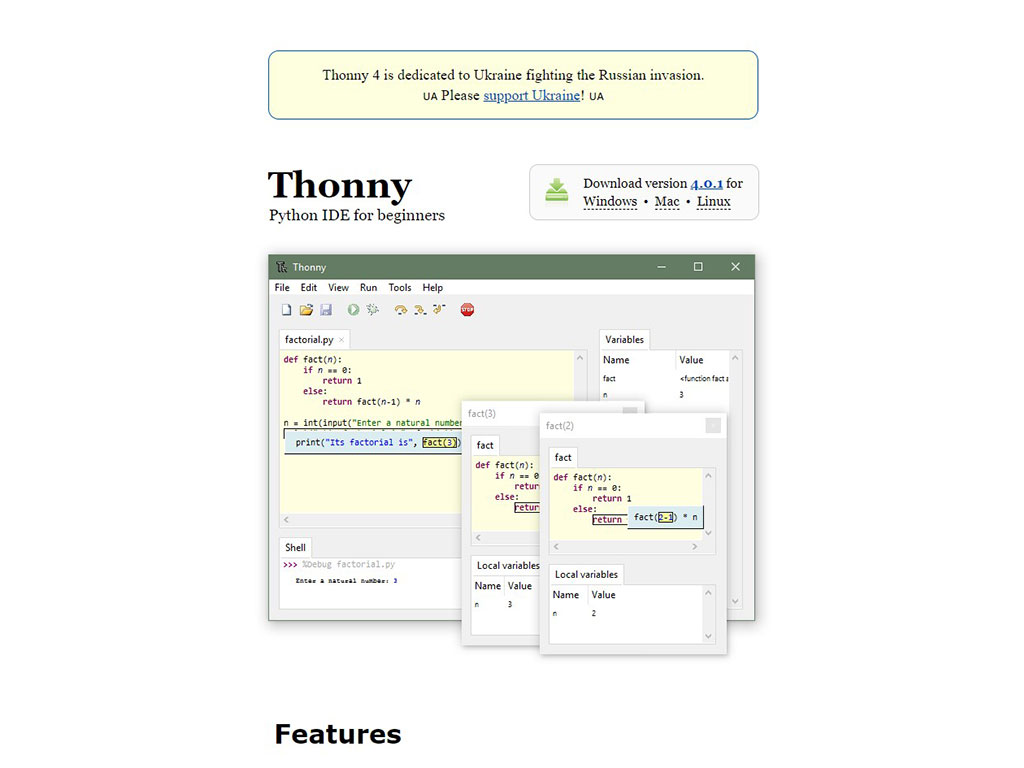
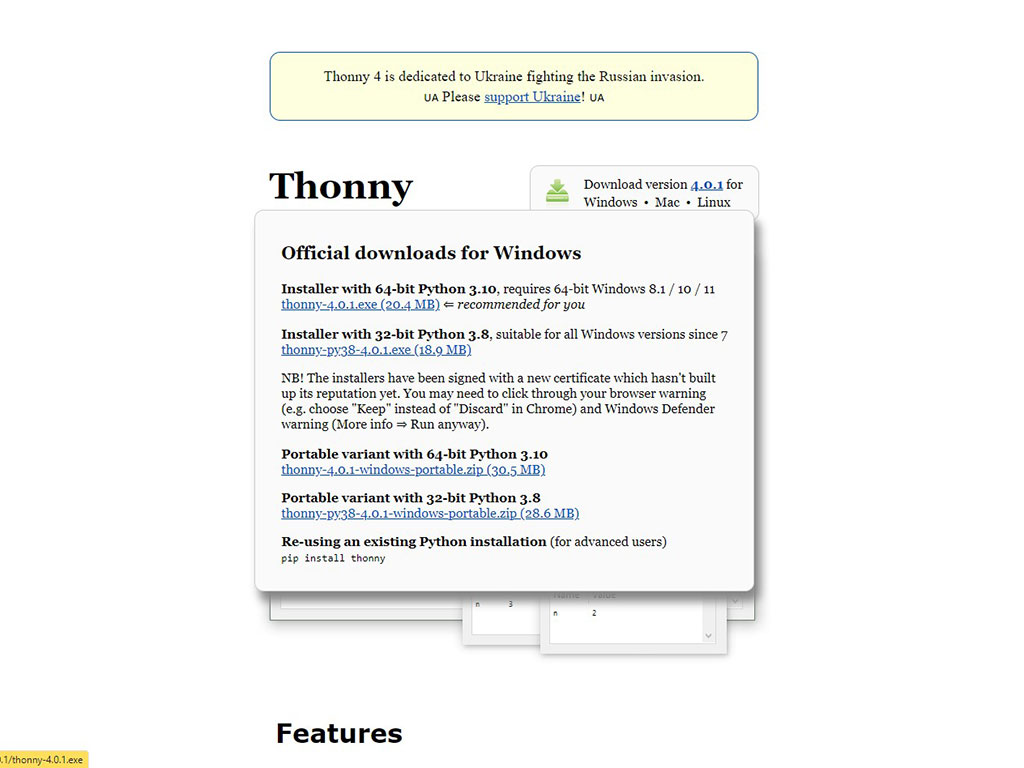
Install the Thonny IDE so we can get started with programming the Raspberry Pi Pico. Go to https://thonny.org/ Hover your mouse over Windows, Mac or Linux depending on your operating system. You should see the options available for downloading Thonny IDE onto your computer. Select the most appropriate one.
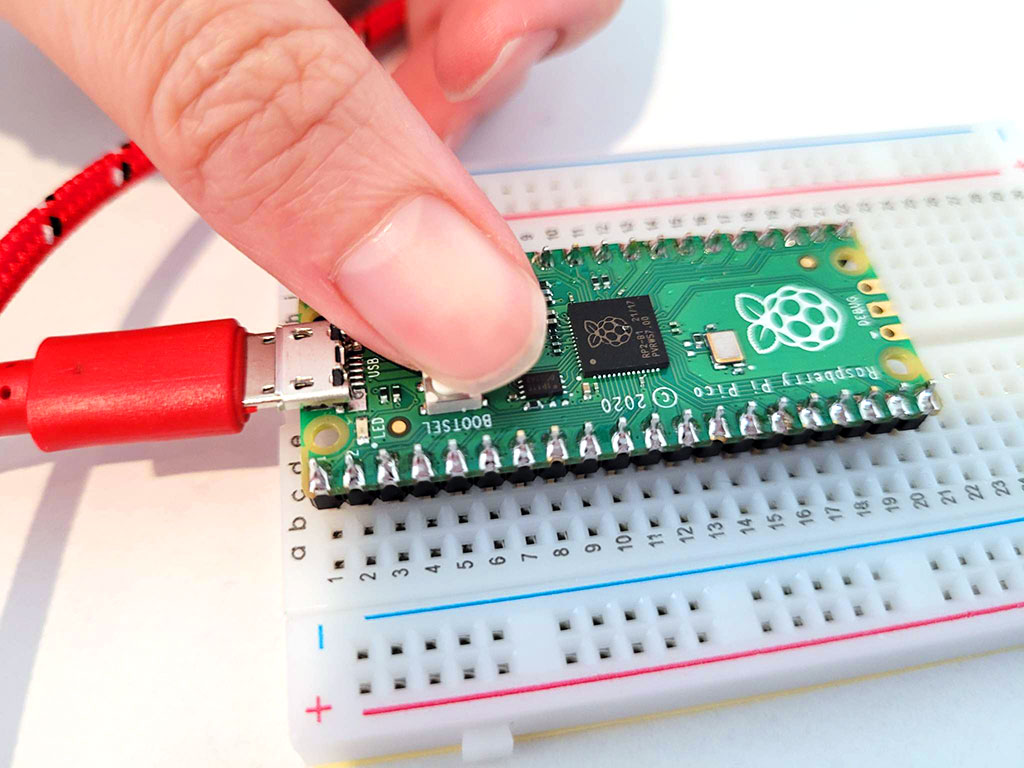
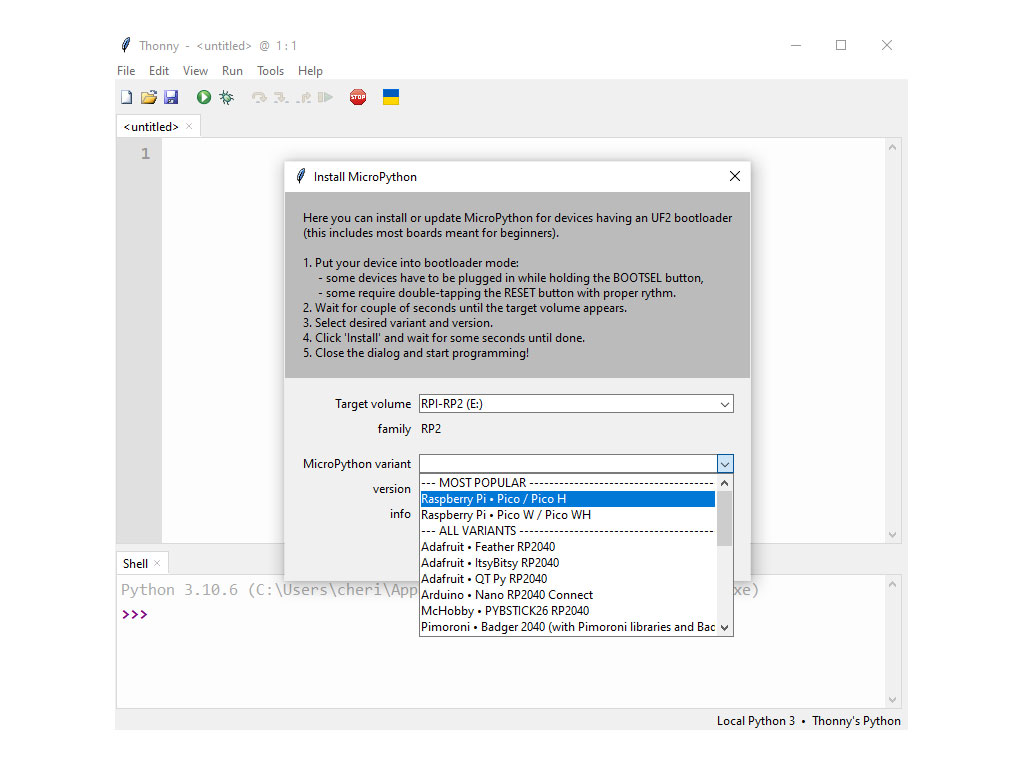
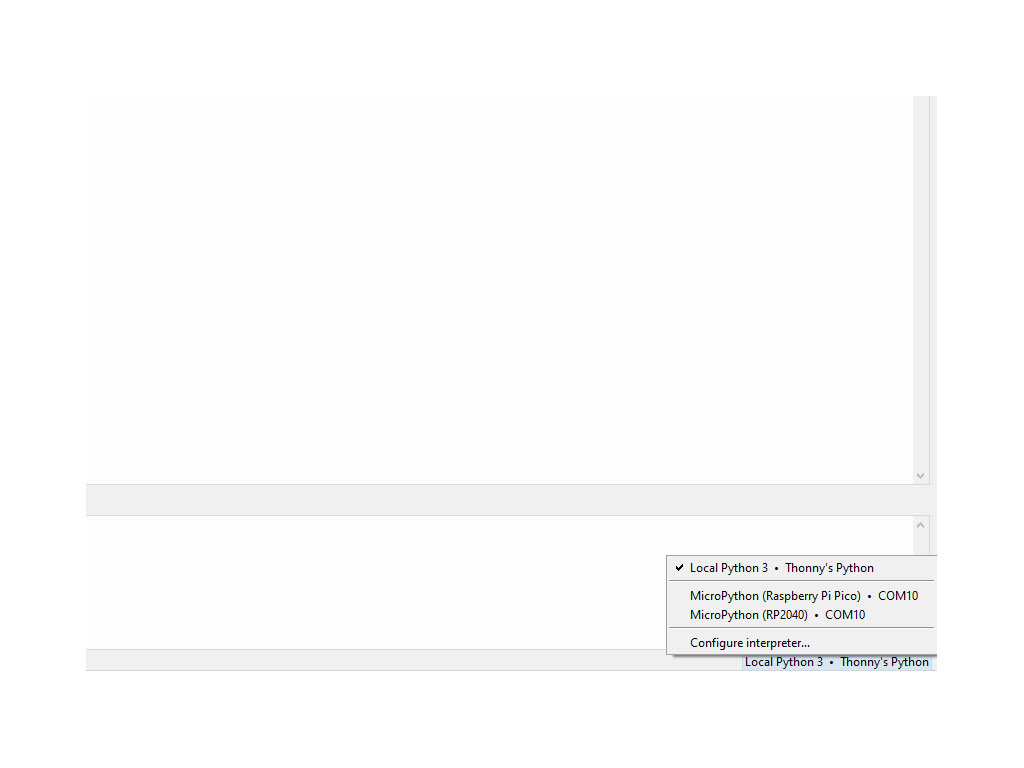
If this is your first time using MicroPython on your Raspberry Pi Pico, you will need to add the MicroPython firmware. To do so, hold the BOOTSEL button on your Raspberry Pi Pico and connect a micro USB cable (that's already connected to your computer) to it. Doing this, it puts your Raspberry Pi Pico into USB mass storage device mode. Look at the bottom right-hand corner of Thonny IDE. The version of Python that you are currently using will be displayed. Click on the Python versionand select 'MicroPython (Raspberry Pi Pico). If you don't see this option in the Python version selections. Click on Install 'MicroPython' first.
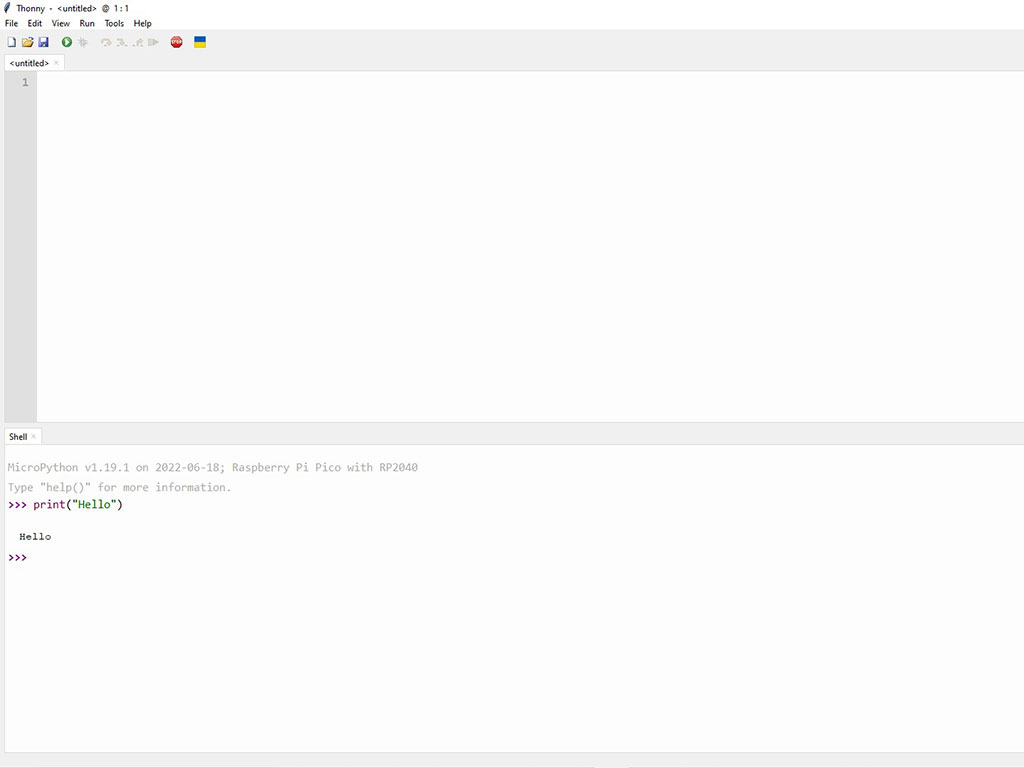
Now type the following command in the shell: print("Hello")
If it is all working it should look as shown.
If it is all working it should look as shown.
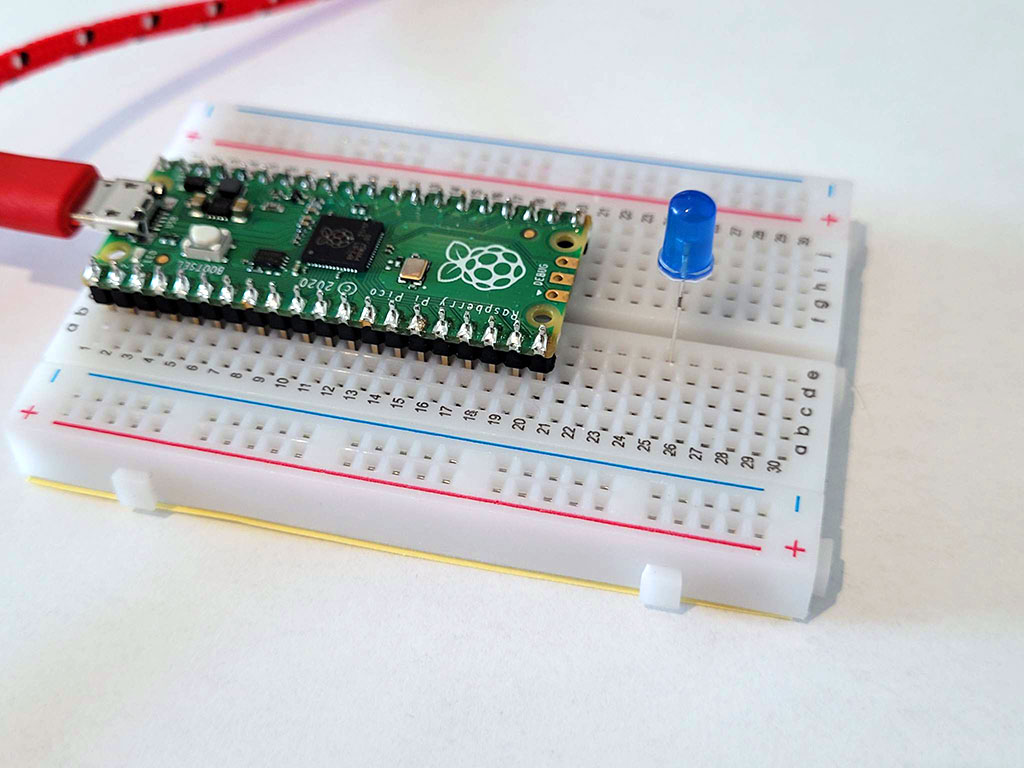
Now connect an LED to the breadboard as shown. In our photo we've connected it to E25 and F25. To get the LED to blink later: Make sure the anode (positive end) or longer leg of the LED is connected to E25. We will connect this to the resistor in the next step.
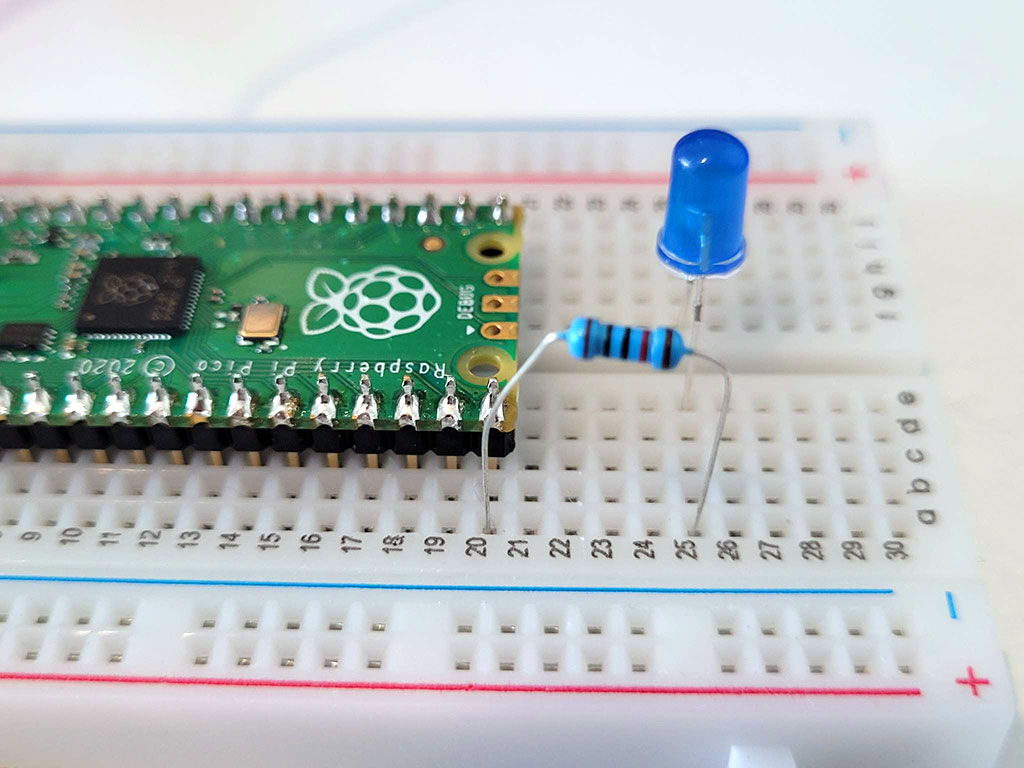
Next, insert the resistor as shown so that it is connected to one leg of the LED and GP15 or Pin 20 on the Raspberry Pi Pico
Now connect the other end of the LED to a black jumper wire and GND on the Raspberry Pi Pico.
from machine import Pin, Timer
led = Pin(15, Pin.OUT)
timer = Timer()

def blink(timer):
    led.toggle()

timer.init(freq=2.5, mode=Timer.PERIODIC, callback=blink)
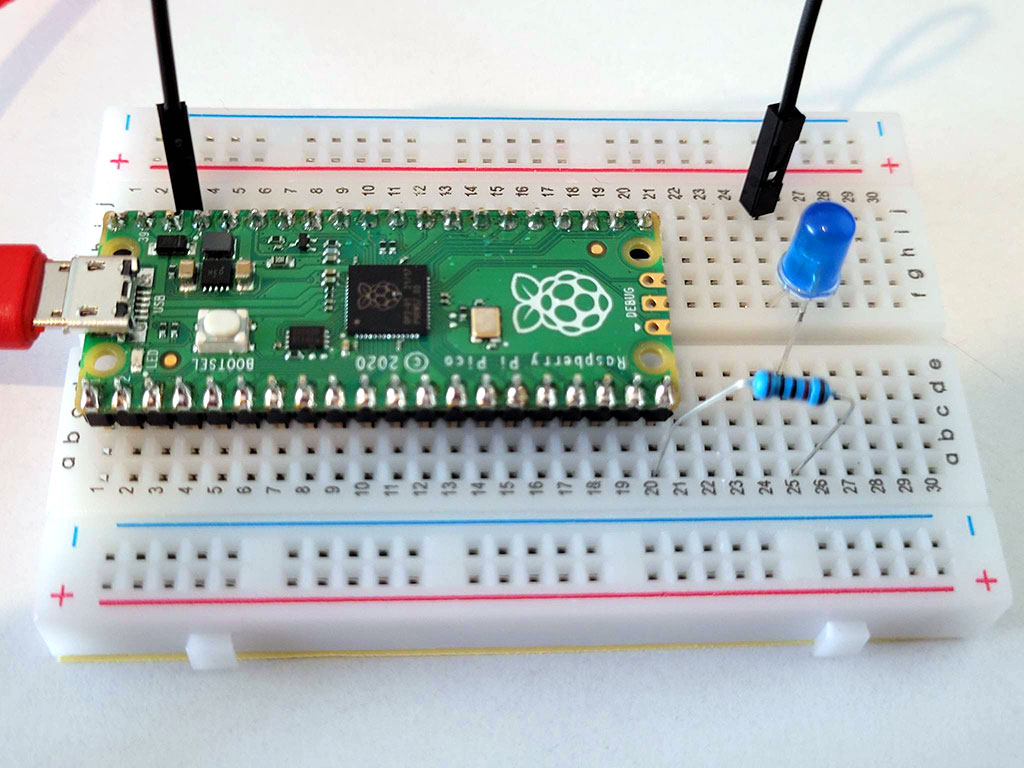
Copy and paste the following code into Thonny, save and run! You should have an LED blinking away now.