Capacitive Touch Sensor with Arduino
We will use the touch sensor to turn an LED on and off
Written By: Cherie Tan
Difficulty
Easy
Steps
8
Capacitive sensors detect touch, force, or pressure on its surface. When there is contact, the circuit closes inside the sensor, and there is a flow of current.
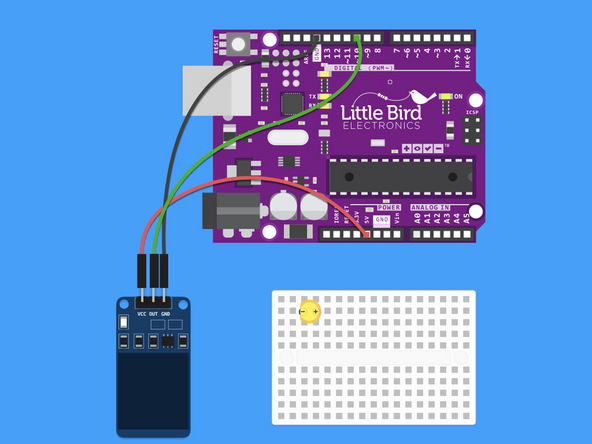
Follow this guide to learn to turn an LED on and off with a touch sensor and an Arduino. In this guide, we will be using a capacitive touch sensor for Arduino and a Little Bird Uno R3 development board.
The completion of this guide will give you a better understanding of how touch sensors work, as well as how to use them in your own Arduino projects!


Insert LED into Breadboard with the Cathode (short leg) on the left hand side.

Insert 220 Ohm Resistor into the Breadboard.
Ensure that it is inline with the LED's anode (longer leg).


int touch = 10;  // pin for touch sensor
int ledPin = 13; // pin for the LED

void setup() {
  Serial.begin(9600);
  pinMode(ledPin, OUTPUT);
  pinMode(touch, INPUT);
}

void loop() {
  int touchValue = digitalRead(touch);
  if (touchValue == HIGH){
    digitalWrite(ledPin, HIGH);
    Serial.println("touched");
  }
  else{
    digitalWrite(ledPin,LOW);
    Serial.println("not touched");
  }
  delay(500);

}
Upload this code to your Arduino.
When you touch the blue area on the sensor the LED on Pin 13 should turn on. Also a red light switches on the sensor.