Build a Nanoleaf Replica with Raspberry Pi
Make your own mini Nanoleaf with the Raspberry Pi and TrinityPixels
Written By: Cherie Tan

Difficulty
Medium
Steps
16
Chances are, you might have seen one of those super cool and flashy Nanoleaf light panels in IKEA or on Amazon. They are a brilliant source of indoor lighting that adds character to a room, with aesthetics that you just can't achieve with a simple light bulb. They are even able to be voice-controlled via amazon Alexa or Google Assistant, etc.
In this Raspberry Pi guide, we'll show you how to build a mini replica of the Nanoleaf. To keep it all as compact as possible, we've chose to use the Raspberry Pi Zero W for this project. However, you can use other models of the Raspberry Pi with it by creating a larger enclosure. This is an intermediate project as you'll need basic soldering skills, as well as access to a 3D printer to create the enclosure for our replica. This guide continues on from our starter guide on TrinityPixel LED strips and Raspberry Pi.
Complete this guide to create your own Nanoleaf replica with the Raspberry Pi.
Chances are, you might have seen one of those super cool and flashy Nanoleaf light panels in IKEA or on Amazon. They are a brilliant source of indoor lighting that adds character to a room, with aesthetics that you just can't achieve with a simple light bulb. They are even able to be voice-controlled via amazon Alexa or Google Assistant, etc.
In this Raspberry Pi guide, we'll show you how to build a mini replica of the Nanoleaf. To keep it all as compact as possible, we've chose to use the Raspberry Pi Zero W for this project. However, you can use other models of the Raspberry Pi with it by creating a larger enclosure.
This is an intermediate project as you'll need basic soldering skills, as well as access to a 3D printer to create the enclosure for our replica.
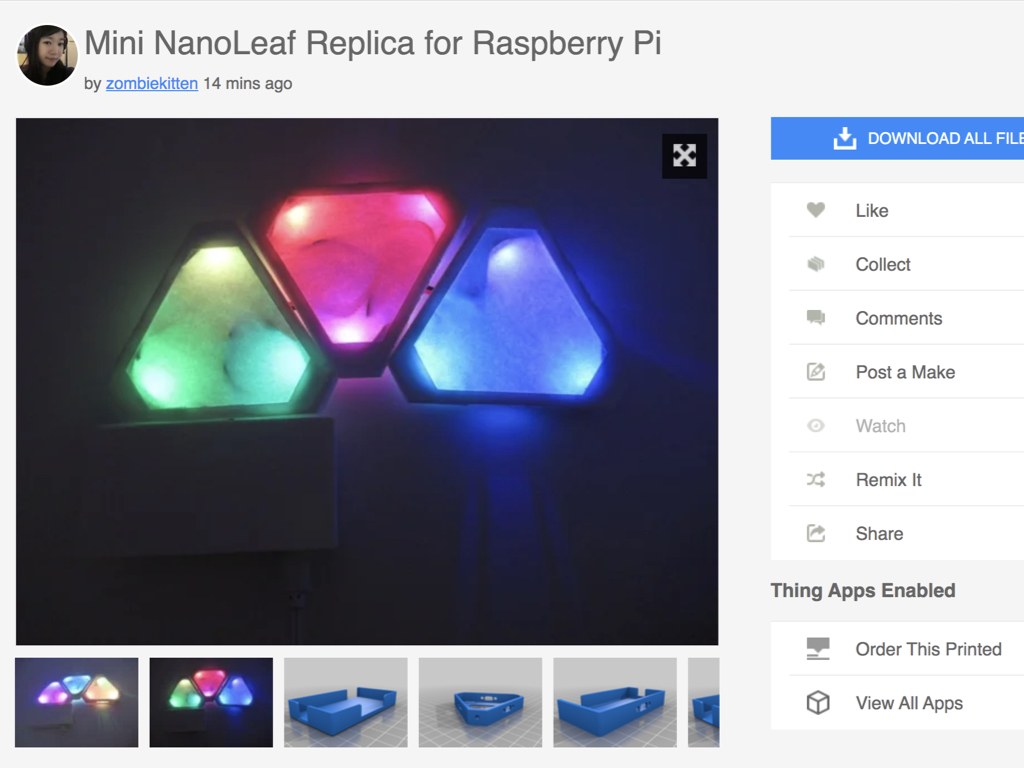
Download the .STL files here.
There are four parts to the enclosure: a mini base, a mini top plate, the bottom component of the box enclosure that will house the Raspberry Pi and other electronics, and the top component of the box. In this guide, we'll need:
3 x mini LED base
3 x mini LED top plate
1 x box enclosure (bottom)
1 x box enclosure (top)
To diffuse the LEDs, we'll later use plain white printer paper, cut into triangular shapes that will fit within the mini base and mini top components.
3 x mini LED base
3 x mini LED top plate
1 x box enclosure (bottom)
1 x box enclosure (top)
To diffuse the LEDs, we'll later use plain white printer paper, cut into triangular shapes that will fit within the mini base and mini top components.
Please take a look at our previous guide on how to get started with the TrinityPixel LED Strips and Raspberry Pi.
The same wiring is used in this guide, although we will be snipping the LED strips so that the replica enclosure will house an LED at each corner. After giving it a look through and successfully installing the required libraries, return to this guide.
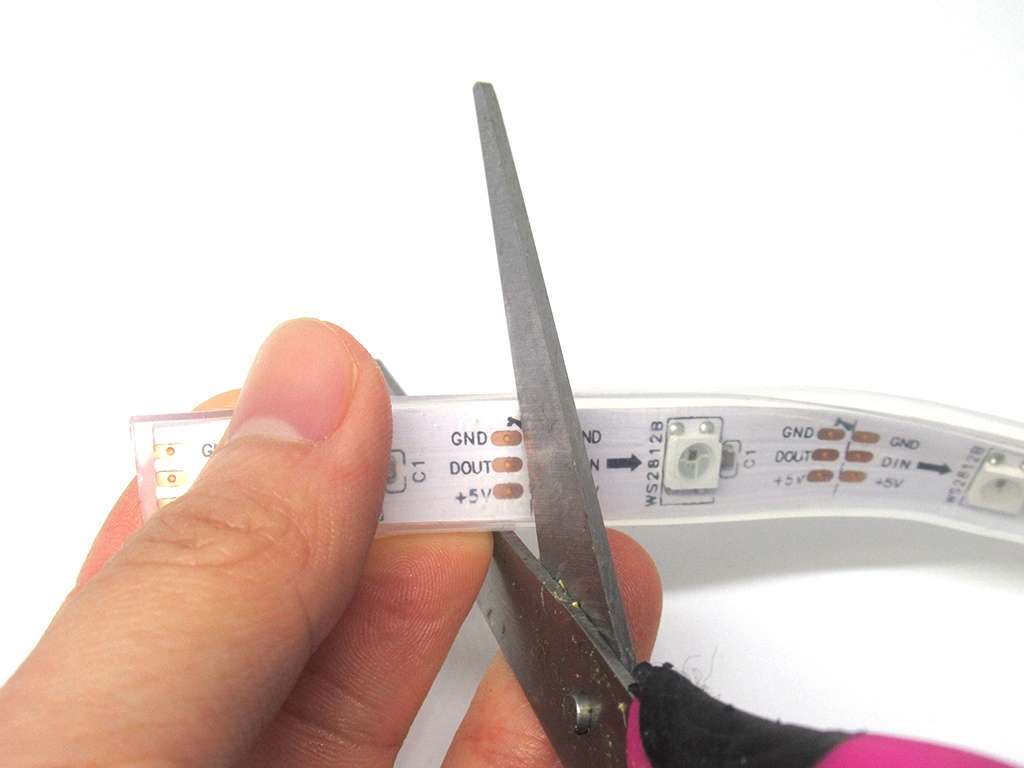
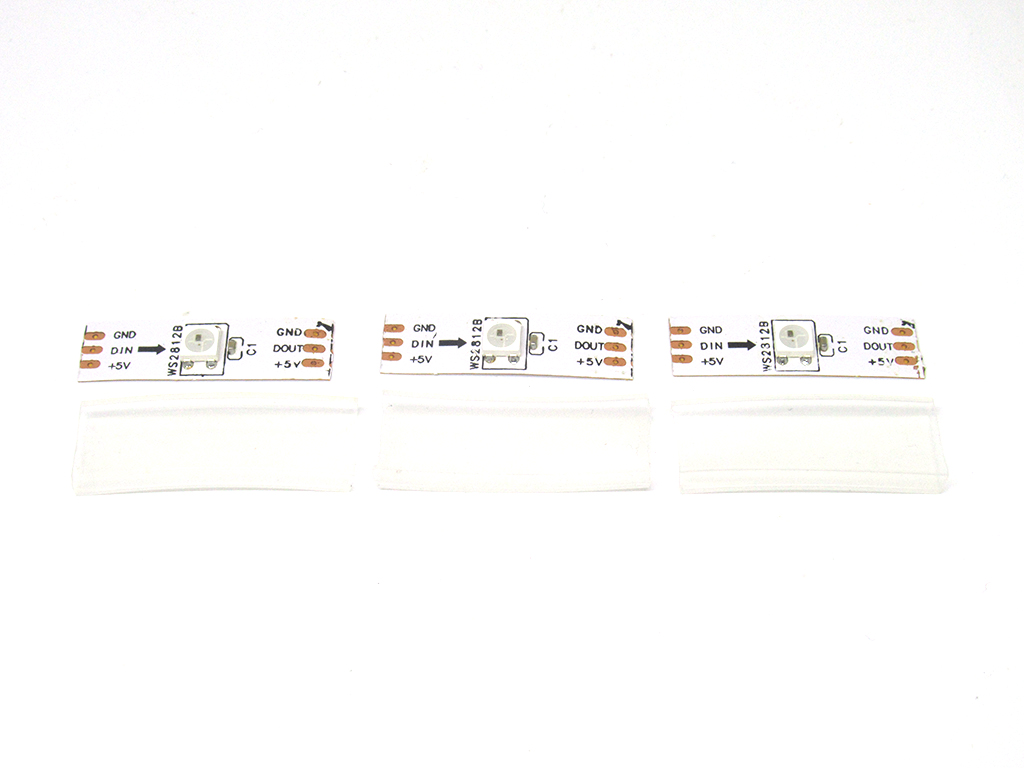
With a pair of scissors, snip the TrinityPixel LED strip along the dotted line.
We'll need nine individual LEDs, so go ahead and snip them all out.
Next, remove the waterproof housing from the LEDs.
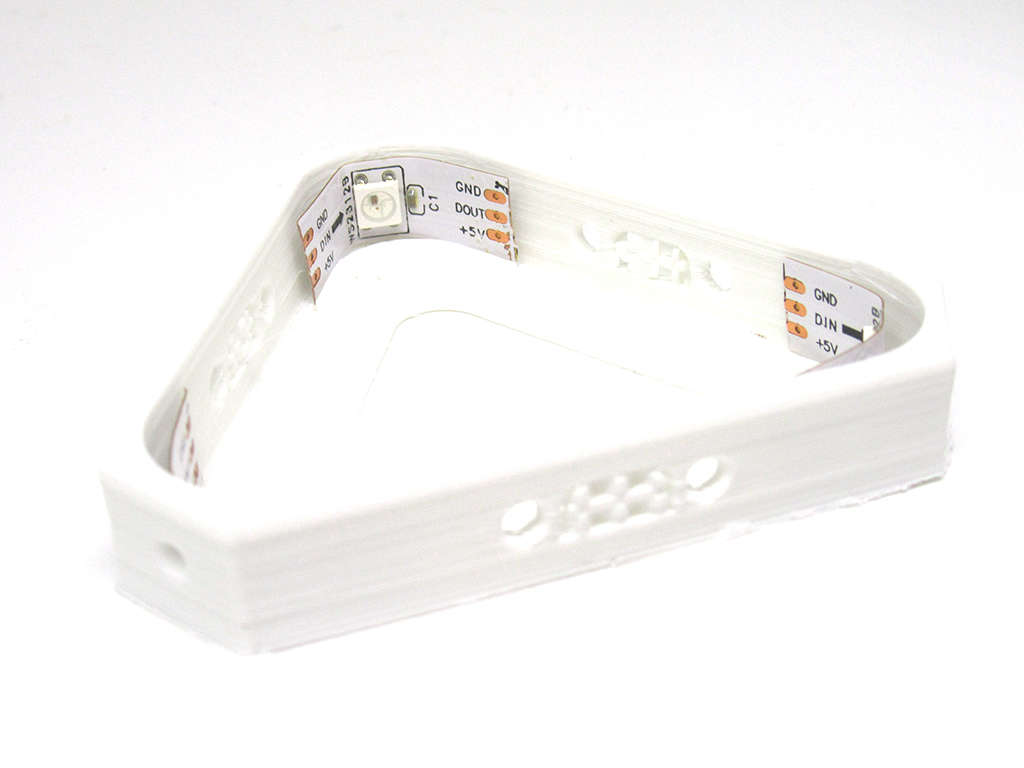
Bend each end of the LED such that they fit snugly on each corner of an enclosure.
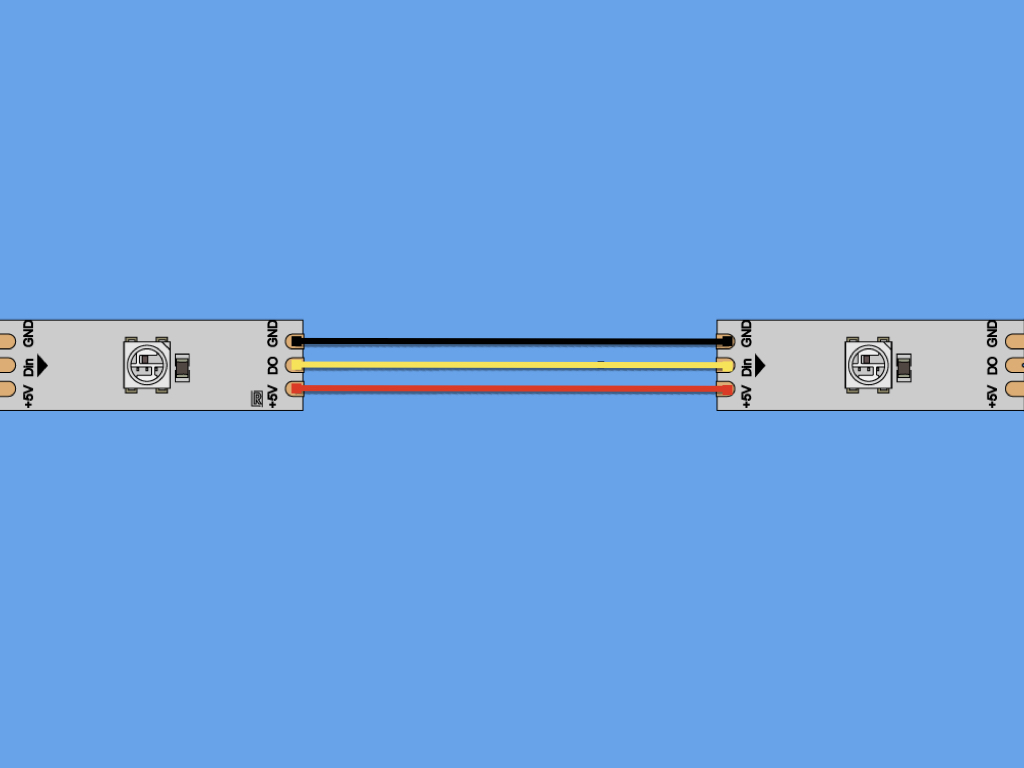
Then, connect +5V of one LED to +5V of the second LED.
Now repeat the steps for the third LED:
Now repeat the steps for the third LED:
- Solder three wires to the other end of the third LED, but leave them unconnected.
- Go ahead and connect the second LED to the third LED : 5V to 5V, GND to GND, DIN to DIN

Place the Raspberry Pi Zero W into the electronics box enclosure, then loop the previous three unconnected wires through the hole.
Solder the wires to the Raspberry Pi Zero W:
GND to GND (third pin from left)
+5V to +5V (first pin from left)
DIN to GPIO 18 (sixth pin from left)
Solder the wires to the Raspberry Pi Zero W:
GND to GND (third pin from left)
+5V to +5V (first pin from left)
DIN to GPIO 18 (sixth pin from left)
If you ran example code #2 in TrinityPixel LED Strips and Raspberry Pi, after changing the third parameter of neopixel.NeoPixel to 3, the LEDs should now light up in green!
Next, loop through those three wires that are currently unconnected, into the hole of the enclosure. They will be soldered next onto the fourth LED.
Only connect the LEDs in series, not parallel!
The top plate of the LED enclosure has also been connected to the base.
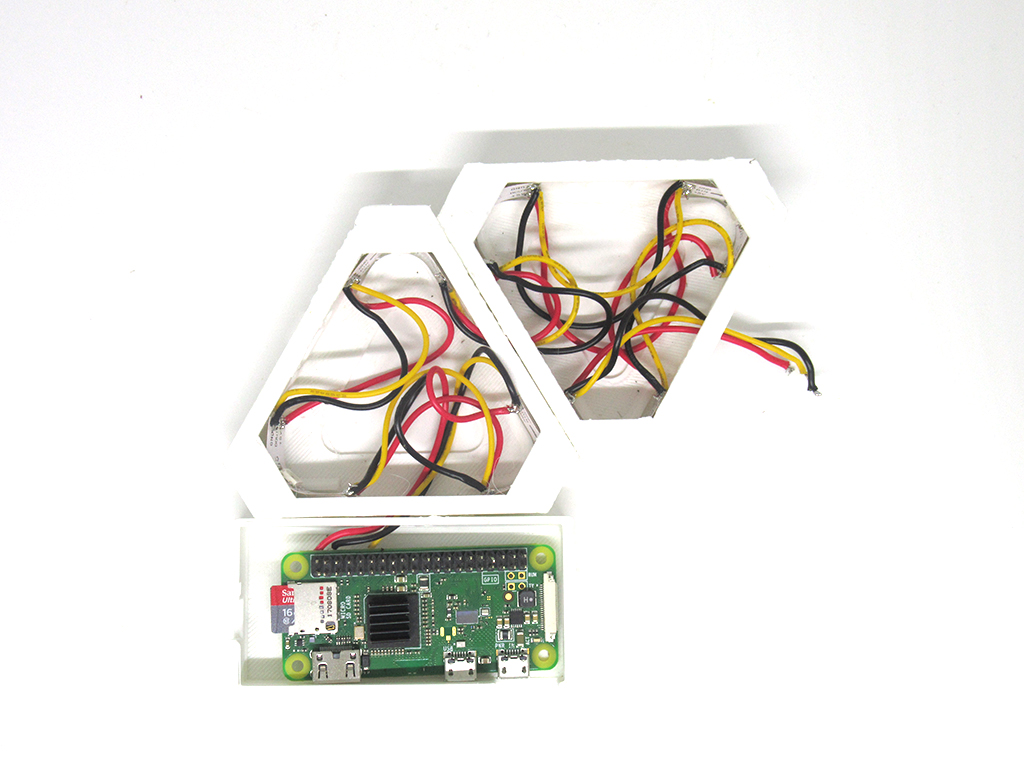
Insert the three wires that were just soldered in the previous step, through the hole in the next enclosure.
Solder the three unconnected wires to the fourth LED.
Then repeat the previous steps so that the sixth LED has three unsoldered wires that will be looped through the enclosure. This will be connected to the seventh LED in the third enclosure.
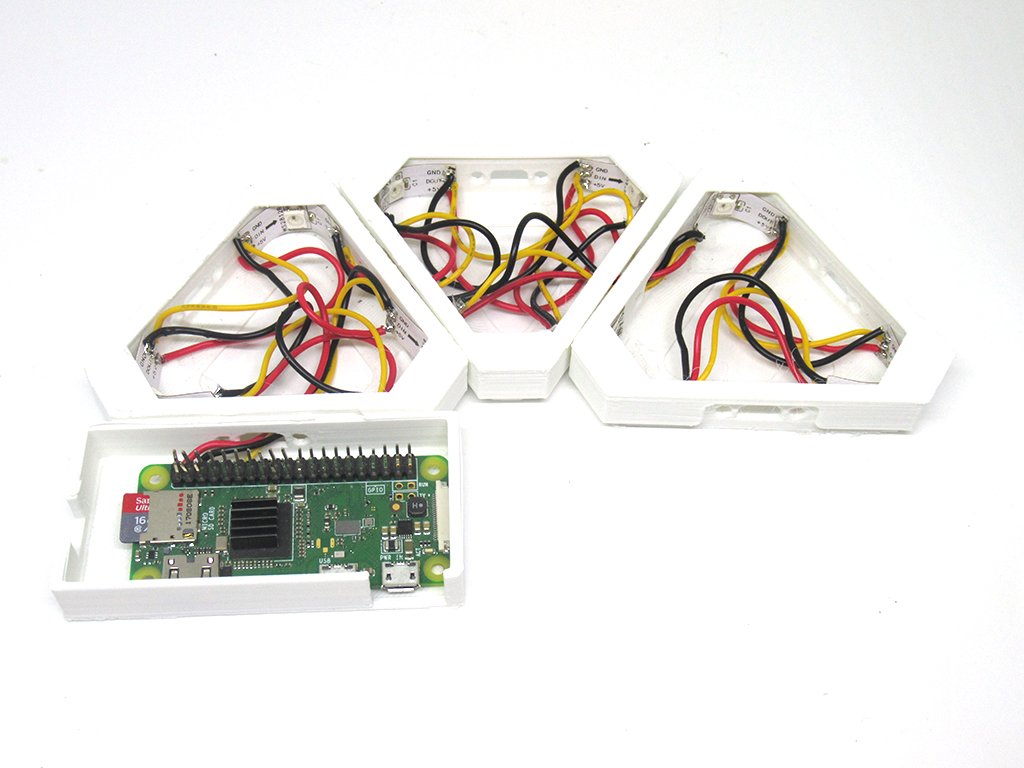
Once complete, the circuit should look something like this, with the ninth LED without any wires attached on one end.
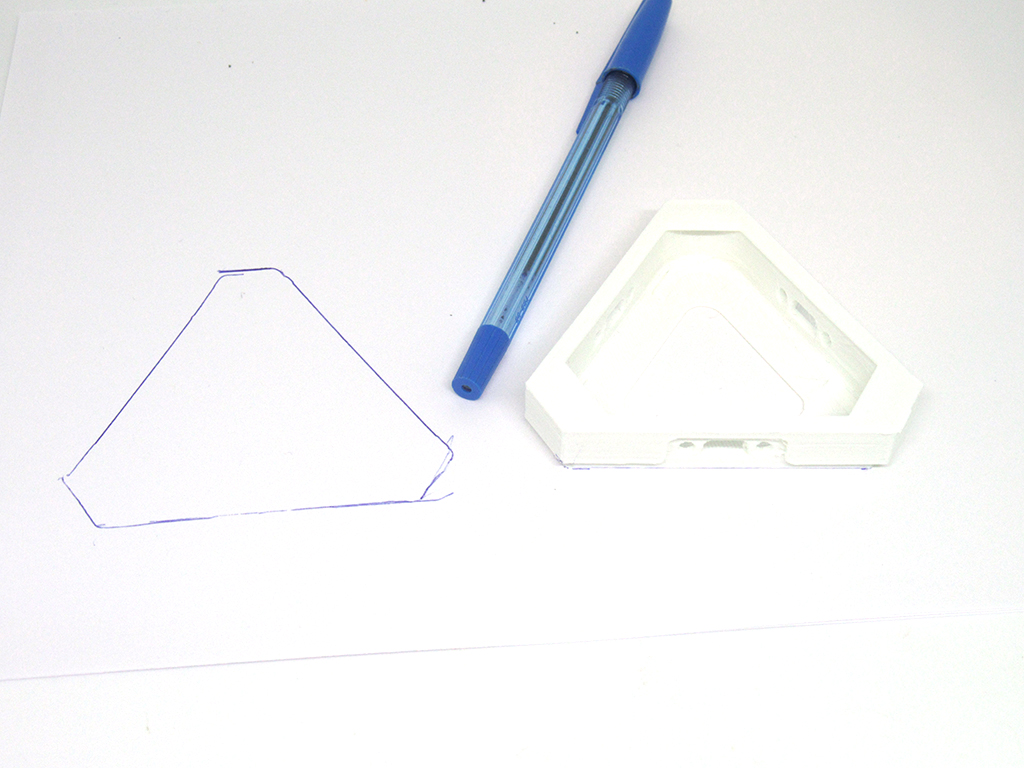
To diffuse the LEDs, we'll use plain white printer paper. So go ahead and trace the outline of the LED enclosure.
Cut out the outline, snipping along its edges a little so that they fit snugly into enclosure.
Remove the top component of the enclosures, and place the paper within.
Place the top components back to the LED enclosures so that they snap into place.
import time
import board
import neopixel


# Choose an open pin connected to the Data In of the LED strip, i.e. board.D18
# The LED strip must be connected to D10, D12, D18 or D21 to work.
pixel_pin = board.D18

# The number of LEDs
num_pixels = 9

# The order of the pixel colors - RGB or GRB. Some LEDs have red and green reversed!
# For RGBW LEDs, simply change the ORDER to RGBW or GRBW.
ORDER = neopixel.GRB

pixels = neopixel.NeoPixel(pixel_pin, num_pixels, brightness=1, auto_write=False,
                           pixel_order=ORDER)


def wheel(pos):
    # Input a value 0 to 255 to get a color value.
    # The colours are a transition r - g - b - back to r.
    if pos < 0 or pos > 255:
        r = g = b = 0
    elif pos < 85:
        r = int(pos * 3)
        g = int(255 - pos*3)
        b = 0
    elif pos < 170:
        pos -= 85
        r = int(255 - pos*3)
        g = 0
        b = int(pos*3)
    else:
        pos -= 170
        r = 0
        g = int(pos*3)
        b = int(255 - pos*3)
    return (r, g, b) if ORDER == neopixel.RGB or ORDER == neopixel.GRB else (r, g, b, 0)


def rainbow_cycle(wait):
    for j in range(255):
        for i in range(num_pixels):
            pixel_index = (i * 256 // num_pixels) + j
            pixels[i] = wheel(pixel_index & 255)
        pixels.show()
        time.sleep(wait)


while True:
    # Comment this line out if your LED strips are RGBW/GRBW
    pixels.fill((255, 0, 0))
    # Uncomment this line if you have RGBW/GRBW LED strips
    # pixels.fill((255, 0, 0, 0))
    pixels.show()
    time.sleep(1)

    # Comment this line out if you have RGBW/GRBW LED strips
    pixels.fill((0, 255, 0))
    # Uncomment this line if you have RGBW/GRBW LED strips
    # pixels.fill((0, 255, 0, 0))
    pixels.show()
    time.sleep(1)

    # Comment this line out if you have RGBW/GRBW LED strips
    pixels.fill((0, 0, 255))
    # Uncomment this line if you have RGBW/GRBW LED strips
    # pixels.fill((0, 0, 255, 0))
    pixels.show()
    time.sleep(1)

    rainbow_cycle(0.001)    # rainbow cycle with 1ms delay per step
Open up the nano editor with sudo nano file-name.py
Then copy and paste the following code into the nano editor.
Then copy and paste the following code into the nano editor.
Save with CTRL+X and press Y for YES
Run the code with sudo python3 file-name.py
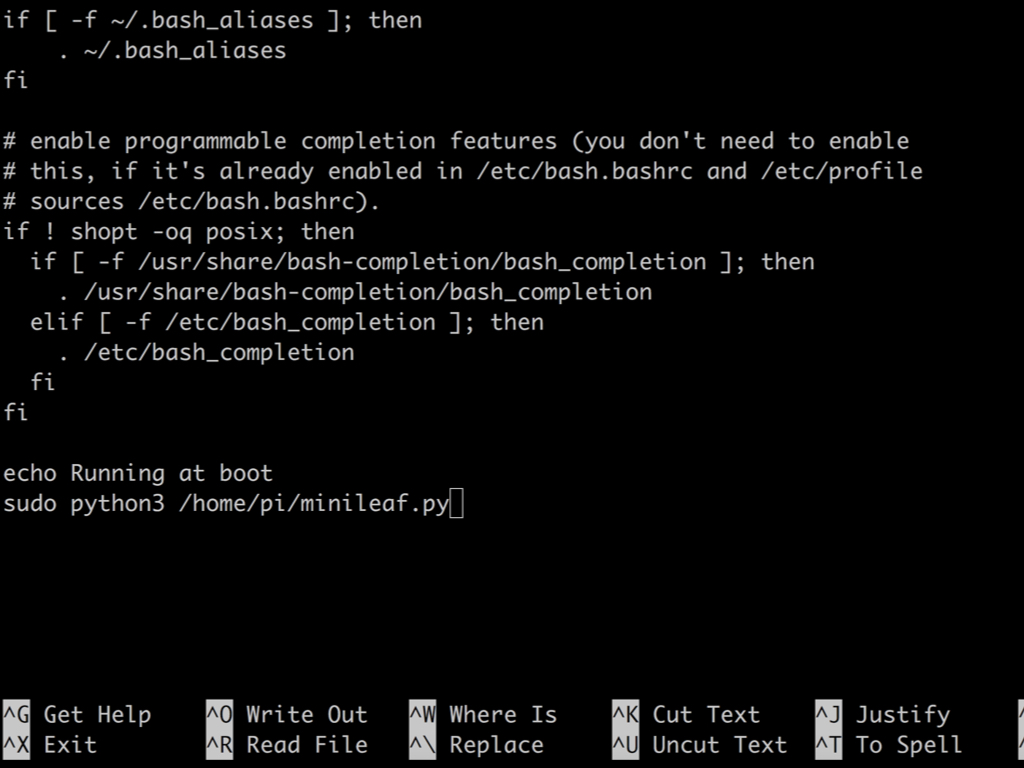
For the program to immediately run when a new terminal is open, first, enter the following into a terminal window: sudo nano /home/pi/.bashrc
Then add the following lines at the end:
echo Running at boot
sudo python /home/pi/file-name.py
echo Running at boot
sudo python /home/pi/file-name.py
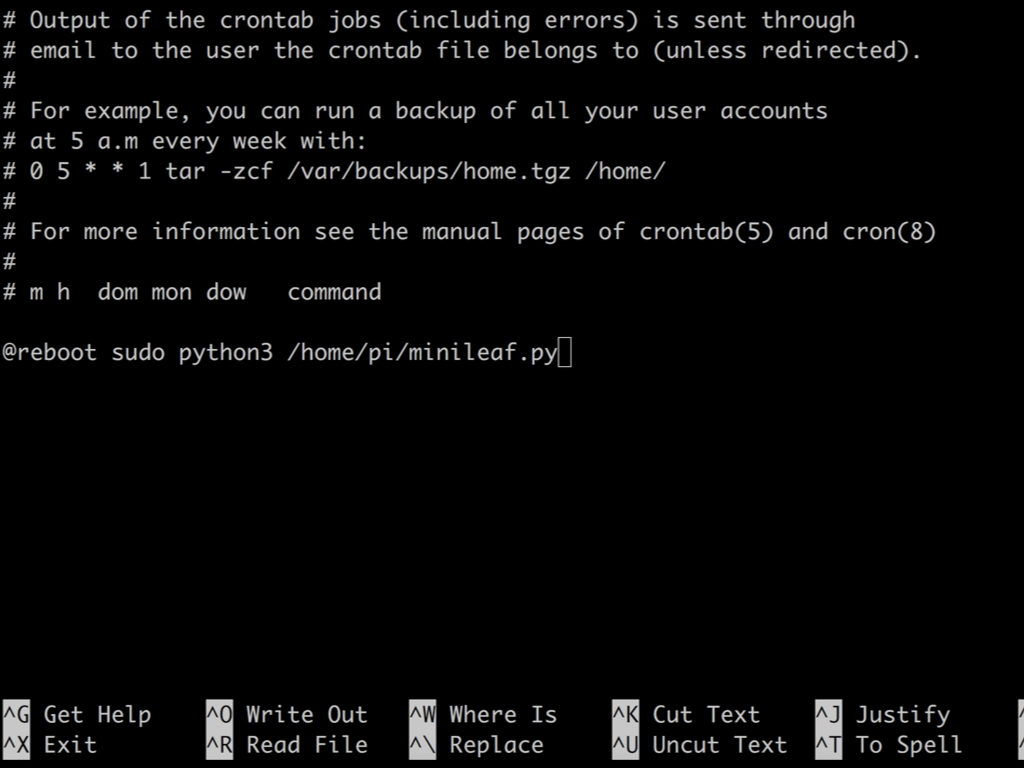
To run the program when the Raspberry Pi Zero W is booted and powered up (without needing to open a terminal window), run the following command: crontab -e
Add this line at the very end: @reboot sudo python /home/pi/file-name.py
Save with CTRL+X and Y for yes
Reboot the Raspberry Pi!
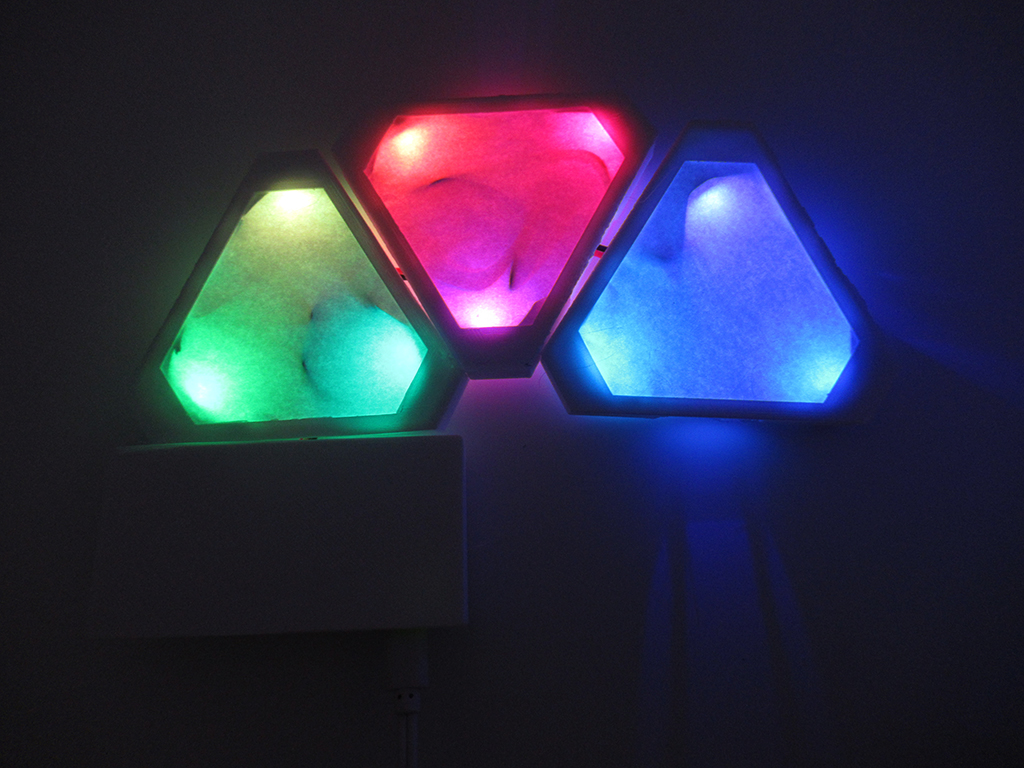
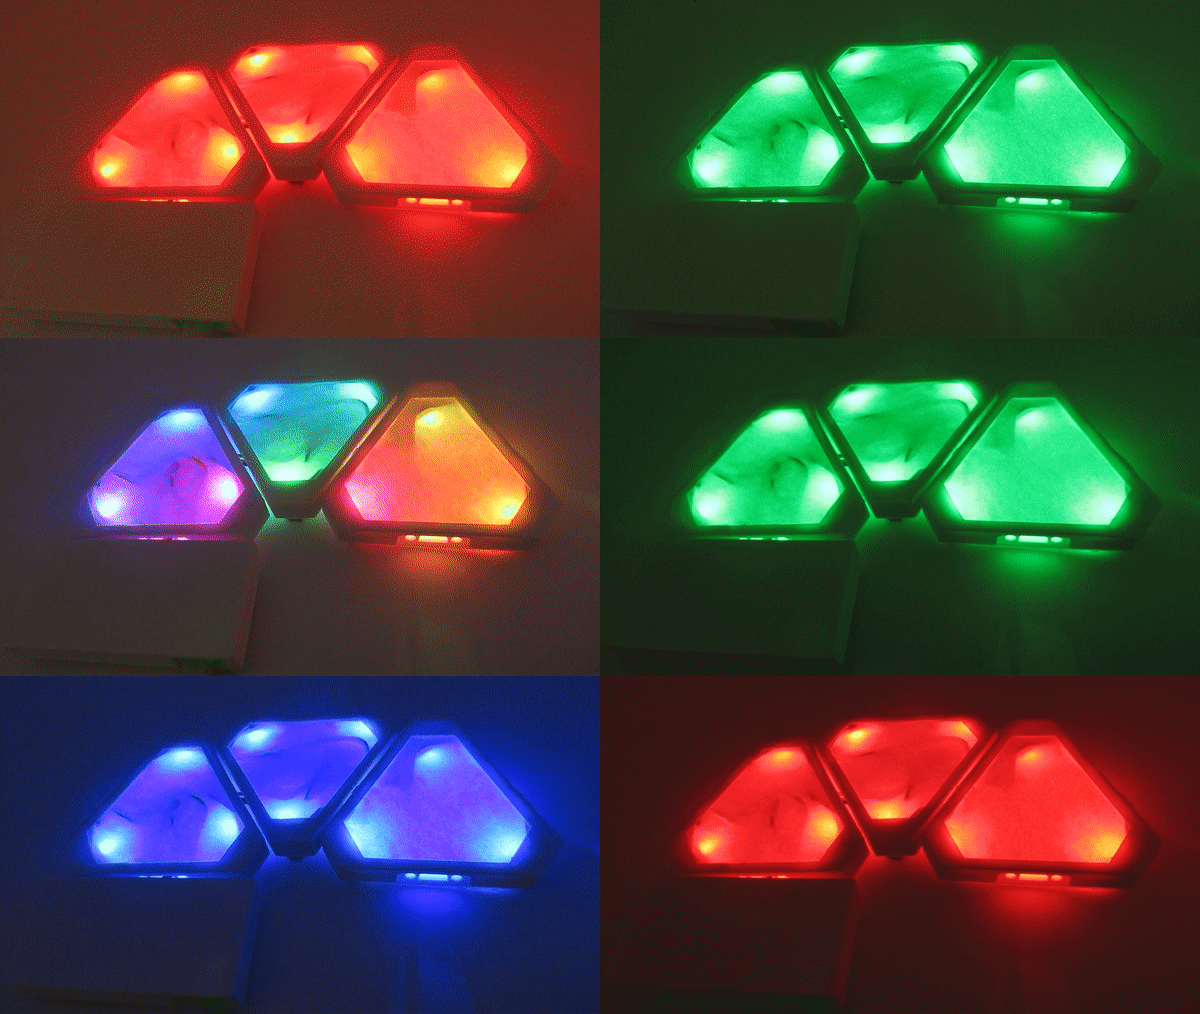
Once complete, it should now light up in red, green, blue, followed by rainbow colours!
Some suggestions on what to do next:
- Add a light sensor to the circuit, so that it automatically turns on when it is dark
- Add more LEDs and panels, but keep in mind that you may need to add a logic level converter chip, the 74AHCT125 to the circuit as well as a power supply and female DC power adapter.
- After making extra adjustments, secure the panels with screws and nuts

