4 Digit Display Module with Arduino
Written By: Cherie Tan
Difficulty
Easy
Steps
7
In this guide, learn to use an Arduino with a 4 digit display digits and characters. We will use the TM1637 library to do this. After completing this guide, you will have gained a basic understanding of how to use a 4 digit display module with the Arduino.
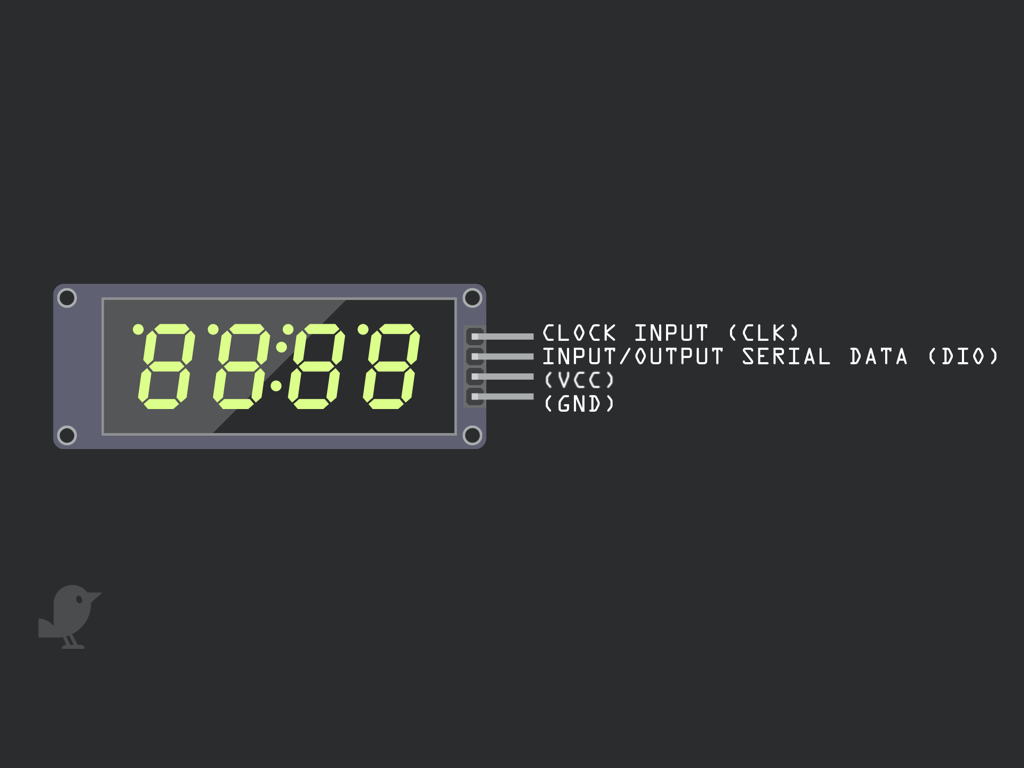
Before we begin, let's take a closer look at the 4-Digit LED Module! There are four pins: Starting with the Clock Input (CLK) and Input/Output Serial Data (DIO). VCC : VCC stands for Voltage Common Collector, we'll connect the VCC pin to 5V on the Arduino GND: In electronics, we define a point in a circuit to be a kind of zero volts or 0V reference point, on which to base all other voltage measurements. This point is called ground or GND. Voltage is the difference in potential between two points. As it is difficult to talk about voltage without a reference point, we need another point to compare it to
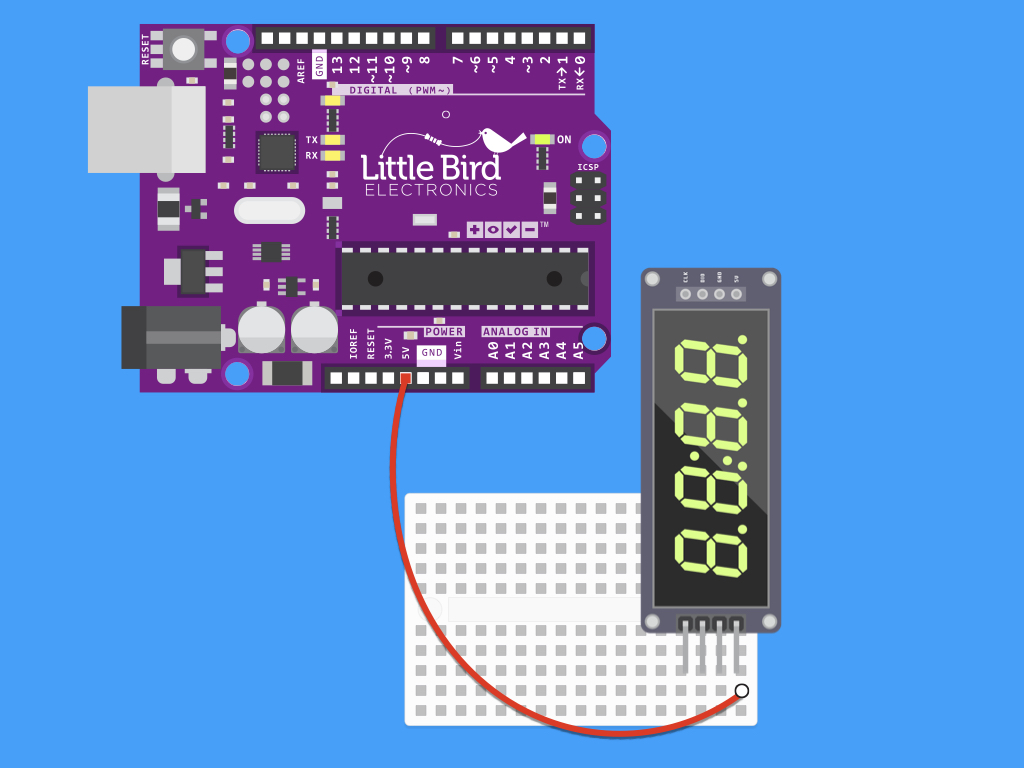
Connect a jumper wire from 5V on the 4 digit display module to 5V on the Arduino


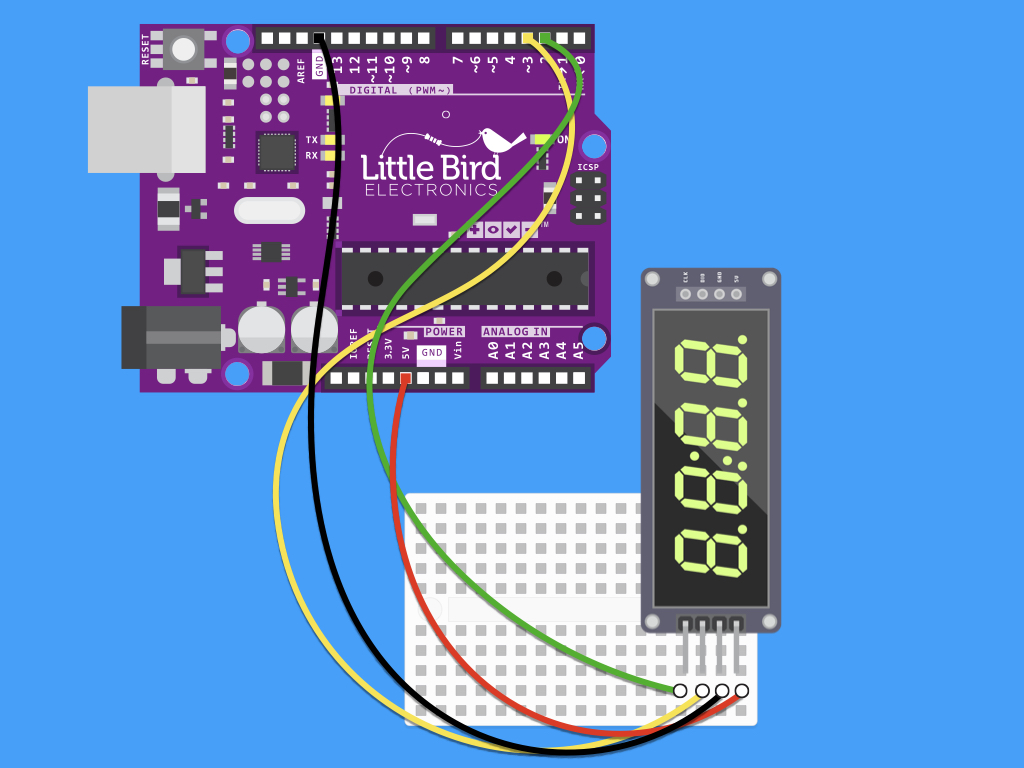
Connect the CLK pin on the module to Digital Pin 2 on the Arduino
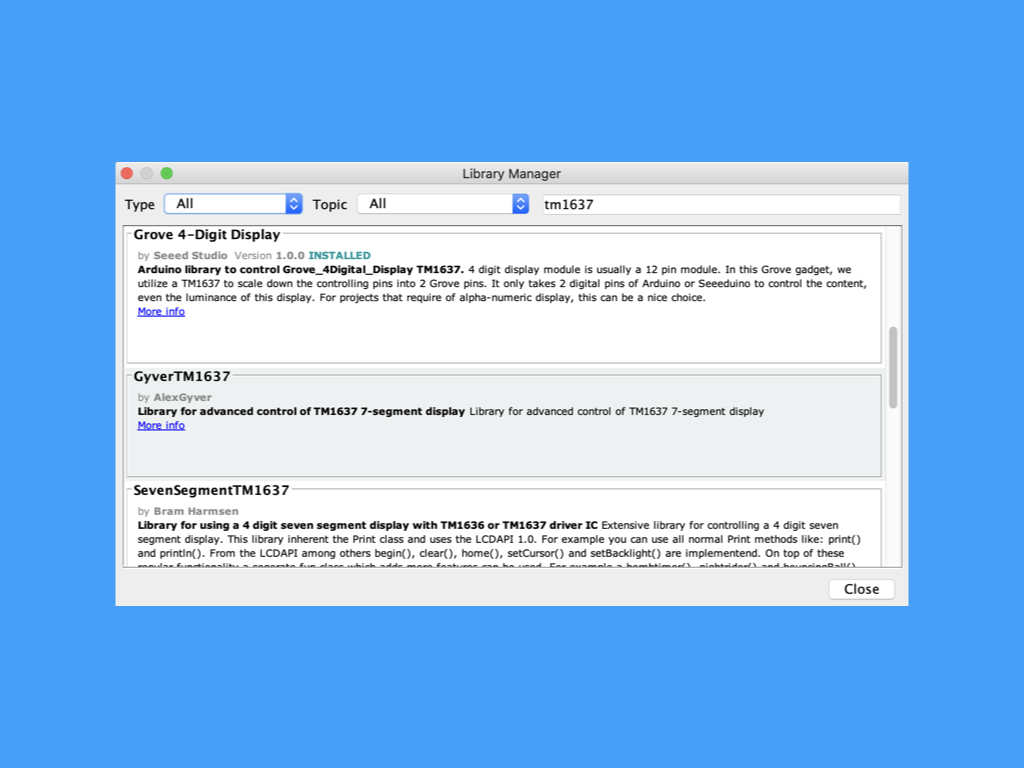
Open the Arduino IDE and navigate to Tools > Navigate Libraries. Then type tm1637 in the search field, scroll down to find Grove 4-Digit Display. Click on the Install button to install it!
#include <TM1637.h>

int CLK = 2;
int DIO = 3;

TM1637 tm(CLK,DIO);

void setup() {
  // put your setup code here, to run once:
  tm.init();

  //set brightness; 0-7
  tm.set(2);
}

void loop() {
  // put your main code here, to run repeatedly:

  // example: "12:ab"
  // tm.display(position, character);
  tm.display(0,1);
  tm.display(1,2);
  tm.point(1);
  tm.display(2,10);
  tm.display(3,11);

  delay(1000);

  // example: "1217"
  displayNumber(1217);

  delay(1000);
}

void displayNumber(int num){
    tm.display(3, num % 10);
    tm.display(2, num / 10 % 10);
    tm.display(1, num / 100 % 10);
    tm.display(0, num / 1000 % 10);
}
Upload the following code to your Arduino and watch what happens! This code will display 12:Ab on the display. The function displayNumber will simply display numbers that you pass into it. For example, to make it display '123' just call the function: displayNumber(1217);