Reed Switch with Arduino
Use a reed switch to turn an LED on and off
Written By: Cherie Tan
Difficulty
Easy
Steps
4
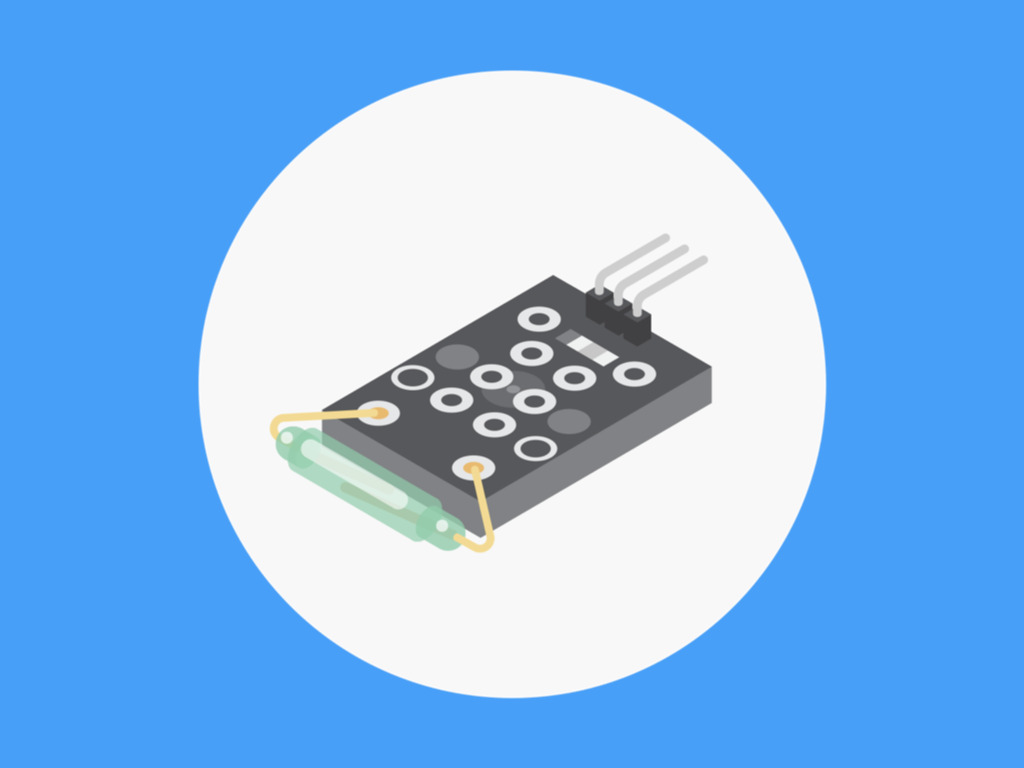
A reed switch is an electrical switch that when exposed to a magnetic field, closes a circuit and allows the flow of current.
After mastering this basic concept, you will be able to use reed switches in more advanced Arduino projects!
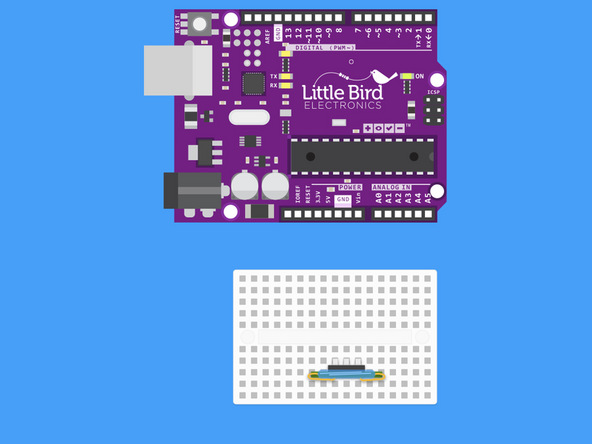
Insert your Reed Switch into Breadboard so that the header pins are facing your Arduin
This module is quite delicate - so be careful when handling it!

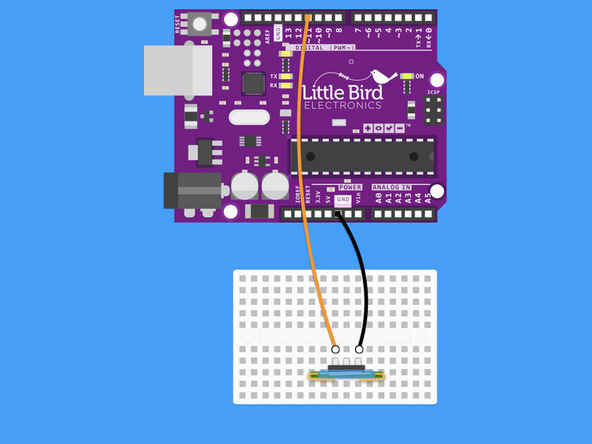
Connect Arduino GND to the 'S' of the Reed Switch.
The Reed Switch is not polarised so you could switch around the '–' and 'S' jumper wires.
const int reed_pin = 11; // Pin connected to reed switch
const int led_pin = 13; // LED pin - active-high

void setup()
{
  Serial.begin(9600);
  pinMode(reed_pin, INPUT_PULLUP);
  pinMode(led_pin, OUTPUT);
}

void loop()
{
  int proximity = digitalRead(reed_pin); // Read the state of the switch
  if (proximity == LOW) // If the pin reads low, the switch is closed.
  {
    Serial.println("Switch closed");
    digitalWrite(led_pin, HIGH); // Turn the LED on as magnet passes
  }
  else
  {
    digitalWrite(led_pin, LOW); // Turn the LED off
  }
}
Copy this code to your Arduino IDE.
Upload it to your Arduino.
Open the Serial Monitor.
As you pass a magnet by the glass tube - the circuit will close and the LED on your Arduino should turn on.
The normal state of a Reed switch is closed.