Adjustable Potentiometer Module with Arduino
Change a variable with a potentiometer module and Arduino
Written By: Cherie Tan
Difficulty
Easy
Steps
8
Potentiometers, also known as variable resistors, can be found in many Arduino projects. You will be introduced to analog inputs using a potentiometer module. Learn to program it using the Arduino IDE. In this guide, you will learn to use a potentiometer to turn values up and down and provide variable resistance. These values are read into the Arduino board as an analog input. After completing this guide, you will be able to use potentiometers in your projects. Some other examples of what you could do with a potentiometer are to control servos.
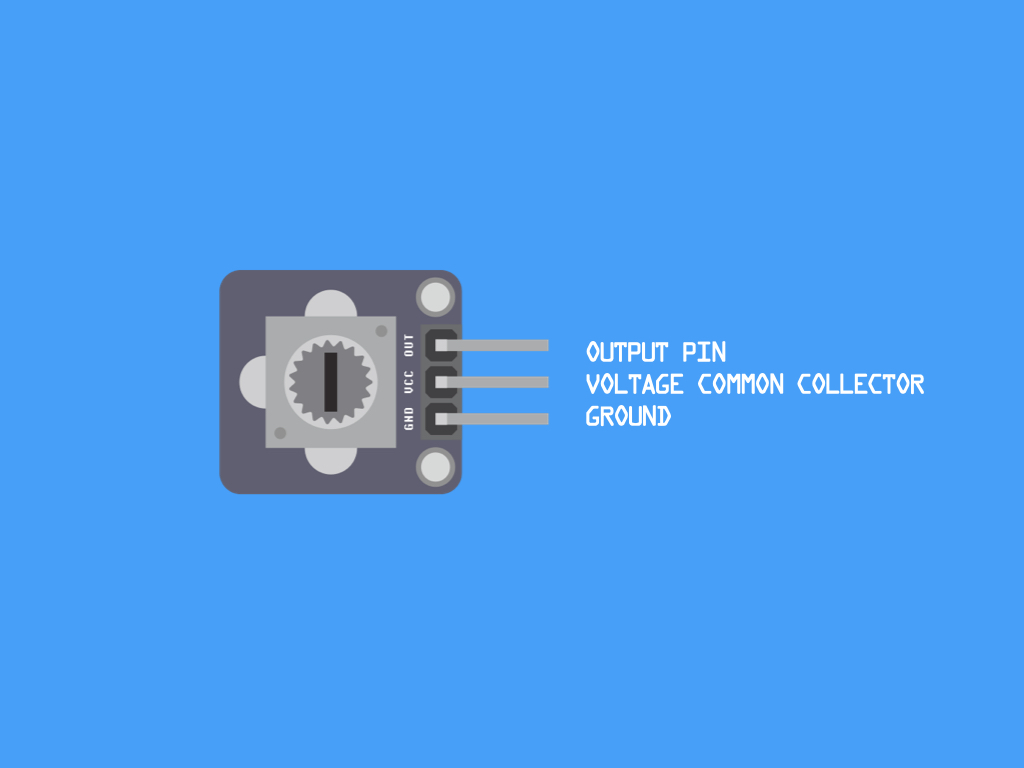
Let's take a closer look at the adjustable potentiometer module that will be used in this guide. There are four pins here:
OUT: Output Pin
VCC : 'VCC' stands for Voltage Common Collector
GND: Ground Pin
OUT: Output Pin
VCC : 'VCC' stands for Voltage Common Collector
GND: Ground Pin


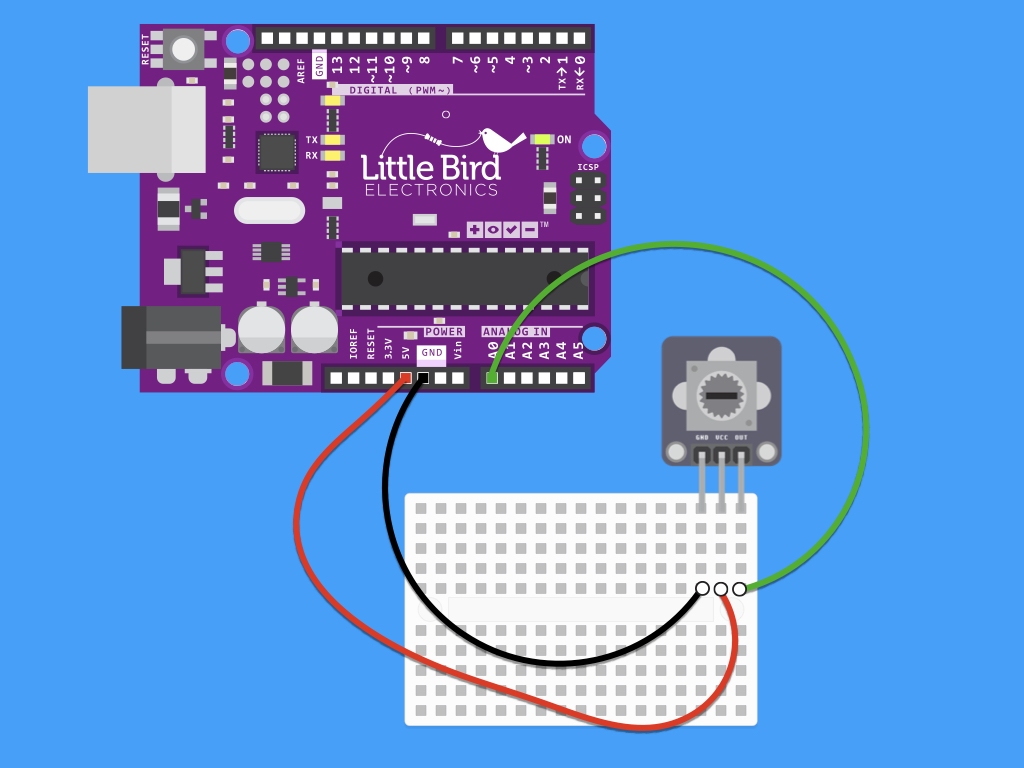
Connect OUT on the adjustable potentiometer module to A0 on the Arduino
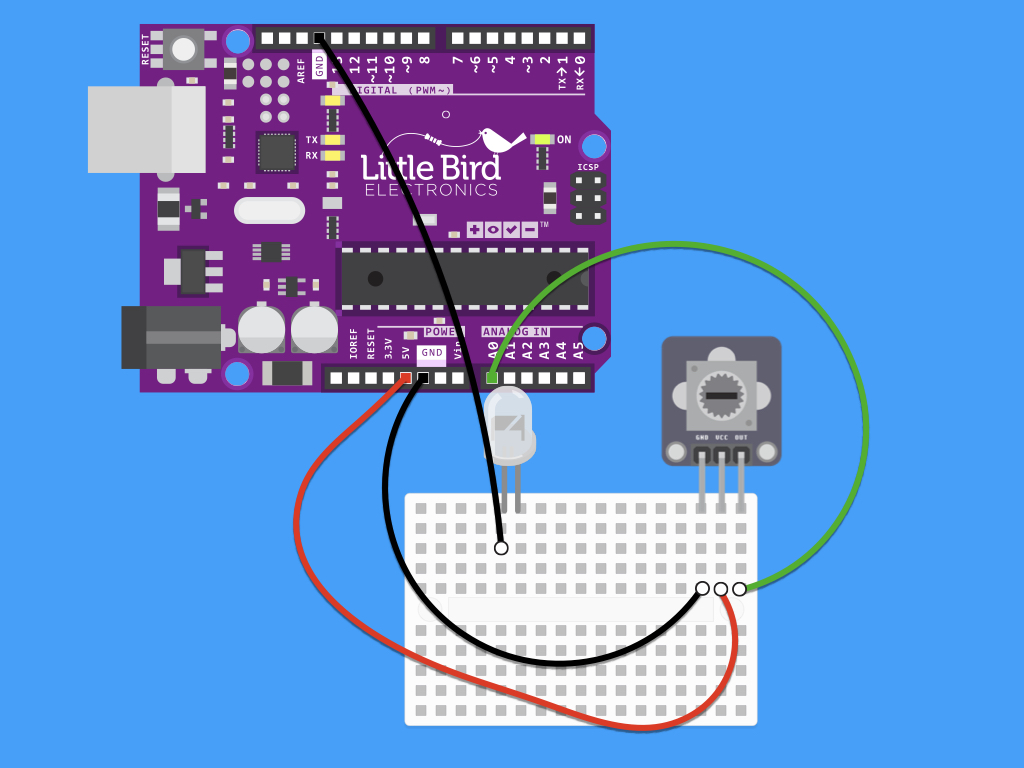
Insert a LED into the breadboard as shown. Connect a black jumper wire from the LED's cathode (where its polarity is -) to GND on the Arduino


int potPin = 0;    // Analog input pin that the potentiometer is attached to
int potValue = 0;  // value read from the pot
int led = 3;      // PWM pin that the LED is on.

void setup() {
  Serial.begin(9600);
  pinMode(led, OUTPUT);
}

void loop() {
  potValue = analogRead(potPin); // read the pot value
  analogWrite(led, potValue/4);  // PWM the LED with the pot value (divided by 4 to fit in a byte)
  Serial.println(potValue);      // print the pot value back to the debugger pane
  delay(10);                     // wait 10 milliseconds before the next loop
}
Copy and paste this code into the Arduino IDE, and upload it to your board! Now try turning the potentiometer module. The light should go from dull to bright!